


16
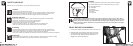
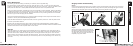
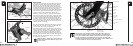
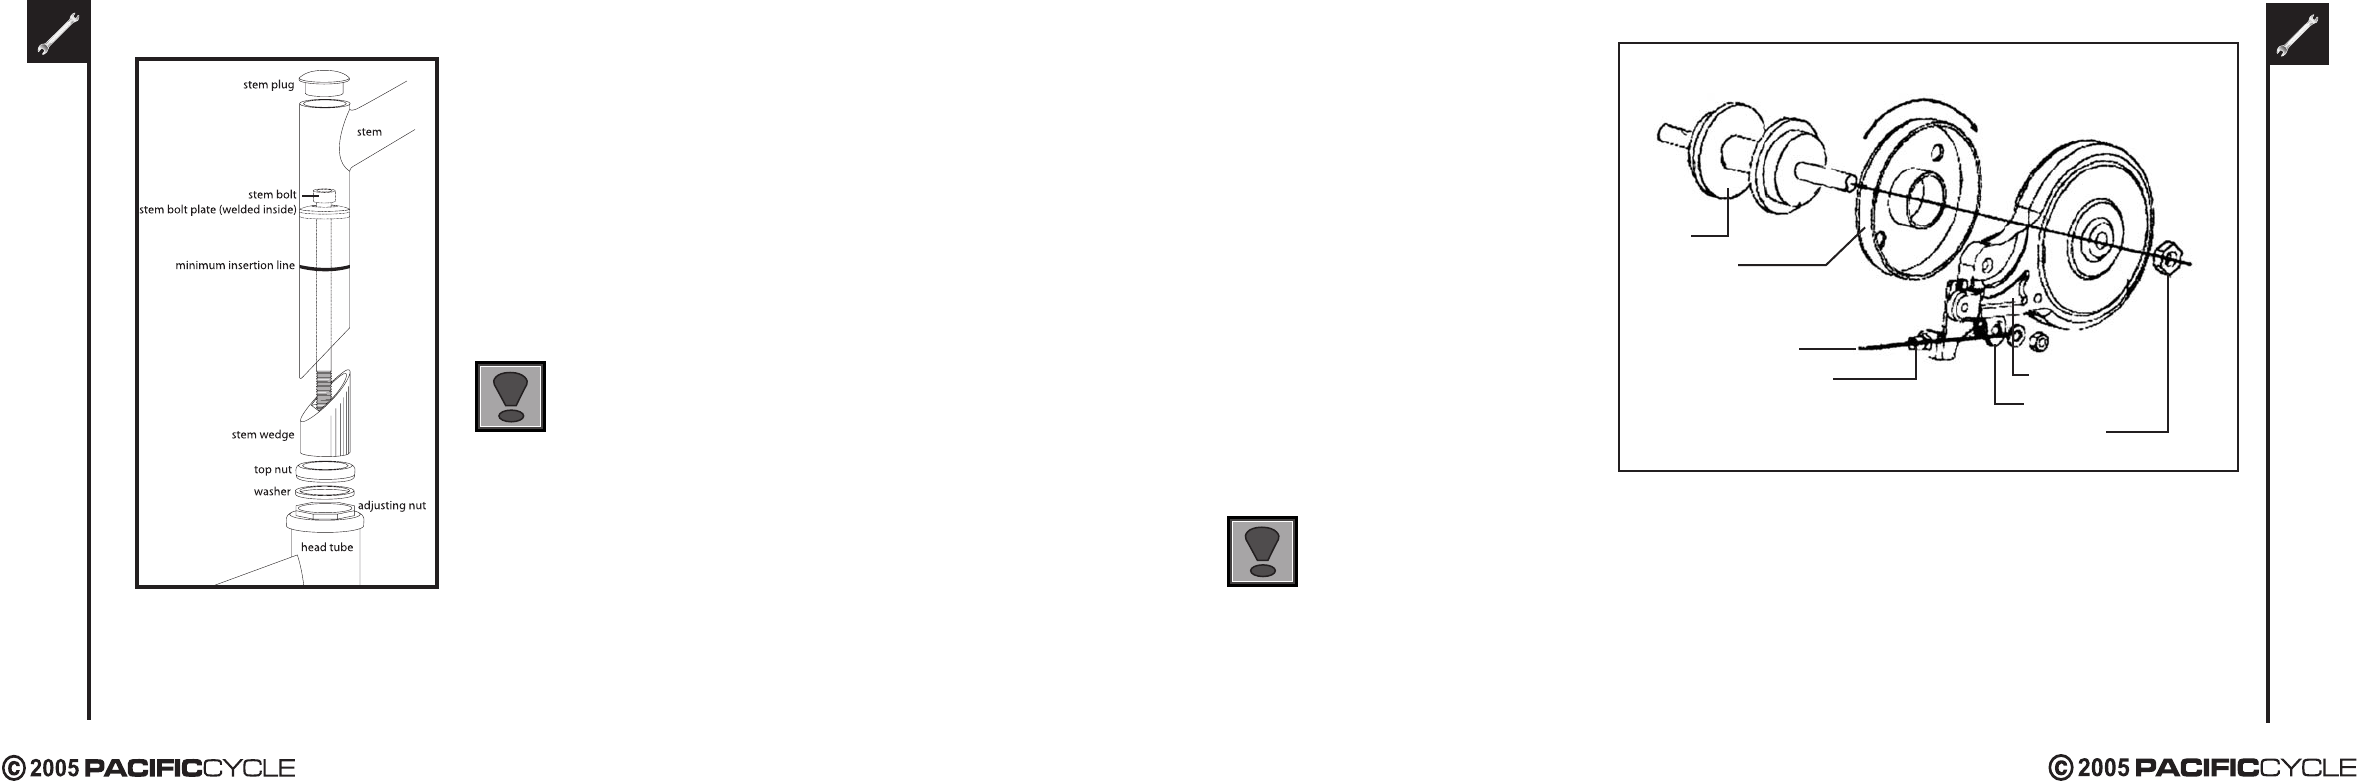
Band Brake Series Installation
Step 1
Assemble the inner drum clockwise onto
the rear hub. Make sure the re-entrant side
is fixed toward you.
Step 2
Assemble the outer shell onto the hub axle
covering inner drum and fasten the nut.
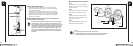
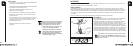
Step 3
Thread inner wire through the adjuster-
screw then connect and fix its end on the
brake pad control lever.
Step 4
Finely adjust the adjuster-screw to reach
the perfect braking performance.
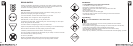
Note:
1. Lubricating the drum can cause faulty braking.
2. Brake pad will wear over time. Turn adjusting barrel to compensate
for pad wear. Replace brake pad before it is completely worn.
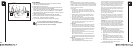
Hub
Inner Drum
Clockwise
Outer Shell
Pad Control Lever
Fixing Nut
Inner Wire
Adjuster Screws
15
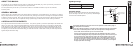
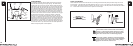
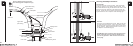
If the stem is not inserted into the top nut to at least the “Mini-
mum Insertion” mark, it is possible to over-tighten the stem
bolt and damage the fork steerer tube. If these instructions are
not followed, it could cause an unsafe condition and risk injury
to the rider. Check steering tightness prior to riding by strad
-
dling the front wheel. Try turning the handlebar. If you can
turn it without turning the front wheel, the stem is too loose.
Re-align the handlebar with the front wheel and re-tighten the
stem bolt.
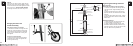
Sunken Stem Bolt System
1. Remove the protective shipping cap from the stem wedge.
2. Remove the Stem Plug from the stem. Loosen the Stem Bolt
with a 6mm allen wrench.
3. Insert the stem into the headtube of the scooter. Ensure that
the Minimum Insertion Line is below the top nut of the headset.
4. Align the stem and handlebar so it is in line with the front wheel.
5. Tighten the Stem Bolt with the 6mm allen wrench. Reinsert the
Stem Plug into the stem.
WARNING: MINIMUM INSERTION LINE MUST BE HIDDEN WITHIN
THE HEADTUBE OF THE SCOOTER.