


9
GB
CLOCK MODE
The time, date (including the day of the week) and time alarm
can be set while the watch is in CLOCK Mode. Follow the
instructions below to set or activate the time, date, zone time,
metric or imperial standards, alarm time, stopwatch and timer.
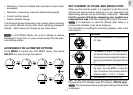
SET CLOCK AND MEASUREMENT UNITS:
You cannot change these settings while in TOUR
Mode. If you attempt to do so, TRIP will show on the display.
Refer to the TOUR Mode section (➔ 14).
Diagram Instructions
1.Press MODE to display the CLOCK mode.
2.Press and hold FUNC/SET for 2 seconds. “24h” will flash
on the display.
3.Press ST/SP/- to change from 24 hour to 12 hour time
display.
4.Press FUNC/SET again. The hour will flash. Press SE-
LECT/+ to move the value up, or ST/SP/- to move the
value down.
Tip: Continuously press and hold a button to fast-change
the value.
5.Repeat Steps 3 – 4 to change the rest of the settings, in
this order: minutes, year, month/date or date/month
display, month, day, time zone (+/- 23 hours), tempera-
ture display (°C / °F), measurement units (feet / meters),
and barometric pressure units (inHg or hPa).
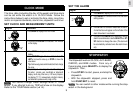
NOTE
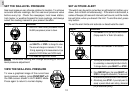
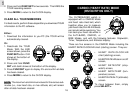
SET THE ALARM
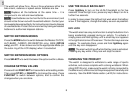
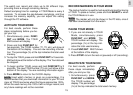
STOPWATCH
The Stopwatch works in CLOCK, ALTI-BARO,
CARDIO, and BIKE modes. From any of
these modes, press SELECT/+ to display the
stopwatch. Then,
•
Press ST/SP/- to start, pause, and stop the
stopwatch.
•
With the stopwatch stopped, press and
hold FUNC/SET to reset.
You
can switch to other modes while running the stop-
watch in the background.
NOTE
Diagram Instructions
1. Press MODE to display the CLOCK mode.
2. Press SELECT/+ 3 times to move it into the alarm
setting screen.
3. Press ST/SP/- to activate or deactivate the alarm.
A small bell icon will appear on the left side of the
alarm time when it is activated.
4. Press and hold FUNC/SET for 2 seconds, to set the
alarm hour and minutes. Use the SELECT/+ or ST/
SP/- buttons to change the value. (The alarm will
be automatically activated once the alarm time is
set).