


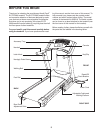
7
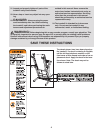
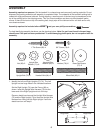
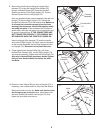
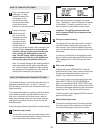
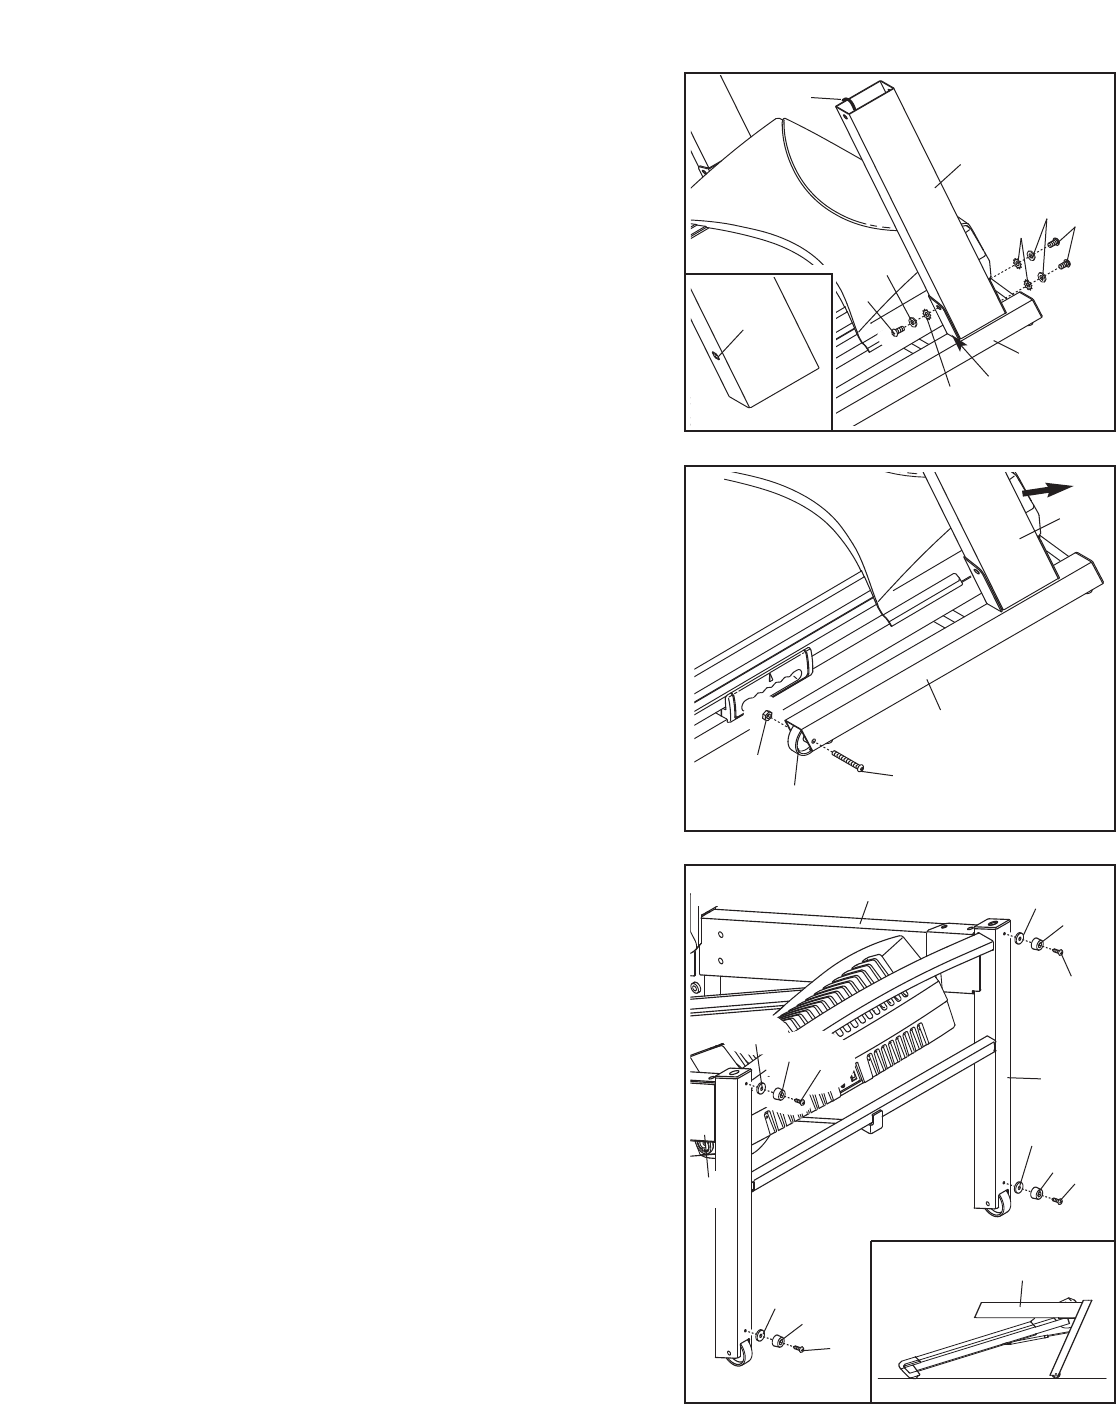
2. Insert the Right Upright (74) into the indicated bracket on
the Base (83); be careful not to dislodge the Cage
N
uts (76) from the Right Upright (see the inset draw-
ing). In addition, be careful not to pinch the Upright
W
ire Harness (75). F
inger tighten three Upright Bolts
(72) with three Washers (78) and three Upright Star
Washers (71) into the Right Upright and the bracket.
Do
not tighten the Upright Bolts yet.
Repeat this step with the Left Upright (not shown). Note:
There is not a wire on the left side.
2
74
83
72
72
78
71
Bracket
71
75
78
81
77
73
74
83
81
77
77
82
82
81
82
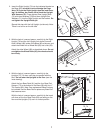
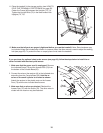
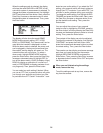
4. With the help of a second person, carefully tip the
Uprights (73, 74) down until they are parallel with the
floor. Do not lower the Uprights to the floor (see the
inset drawing).
Attach the four Base Pads (81) and the four Base Pad
Spacers (77) to the bottom of the Base (83) with four 1”
Tek Screws (82). Note: One replacement Base Pad may
be included. Use the Base Pad to replace any Base Pad
that becomes worn.
With the help of a second person, carefully tip the tread-
mill down so the four Base Pads (83) are resting on the
floor and the Uprights (74) are in a vertical position.
4
83
74
85
86
38
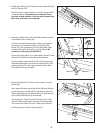
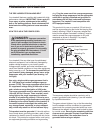
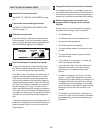
3. With the help of a second person, carefully tip the Right
Upright (74) and the Left Upright (not shown) forward.
Hold a Wheel (86) inside of the Base (83) as shown, and
attach the Wheel with a Wheel Bolt (85) and a Nut (38).
Attach the other Wheel (86) as described above.
Do not
overtighten the Wheel Bolts (85); the wheels should
turn freely.
3
81
82
77
76
73, 74