


Handlebar Assembly
Note: During the handlebar assembly process it is best to wait to tighten all screws until after
the handlebars are assembled.
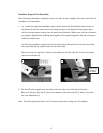
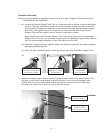
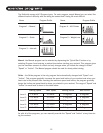
1. (a.) Locate the Console Support Tube. This is a round tube with a bracket to mount the display
console. The right end of the console has 1 wire connector coming out of the end. Push
this connector through the round hole on the inside of the right side Handlebar Support
Post and up through the top of the support post. Then push the end of the Console
Support Tube into the support post as shown in illustration A below.
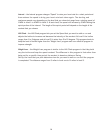
Insert the left end of the Console Support Tube in the round hole on the left Handlebar
Support Post. To do this you will need to gently pull the Handlebar Support Posts apart so
that you have enought clearance to insert the tube on the left side.
(b.) Push the 2 large connectors together. Make sure that the connectors are properly aligned
and tightly pushed together.
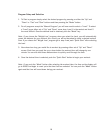
(c.) Push the large connectors and extra wiring into the top of the Handlebar Support Post.
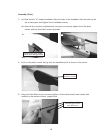
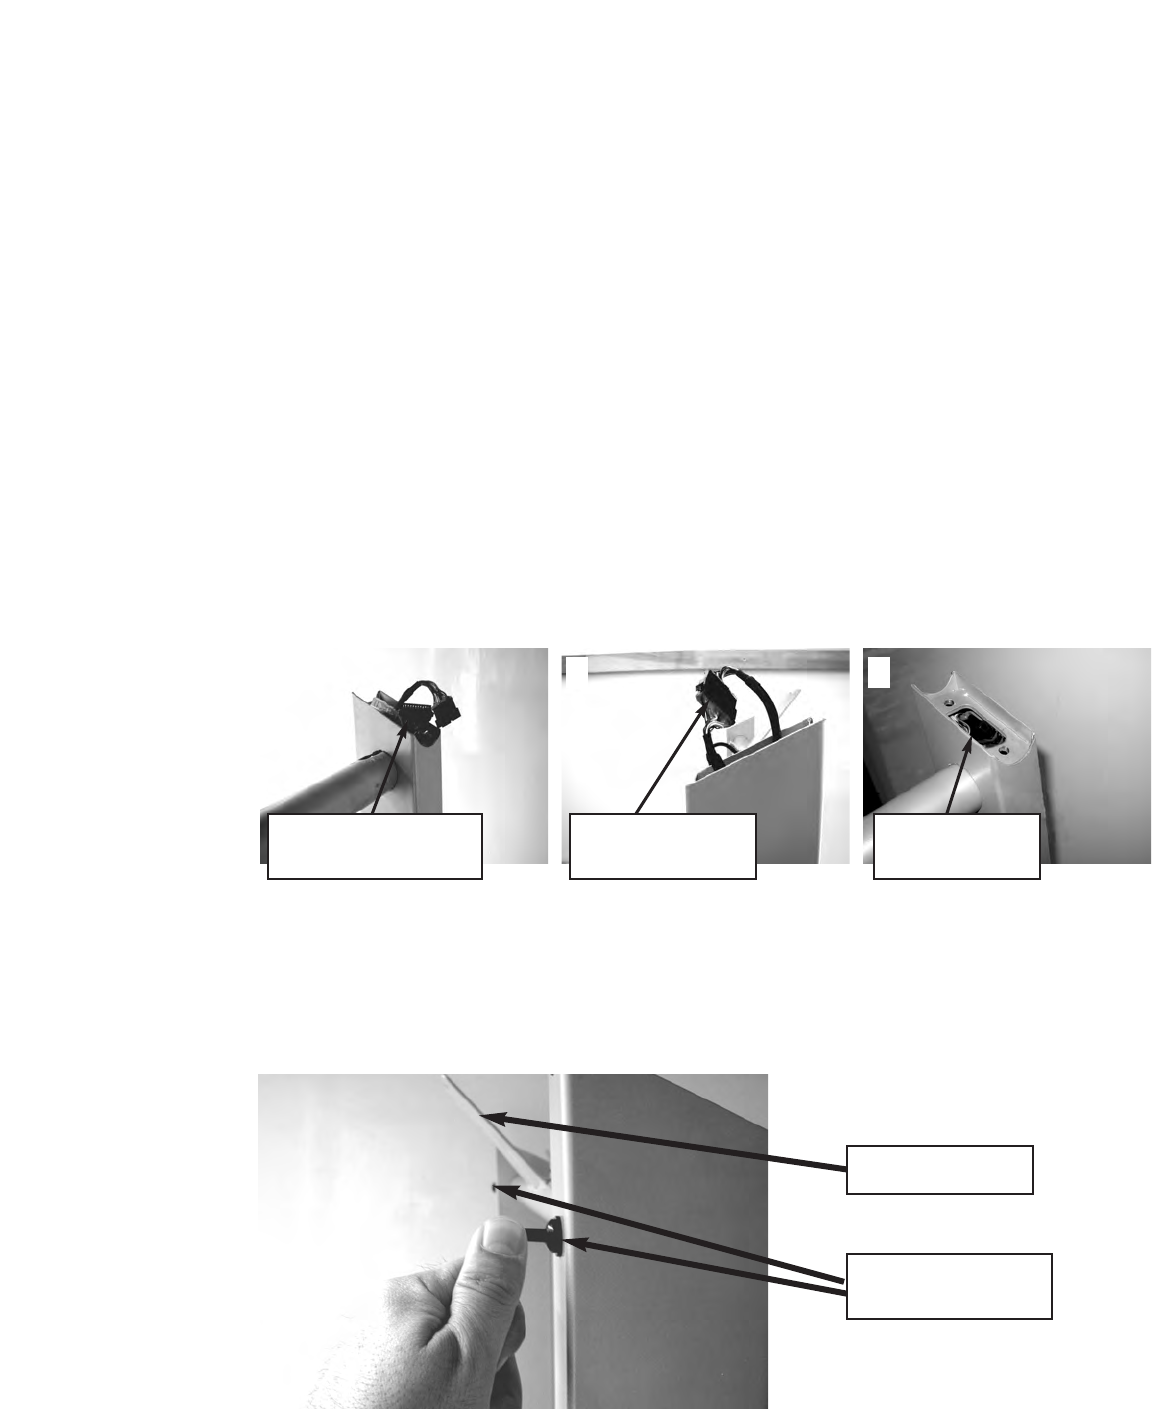
2. Rotate the display support tube so that the display bracket matches the picture below. This
will align a hole in the round display tube with the hole in the front of the support post.
Tighten each of the two button head screws with washer and proceed to the next step.
As always, be careful not to pinch any wires with the screws.
Handlebar
9
Correct Display
Bracket Angle
Display Support
Tube Screws
(one on each side)
a
b
c
Pull connectors to
the top of the post
and insert tube
Align and push
together 2 large
connectors
Push 2 large
connectors
into the post