


6
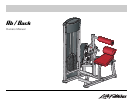
Ab / Back
1. Assembly Instructions
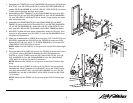
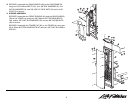
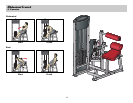
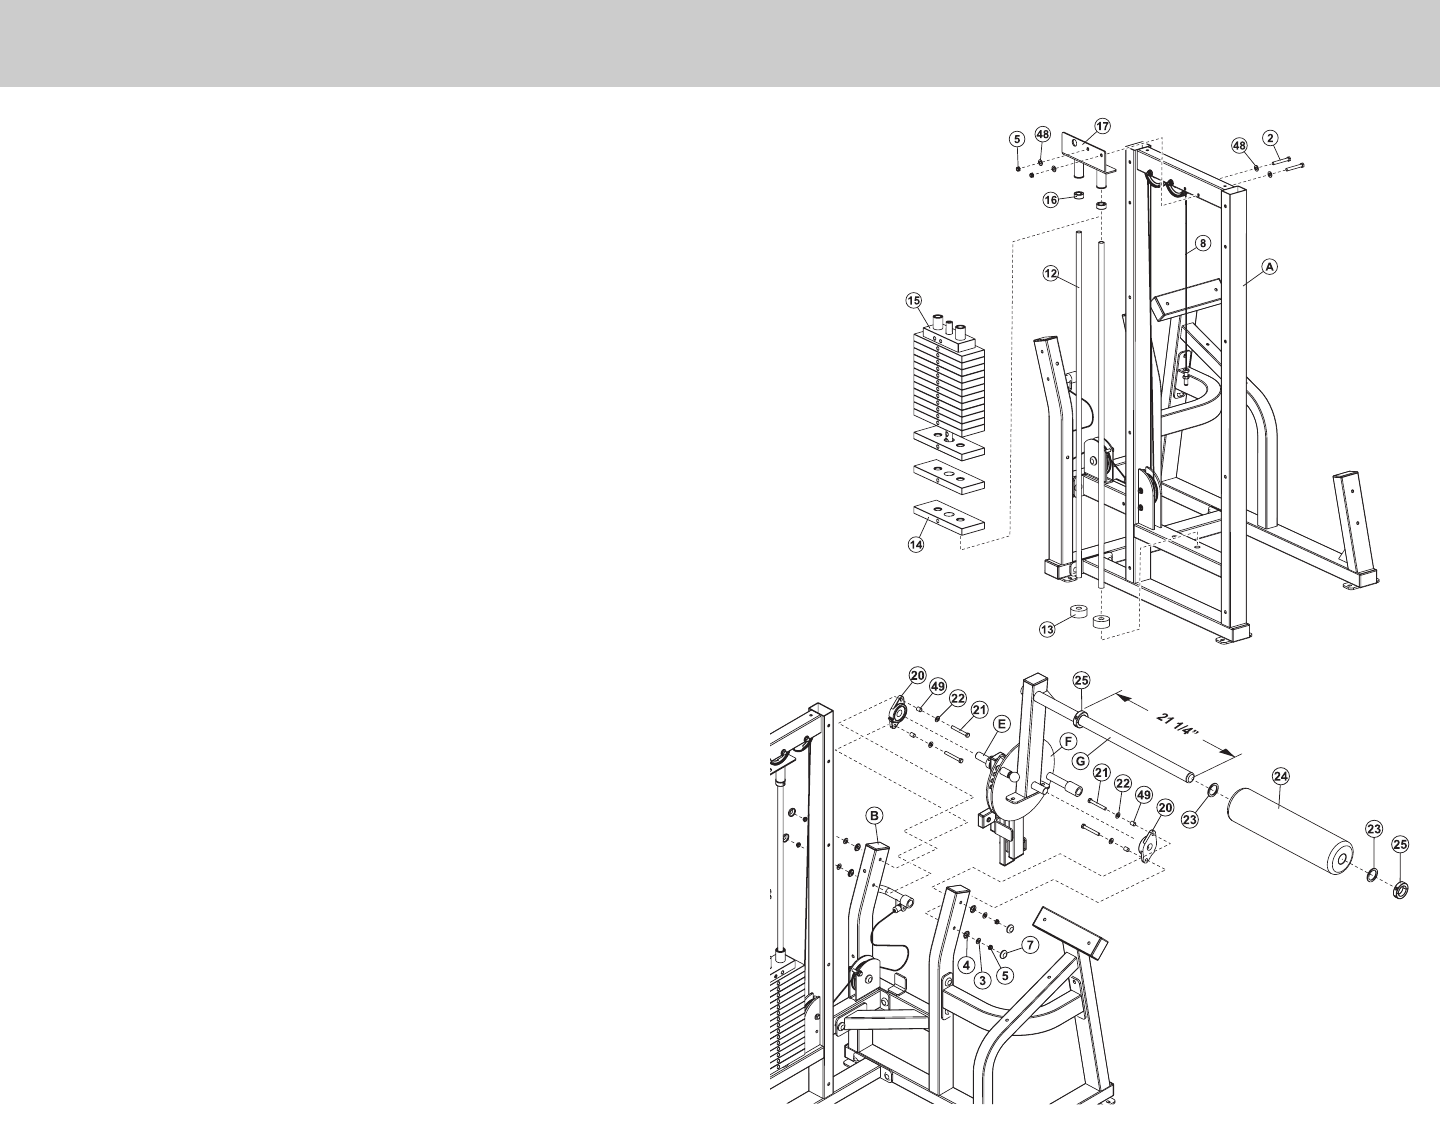
7. WEIGHT STACK ASSEMBLY
Insert the two GUIDE RODS (12) into the base of the TOWER (A) as
shown.
Slide two WEIGHT STACK CUSHIONS (13) down over the GUIDE RODS
as shown.
Lubricate the GUIDE RODS with a slicon or teflon spray that is available
at most hardware stores.
Using EXTREME CARE, slide fifteen 10 LB. WEIGHT PLATES (14) down
over the GUIDE RODS.
Carefully Slide the HEAD PLATE ASSEMBLY (15) down over the GUIDE
RODS onto the weight stack.
Slide one 13/16" SHAFT COLLAR (16) over each GUIDE ROD.
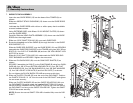
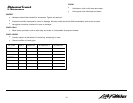
8. Route the threaded end of the CABLE (8) through the hole in the GUIDE
ROD SUPPORT (17).
Slide the GUIDE ROD SUPPORT over the GUIDE RODS (12) and SECURELY
assemble the GUIDE ROD SUPPORT to the TOWER using two 3/8 X 67mm
BOLTS (2), four 3/8" FLAT WASHERS (48) and two 3/8" LOW HEIGHT LOCK
NUTS (5) as shown.
Slide the 13/16" SHAFT COLLARS (16) underneath the GUIDE ROD SUP-
PORT BUSHINGS and SECURELY tighten the set screws.
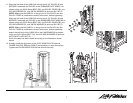
9. Slide two PILLOW BLOCKS (20) over the CAM PIVOT SHAFTS (E) as
shown.
SECURELY assemble the CAM (F) to the CAM FRAME (B) using four BUSH-
INGS (49), four 3/8 X 75mm BUTTON HEAD BOLTS (21), four 3/8" FLAT
BLK WASHERS (22), four 3/8" RH WASHERS (4), four 3/8" SAE WASHERS
(3), four 3/8" LOW HT LOCK NUTS (5) and four RH CAPS (7) as shown.
Do not tighten the PILLOW BLOCK COLLAR set screws at this time.
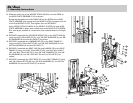
10. Slide one PLASTIC COLLAR (25) over the end of the PAD SHAFT. Position
the PLASTIC COLLAR 21 1/4” from the end of the PAD SHAFT and tighten
the set screw securely.
Slide one PLASTIC WASHER (23) and the CHEST ROLLER PAD (24) over
the PAD SHAFT (G) until it meets the installed SHAFT COLLAR. Install a
second PLASTIC WASHER and the PLASTIC COLLAR (25) over the end of
the PAD SHAFT and snug to the CHEST ROLLER PAD. Tighten the SHAFT
COLLAR set screw securely.
NOTE: Be sure the second SHAFT COLLAR is installed fully onto the PAD
SHAFT.