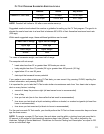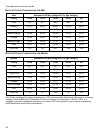
35
U
SING INSTAPACE
TM
F
EEDBACK
The InstaPace
TM
Feedback feature enables users to monitor their pace, or rate of minutes
per mile, while running on the treadmill. This feature must be enabled in the Manager’s
Configuration. See Section 5, titled The Manager’s Configuration, for more information. The
MESSAGE CENTER displays the MPH and pace simultaneously when the user adjusts the
treadmill speed with the ARROW KEYS. If the user adjusts the speed using the NUMERIC key-
pad, the MESSAGE CENTER displays the pace after the treadmill reaches the new speed.
USING ZEROUT
TM
SPEED CONTROL
If, during a workout, a user decreases the speed to the minimum and continues to hold the
DECREASE SPEED ARROW, the speed falls to 0 MPH, which is pause mode. The minimum
speed is 0.5 MPH, unless changed in the Manager’s Configuration. See section 5.2, titled
Configuration Settings, for more information.
COOL-DOWN
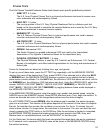
Life Fitness' unique Cool-Down Protocol automatically customizes every cool-down based on
each user's workout performance. Workout performance factors, such as speed, incline, dura-
tion, and heart rate, determine the duration and intensity of the cool-down.
DIMMING
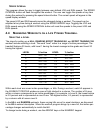
The dimming feature controls the brightness of the treadmill console display. To change the
default brightness setting, press the PERSONAL TRAINER button repeatedly until the MES-
SAGE CENTER displays “DIMMING,” and press ENTER. Then, use the ARROW keys to
increase or decrease the brightness to the desired setting, and press ENTER to save the new
setting; or press CLEAR to revert to the default brightness setting.
If a new brightness setting is selected for a workout, that setting remains in place until it is man-
ually changed, or the workout concludes. When a new workout begins, the brightness reverts to
the default setting.
4.5 LOGGING ONTOTHENETWORK
When the treadmill is connected to a network, the MESSAGE CENTER displays a prompt to
log on with a personal ID number. Press ENTER. Then, using the NUMERIC KEYPAD, enter the
correct digits of the ID number, and press ENTER again.
Refer to Section 5.1 “Using Quick Start Disable” for detailed information regarding network con-
figuration options.


