14
P
OWER CORD ROUTING
The power cord can be run straight from the treadmill, shortened and exited out the user-front
left side, or run under the frame using the power cord clips and exited out the user right-rear
side of the treadmill.
For efficient cord management, the following routing options are recommended:
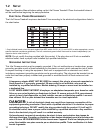
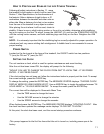
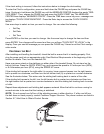
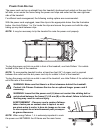
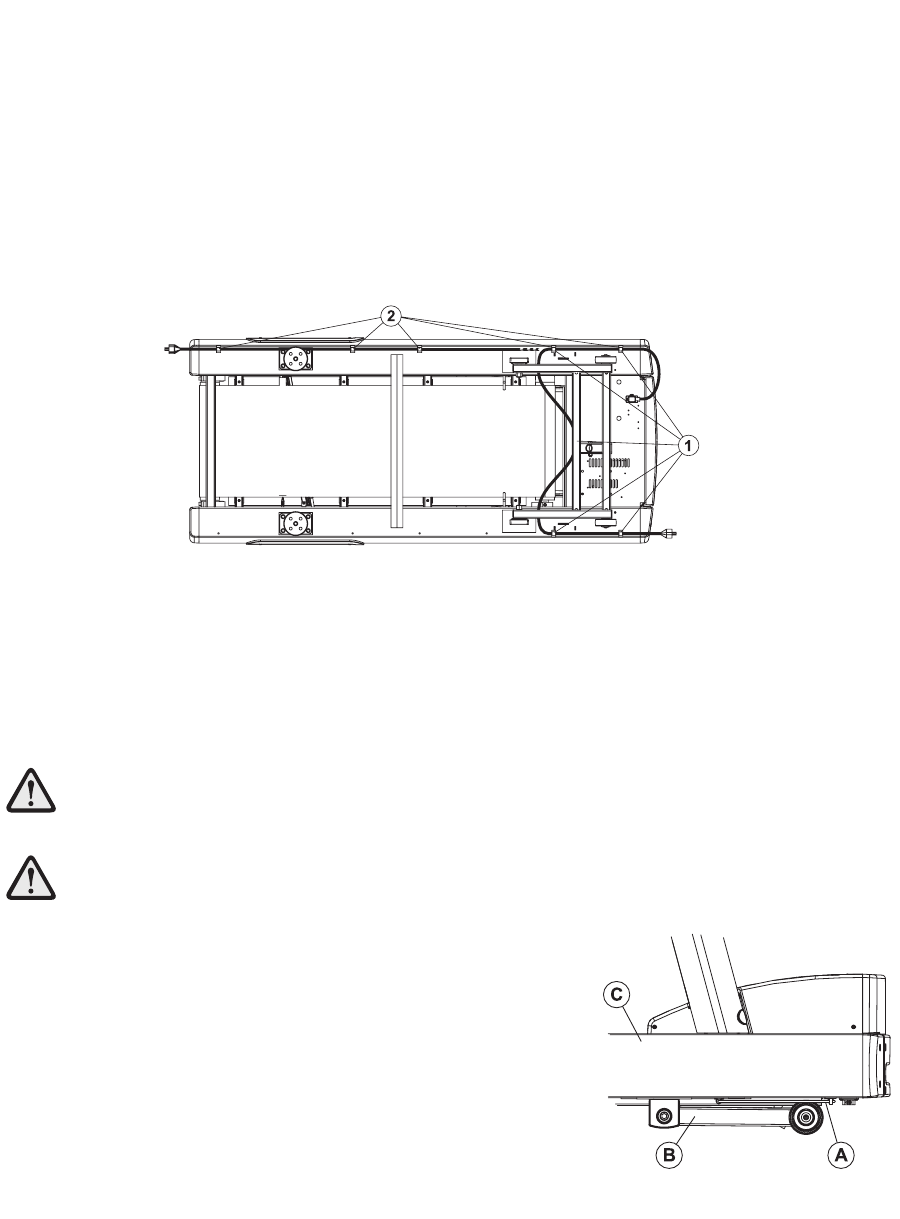
With the power cord unplugged, insert the clips in the appropriate holes. See the illustration
below. Use Hole Pattern 1 or 2 to locate the clips and secure the power cord with the clips,
taking up any slack between clips.
NOTE: It may be necessary to tip the treadmill to route the power cord properly.
To plug the power cord into an outlet in front of the treadmill, use Hole Pattern 1 for outlets
located at the front of the machine.
NOTE: To accomodate treadmill incline, at least two feet (24”) of power cord is required
between the outlet and the last power cord clip for outlets in front of the treadmill.
To plug the power cord into an outlet in rear of the treadmill, use Hole Pattern 2 for outlets locat-
ed at the rear of the machine.
WARNING: Make sure that there is a 6-foot clearance behind the treadmill.
Contact Life Fitness Customer Service for an optional longer power cord if
necessary.
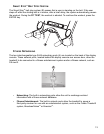
WARNING: Insure that the power cord (A) does not contact the striding belt or
get pinched between the frame (C), lift arm (B) or the wheel; failure to follow this
warning may result in serious injury.
AVERTISSEMENT : S'assurer que le cordon d'alimen-
tation n'entre pas en contact avec le tapis et ne soit
pas pincé entre le cadre, le bras de levage ou la roue.
Le non-respect de cet avertissement peut provoquer
de graves blessures.
NOTE: When using Pattern 1, it is extremely important to route
the power cord BETWEEN the lift frame and the main frame.


