


Page
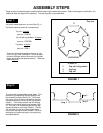
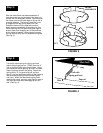
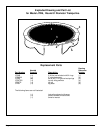
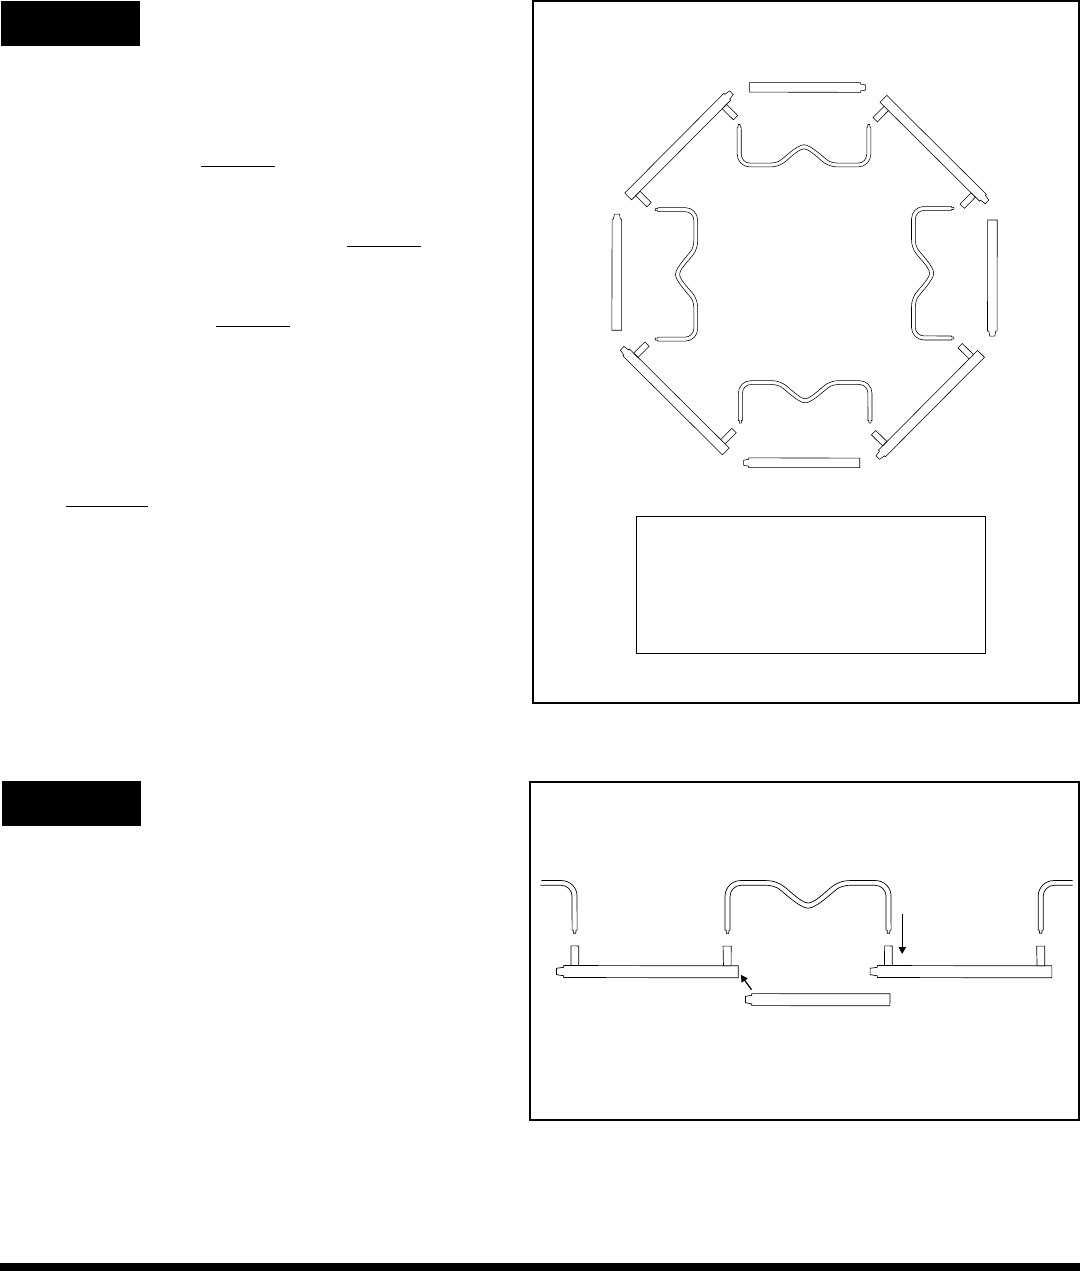
Lay out all frame sections in a circle (See Fig. 1).
The frame sections consist of 3 components:
Top rail - 4 pieces
(part no. JTR6TR)
Top rail with leg sockets - 4 pieces
(part no. JTR6TRS)
Leg base - 4 pieces
(part no. JTR6L)
These are all interchangeable and have no “left
hand” or “right hand” orientation. All connections
consist of sliding a section tube end into a slightly
larger tube end on the adjacent section. These are
called slip joints.
Step 1:
Step 2:
ASSEMBLY STEPS
Read through all assembly steps carefully before beginning the assembly process. Refer to drawings for clarification. No
additional tools are required for assembly. The use of gloves is recommended.
4
4
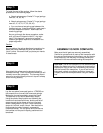
Top view
Top view
FIGURE 1
FIGURE 2
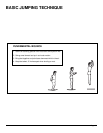
The frame will be assembled upside down. This
means all leg sockets will be facing away from
the assembly surface (See Fig. 2). First insert
the end of a top rail without leg sockets into the
corresponding end of a top rail with leg sockets
(Step 1). Then attach another top rail with leg
sockets to the top rail without leg sockets (Step
2). Then put a “W” shaped leg into the two leg
sockets closest to each other (Step 3). The leg
will now span the top rail without sockets and
connect the two top rails with sockets. Continue
adding top rail pieces and legs in the previously
described fashion.
1 Top rail w/leg sockets
2 Leg base
3 Top rail
PARTS:
1
3
2
Step 3
Step 2
Step 1