Assembly
7
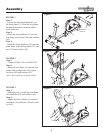
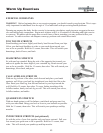
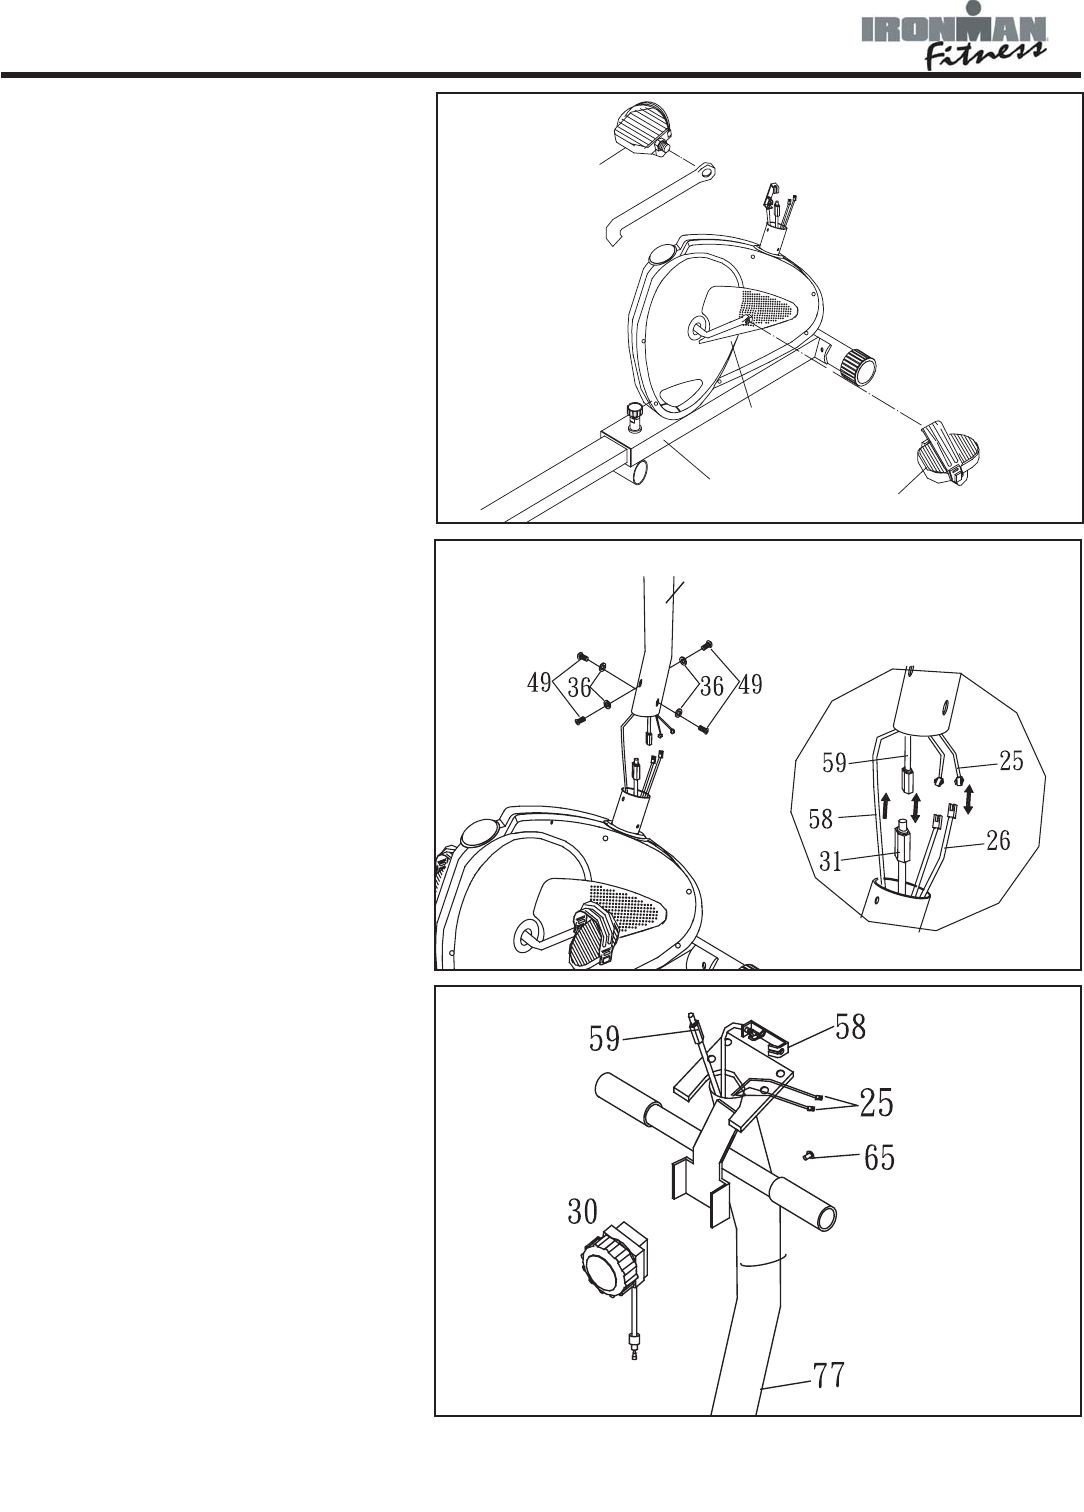
FIGURE 4:
Step 1:
Thread the right pedal (39) onto the right
side of the crank (8) as shown. Tighten the
pedal securely. Select the right pedal strap
which has “R” marked on the bottom side
of the strap. Snap the three hole end onto
the inside edge of the right pedal (39).
Snap the other three hole end onto the
outside edge of the right pedal (39). Select
adjustment holes which allow your foot to
be easily removed from the pedals.
Step 2:
Repeat with the left pedal and strap.
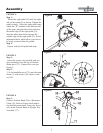
FIGURE 5
Step 1:
Insert the sensor wire (packed with ten-
sion controller) from the top of the han-
dlebar post (75). Connect the wires per
Figure 5.
Step 2:
Fix the handlebar post (75) onto the main
frame (1) with screws (49) and arc wash-
ers (36).
75
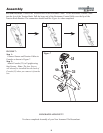
FIGURE 6
Step 1:
Connect Tension Knob (30) to Resistance
Cable (58). Refer to Figure 6a,6b,and 6c
for detailed instructions. Using one Screw
(65) attach Tension Knob to Upright Post
Assembly (77).
Figure 5
Figure 6
Figure 4


