13
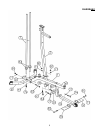
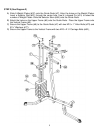
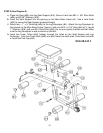
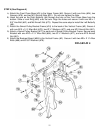
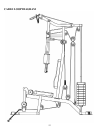
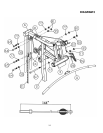
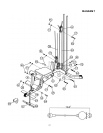
STEP 5 (See Diagram 5 & Cable Loop Diagram)
A) Attach the 144” Upper Cable (#57) to the front opening on the Upper Frame (#6). NOTE:
The Ball Stopper on the Cable needs to be underneath the Frame. B.) Attach a Pulley
(#41) to the opening. Secure it with one M10 x 2 ½” Allen Bolt (#64), two Ø 7/8” Pulley
Bushings (#35), and one M10 Aircraft Nut (#81). C.) Draw the Cable towards the back of
the machine to another opening on the Upper Frame. Repeat Step B above to install a
Pulley.
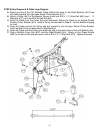
B) Draw the Cable around the Pulley then pull back to the opening on the Front Press Base
(#3). Attach a Pulley to the opening. Secure it with one M10 x 5 ¾” Allen Bolt (#67), two Ø
¾” Washers (#77), and one M10 Aircraft Nut (#81).
C) Draw the Cable around the Pulley then through the hole on the Vertical Frame (#2) to the open
bracket on the back of Vertical Frame. F.) Attach a Pulley to the bracket. Secure it with one
M10 x 1 ¾” Allen Bolt (#65), two ∅ ¾” Washers (#77), and one M10 Aircraft Nut (#81).
D) Draw the Cable over the Pulley and pull the Cable downwards. Attach a Pulley to the upper
holes on the two Double Floating Pulley Brackets (#14). Repeat Step F above to install another
Pulley. Let the Bracket hanging for now.
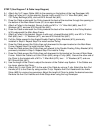
E) Draw the Cable around the Pulley then pull upwards to the open bracket underneath the Upper
Frame. Repeat Step F above to install another Pulley. I.) Pull the Cable downwards between
the two Guide Rods to the Selector Rod (#21). Securely thread the bolt on the end of the Cable
into the Selector Rod.
F) Attach a 10-Joint Chain (#26) to the Cable using a C-clip (#28). Attach the Lat Bar (#11) to the
Chain using a C-clip. Adjust the length of Chain to obtain the desired Lat Bar exercise.


