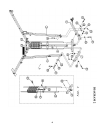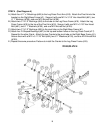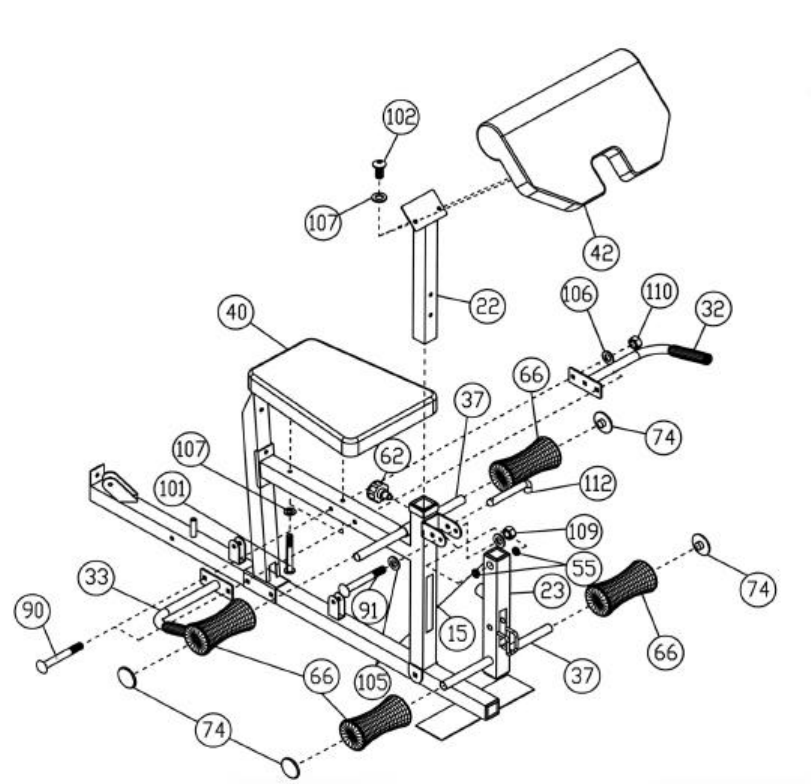
STEP 8 (See Diagram 8)
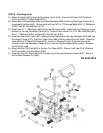
A.) Attach the Seat (#40) to the Leg Developer Frame (#15). Secure it with two ∅5/8” Washers
(#107) and M8 x 2 ½” Allen Bolts (#101).
B.) Attach both Left Handlebar (#32) and Right Handlebar (#33) to the Leg Developer Frame (#15)
underneath the Seat (#40). Secure them with two M10 x 2 ¾” Carriage Bolts (#90), ∅ ¾” Washers
(#106), and M10 Aircraft Nuts (#110).
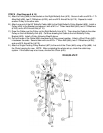
C.) Attach two ∅1” x ½” Bushings (#55) to the Leg Developer (#23). Attach the Leg Developer to the
bracket on the Leg Developer Frame (#15). Secure it with one M12 x 3 1/8” Hex Head Bolt (#91),
two ∅ 1” Washers (#105), and one M12 Aircraft Nut (#105).
D.) Insert two Foam Roll Tubes (#37) halfway through the holes on the Leg Developer (#23) and Leg
Developer Frame (#15). Push four Foam Rolls (#66) onto the tubes from both sides. Close the
ends with four 2” Round End Caps (#74). Insert a L-Shaped Pin (#112) into the hole on the
bracket on the Leg Developer Frame (#15) to lock the Leg Developer (#23) in place. Remove
the Pin when using.
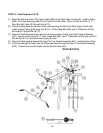
E.) Attach the Arm Curl Pad (#42) to the Arm Curl Stand (#22). Secure it with two ∅5/8” Washers
(#107) and M8 x 5/8” Allen Bolts (#102).
F.) Insert the Arm Curl Stand (#22) into the opening on the Leg Developer Frame (#15). Secure it
with a Quick Release Pin (#62).
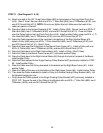
DIAGRAM 8
12


