


BEFORE
YOU BEGIN
8
INTRODUCTION
IMPORTANT
PRECAUTIONS
ASSEMBLY
BEFORE
YOU BEGIN
BIKE
OPERATION
LIMITED
WARRANTY
TROUBLESHOOTING
& MAINTENANCE
CONDITIONING
GUIDELINES
BEFORE
YOU BEGIN
ASSEMBLY
9
INTRODUCTION
IMPORTANT
PRECAUTIONS
BIKE
OPERATION
CONDITIONING
GUIDELINES
TROUBLESHOOTING
& MAINTENANCE
LIMITED
WARRANTY
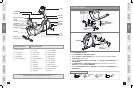
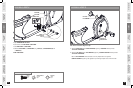
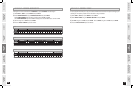
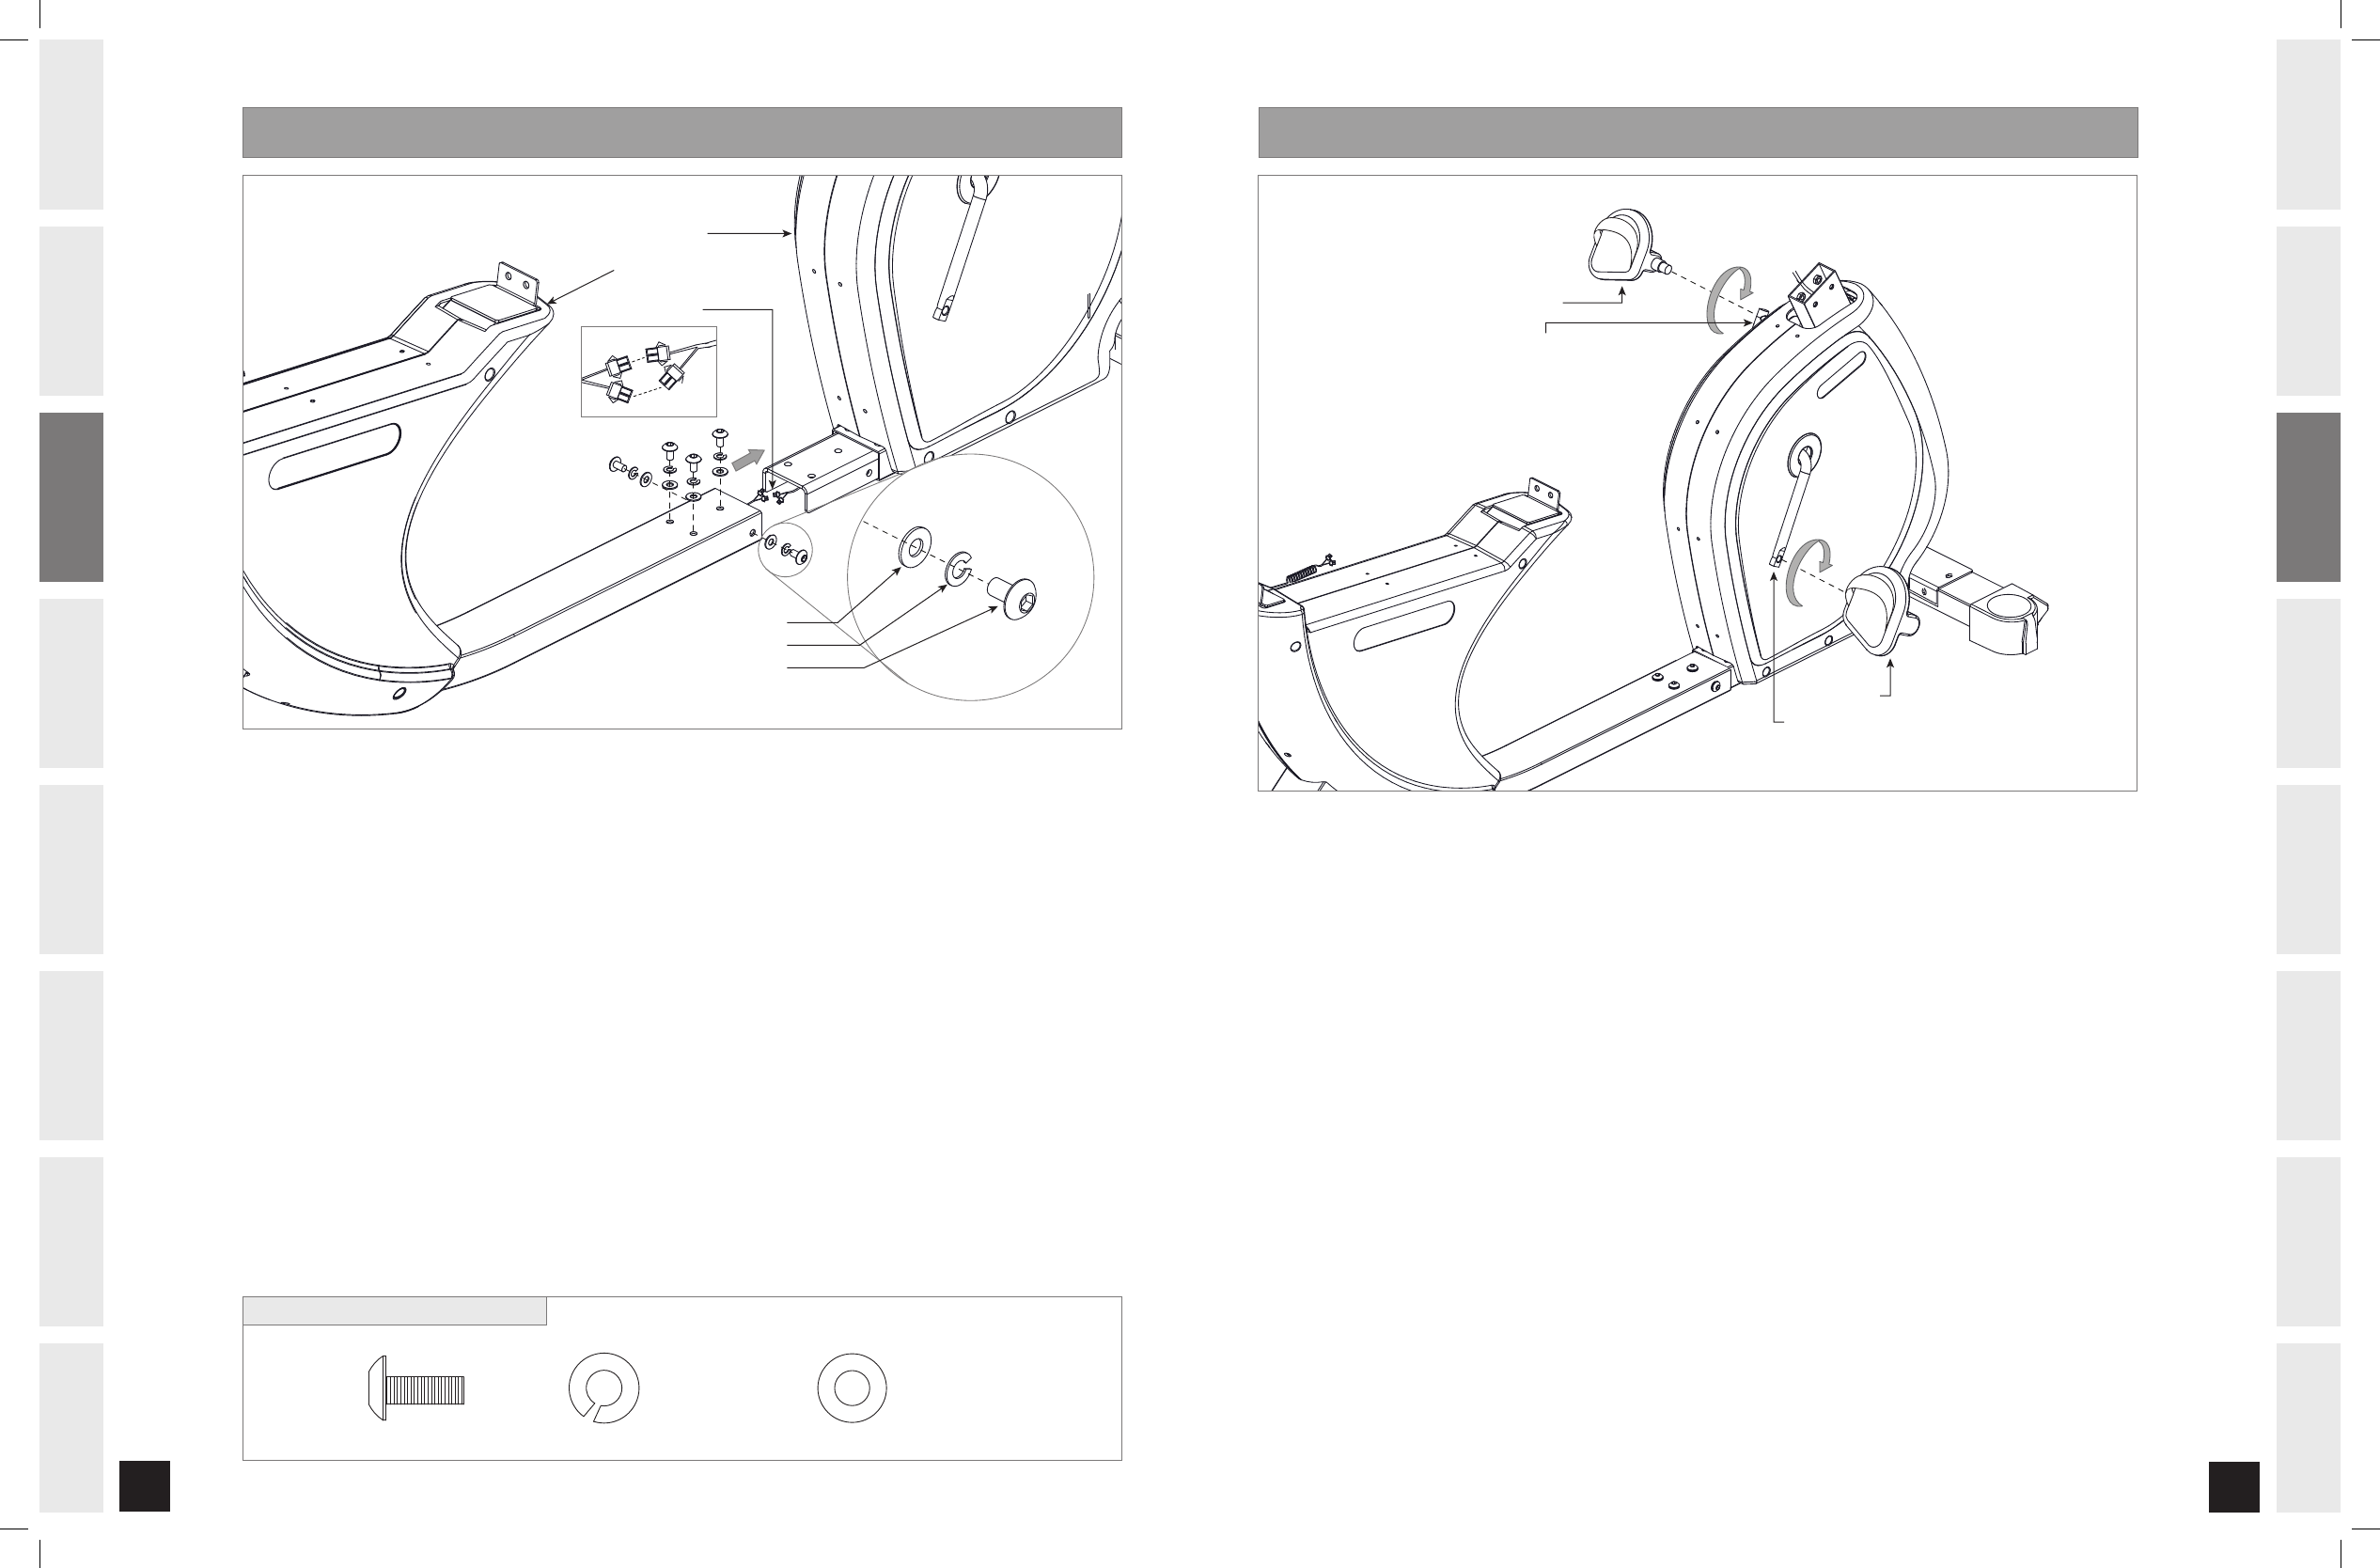
A S S E M B LY S T E P 3
RIGHT PEDAL
RIGHT CRANK ARM
LEFT PEDAL
LEFT CRANK ARM
Note: There is no hardware bag for this step.
Attach the RIGHT PEDAL onto the RIGHT CRANK ARM, tightening it CLOCKWISE with the provided
13mm/15mm FLAT WRENCH.
Attach the LEFT PEDAL onto the LEFT CRANK ARM, tightening it COUNTER-CLOCKWISE with the provided
13mm/15mm FLAT WRENCH.
Note: The LEFT CRANK ARM is reverse threaded so it is very important that it is tightened
COUNTER-CLOCKWISE. Tightening it the opposite way can damage the pedal or the crank arm or both.
A.
B.
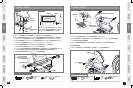
MAIN FRAME
CONNECT WIRES
BASE FRAME
BOLT (A)
SPRING WASHER (B)
WASHER (C)
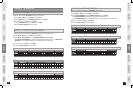
A S S E M B LY S T E P 2
A) Open HARDWARE BAG FOR STEP 2.
B) Connect wires from BASE FRAME to MAIN FRAME.
C) Slide MAIN FRAME into BASE FRAME.
D) Attach the BASE FRAME to the MAIN FRAME using 5 BOLTS (A), 5 SPRING WASHERS (B) and
5 WASHERS (C).
DO NOT PINCH WIRES!
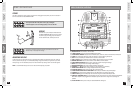
SPRING WASHER (B)
15.4 mm
Qty: 5
WASHER (C)
18 mm
Qty: 5
BOLT (A)
20 mm
Qty: 5
HARDWARE BAG FOR STEP 2 CONTENTS :
B600_Rev.1.6.indd 8-9 7/11/07 1:31:27 PM