ASSEMBLY
INSTRUCTIONS
FRAME ASSEMBLY
Step 2c
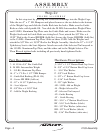
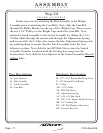
7 - 41 13/16 x 3/4” Dia. Guide Rod
8 - 20 LBS. Intermediate Weight
9 - 15 LBS. Aluminum Top Plate
10 - 3” x 1” I.D. x 1 1/2” THK Bumper
11 - Guide Rod Bushing (PLAS 134)
12 - Center RH BRK (Add-on)
13 - 12” x 14 1/2” Upholstery Seat
14 - Seat Adjuster
22 - 5/8” Dia. x 6 13/32” Rod
27 - Add On Weight Bushing
Part Descriptions
J - 5/16” x 1 1/4” Button Head Cap Screw
K - 3/8” x 2 3/4” Button Head Cap Screw
L - 5/16” Flat Washer
P - 3/8” Lock Washer
S - 3/8” x 1” Button Head Cap Screw
U - 5/16” Lock Washer
Z - 3/8” Split Washer
AR - 5 LBS. Add on Weight
AS - Weight Selector Pin
AT - Selector Pin Lanyard
AX - Guide Bearing
AY - Guide Bearing
BC - 5/16” x 1” Button Head Screw
BF - 5/16” Lock Washer (black)
BG - 3/8” Flat Washer (white zinc)
BH - 3/8” Lock Washer (black)
BJ - 5/16” Flat Washer (white zinc)
Hardware Descriptions
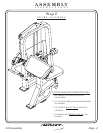
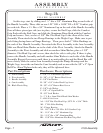
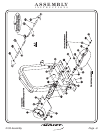
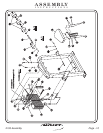
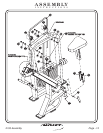
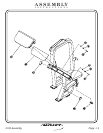
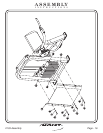
In this step start by pressing two Guide Rod Bushings into the Weight Cage.
Take the two 3” x 1” I.D. Bumpers and place them over the two holes in the bottom
of the Weight Cage and slide the Guide Rods into the holes. Make sure the Guide
Rods are lube with Spindle Oil. Now slide the 20 LBS. Intermediate Weight Plates
and 15 LBS. Aluminum Top Plate onto the Guide Rods and secure. Make sure the
Weight Stack and its Guide Rods are sitting level. Next, attach the 5/8” Dia. x 6
13/32” Rod to the Center RH BRK (Add-On). Secure the Center RH BRK (Add-On)
to the 15 LBS. Aluminum Top Plate. Slide on three 5 LBS. Add-On Weights and
attach the 5/8” Dia. x 6 13/32” Rod to the Weight Assembly. Attach the 12” x 14 1/2”
Upholstery Seat to the Seat Adjuster. Attach one end of the Selector Pin Lanyard to
the 15 LBS. Aluminum Top Plate, and the other end to the Weight Selector Pin.
Then bolts including all previously hand tightened boltsWrench tighten .
FITNESS SYSTEMS
R
HOIST
Page - 9 2103 Assembly


