


13
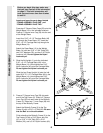
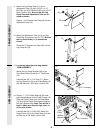
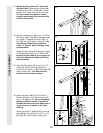
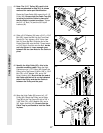
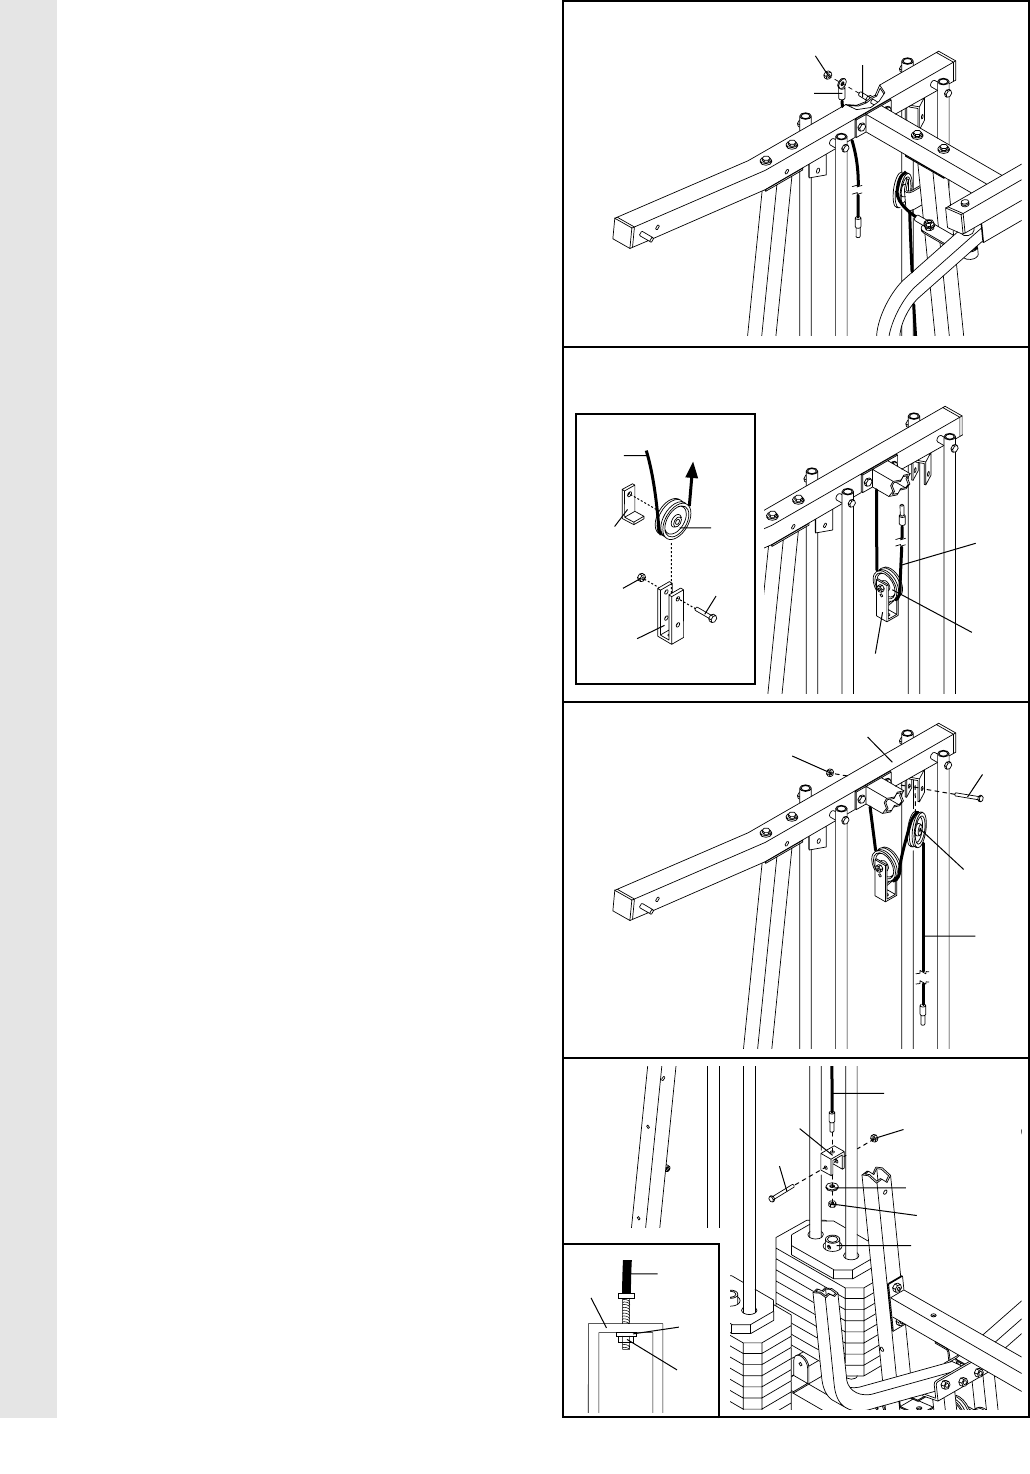
25. Identify the Rear Cable (87)—this is the
shortest Cable. Slide one end of the Rear
Cable onto the 5/16” x 3” Bolt (92). Thread
another 5/16” Nylon Jam Nut (91) onto the
Bolt, but do not fully tighten it. Leave
enough room between the two Jam Nuts
for the Cable to pivot.
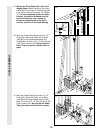
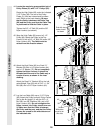
26. See the inset drawing. Attach a 3 1/2” Pulley
(82) and a Cable Trap (80) to the upper hole
in a Large “U” Bracket (84) with a 3/8” x 2”
Bolt (50) and a 3/8” Nylon Locknut (42). Be
sure that the Cable Trap is inside the
Large “U” Bracket. Note: This may come
pre-assembled.
Route the Rear Cable (87) through the Large
“U” Bracket (84) and the 3 1/2” Pulley (82).
Be sure that the Cable is in the groove of
the Pulley and that the Cable and Pulley
move smoothly.
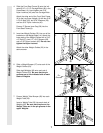
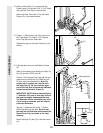
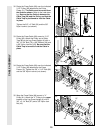
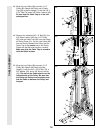
27. Wrap the Rear Cable (87) around a 3 1/2”
Pulley (82). Attach the Pulley to the Top
Frame (2) with a 3/8” x 2” Bolt (50) and a 3/8”
Nylon Locknut (42). The Cable must be
routed from the direction shown.
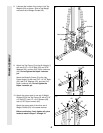
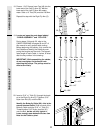
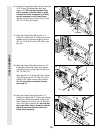
28. Attach the Rear Cable (87) to a Small “U”
Bracket (32) with a 1/4” Nylon Locknut (44)
and a 1/4” Washer (37). Do not completely
tighten the Nylon Locknut. It should be
threaded onto the end of the Cable only a
couple of turns, as shown in the inset
drawing.
Attach the Small “U” Bracket (32) to the indi-
cated Weight Tube (25) with a 5/16” x 1 3/4”
Bolt (68) and a 5/16” Nylon Locknut (40).
28
25
26
27
CABLE ASSEMBLY
92
91
87
87
80
42
84
50
82
82
82
50
42
37
44
25
32
68
2
87
84
87
87
40
87
44
32
37