


5
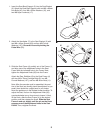
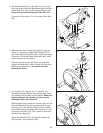
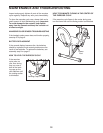
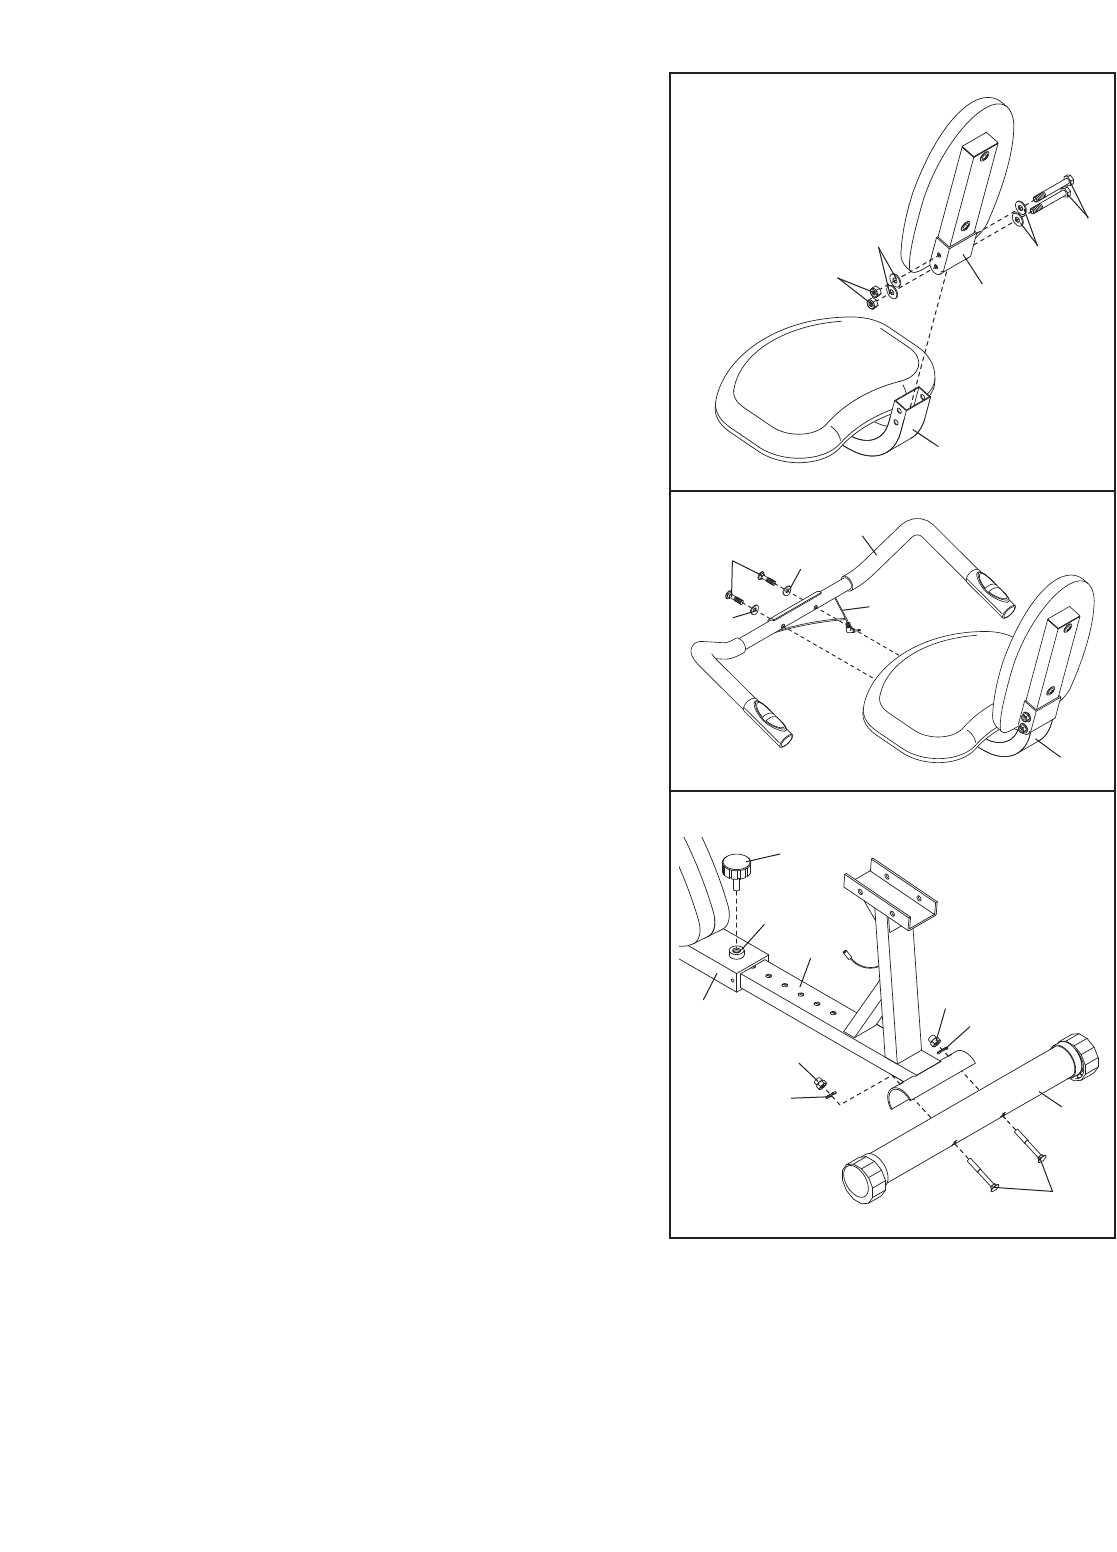
3. Slide the Seat Frame (4) partially out of the Frame (1),
and align one of the adjustment holes in the Seat
Frame with the indicated hole in the Frame. Next,
tighten the Adjustment Knob (99) into the Frame.
Attach the Rear Stabilizer (8) to the Seat Frame (4)
with two M8 x 70mm Carriage Bolts (9), two M8
Curved W
ashers (107), and two M8 Acorn Nuts (11).
Note: After the exercise cycle is assembled, the posi-
tion of the Seat (not shown) should be adjusted; as you
pedal, there should be a slight bend in your knees
when the pedals are in the farthest forward position. To
adjust the Seat, first turn the Adjustment Knob (99)
counterclockwise two or three turns to loosen it. Next,
lift the Knob, slide the Seat Frame (4) to the desired
position, and then release the Knob. Slide the Seat
Frame in and out slightly until the pin on the Knob
engages one of the adjustment holes in the Seat
Frame. Then, retighten the Knob.
9
8
99
4
Hole
11
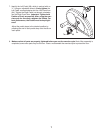
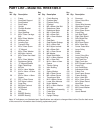
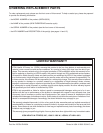
1. Insert the Seat Back Support (2) into the Seat Bracket
(3). Attach the Seat Back Support with two M8 x 80mm
H
ex Bolts (40), four M8 x 20mm Washers (10), and
two M8 Nylon Locknuts (17).
3
1
0
10
2
1
2. Attach the Handlebar (7) to the Seat Bracket (3) with
two M8 x 40mm Screws (63) and two M8 Curved
W
ashers (107). Be careful to avoid pinching the
Pulse Wire (71).
7
3
2
71
63
107
3
17
40
107
11
107
107
1