


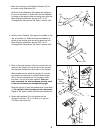
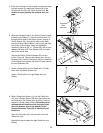
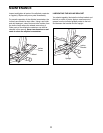

8. Slide a Pedal Arm Spacer (41), the left Pedal Arm
(12), and a Plastic Spacer (56) onto the axle on the
left Pulley Arm (34) (these parts fit tightly; it may be
helpful to use the rubber mallet). Be careful not to
confuse the left Pedal Arm with the right Pedal
Arm (not shown); look at the position of the
Chrome Extension Tube (63) to identify the left
Pedal Arm.
Tap a 3/4Ó Axle Cap (43) onto the axle on the left
Pulley Arm (34).
Repeat this step to attach the right Pedal Arm (not
shown).
6
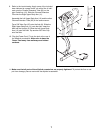
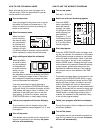
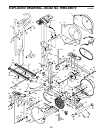
5. Feed all of the slack in the console wire harness down
into the Upright (3). Attach the Console (6) to the
Upright with four #8 x 3/4Ó Black Screws (44). Be
careful to avoid pinching the console wire har-
ness.
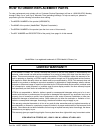
6. Align the indicated holes in the Incline Frame (2) with
the tube on the Base (1). Insert the Incline Axle (75)
through the left side of the Incline Frame, through a
Plastic Spacer (56), through the tube on the Base,
through another Plastic Spacer, and through the right
side of the Incline Frame. Using two adjustable
wrenches, tighten a 3/8Ó x 1Ó Screw (59), with a Lock
Washer (58) and a 3/8Ó Zinc Washer (52), into each
end of the Incline Axle.
Tap the two Incline Frame Endcaps (55) into the
Incline Frame (2). Remove the backing from the two
Bumpers (62). Press the Bumpers onto the underside
of the Incline Frame where the Incline Frame touches
the front Stabilizer (30).
44
3
Console
Wire
Harness
6
5
6
2
55
1
75
52
52
58
59
58
59
56
30
Hole
Tube
62
62
60
44
41
43
63
12
34
56
7
8
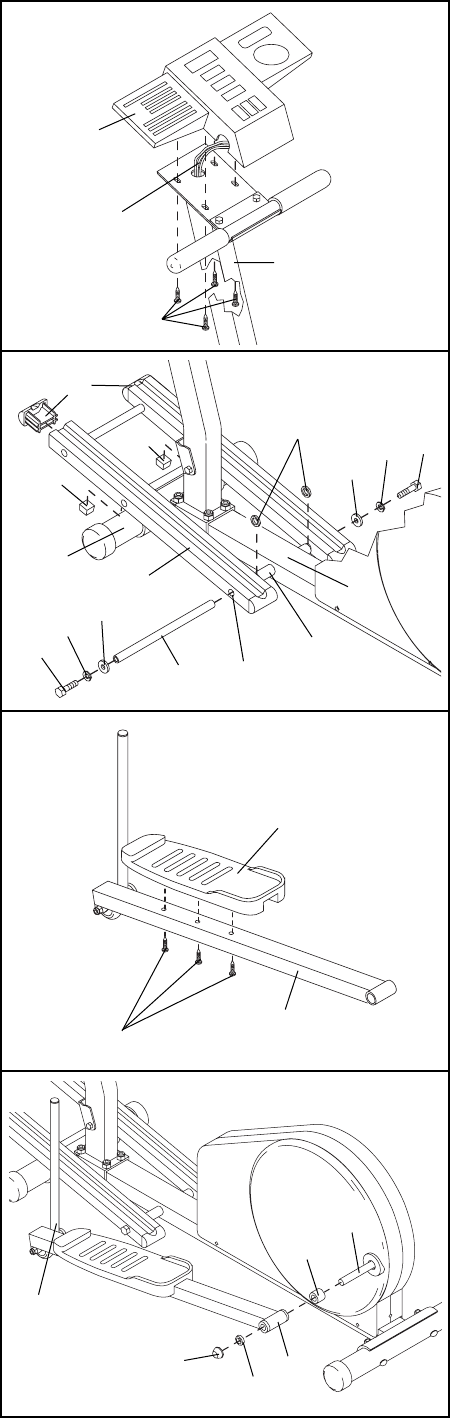
7. Attach a Pedal (60) to the left Pedal Arm (12) with
three #8 x 3/4Ó Black Screws (44).
Attach a Pedal (60) to the right Pedal Arm (not
shown).
12