


6
7. Make sure that all parts of the elliptical crosstrainer are properly tightened. Note: There may be some
hardware left over after assembly is completed. To protect the floor or carpet from damage, place a mat
under the elliptical crosstrainer.
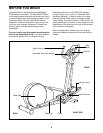
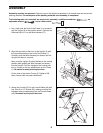
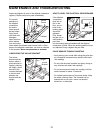
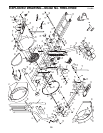
5. Refer to the inset drawing. Apply a small amount of the
included lubricant to a paper towel; rub a thin film of
lubricant onto the Chrome Extension Tube (21) on the
Right Pedal Arm (4). Slide the Chrome Extension Tube
into one of the Upper Body Arms (7).
Slide the other Chrome Extension Tube (21) into the
other Upper Body Arm (7) in the same way.
Tap a 5/8Ó Axle Cap (85) onto one end of the Axle (19).
Insert the Axle through one of the Upper Body Arms
(7) and then through the Upright (2). It may be helpful
to tap the Axle with a rubber mallet. Slide the other
Upper Body Arm (7) onto the Axle. Make sure that the
Upper Body Arms are turned as shown. Tap another
5/8Ó Axle Cap (85) onto the Axle.
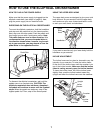
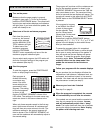
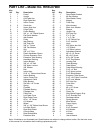
4. Connect the Extension Wire (51) to the corresponding
wire on the Console (87).
Next, connect the two Pulse Wires (86) to the two
remaining wires on the Console (87). Note: Either
Pulse Wire can be attached to either wire on the
Console.
Next, connect the ground wire to the indicated hole in
the Upright (2) with a Zinc #8 x 1/2Ó Screw (35) and
the #8 Star Washer (53).
Carefully feed the wires down into the Upright (2).
Attach the Console Base (49) to the Upright with four
Zinc #8 x 1/2Ó Screws (35). Be careful to avoid
pinching the wires.
86
87
49
35
35
2
57
Console
Wires
35
53
Ground Wire
4
5
19
2
85
7
7
85
21
Lube
4
7
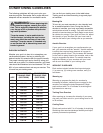
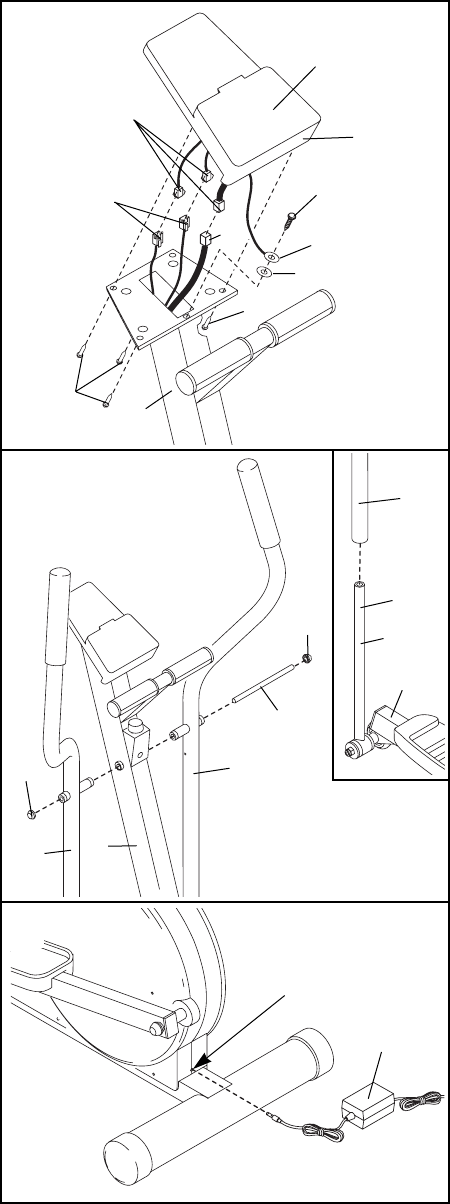
6. Plug the Power Supply (96) into the jack at the rear of
the elliptical crosstrainer. Note: Your Power Supply
may look different from the one pictured.
6
Jack
96