6
29
1
2
1
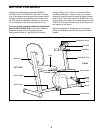
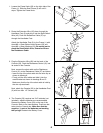
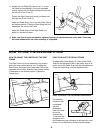
1. Loosen the Frame Knob (29) on the right side of the
Frame (1). Slide the Seat Frame (2) out until it
stops. Tighten the Frame Knob.
2. Route the Extension Wire (56) down through the
Handlebar Post (3) and plug it into the Reed Switch
Wire (42). Push the Resistance Cable (57) up
through the Handlebar Post.
Attach the Handlebar Post (3) to the Frame (1) with
three M8 x 15mm Button Head Screws (53) and
three M8 x 19mm Washers (54). Be careful not to
pinch the Reed Switch Wire, Extension Wire or
the Resistance Cable.
2
3
1
54
54
53
53
57
56
42
3
4
3
56
57
33
59
31
43
43
33
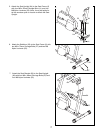
3. Plug the Extension Wire (56) into the back of the
Console (33). Push the Resistance Control (31) into
its socket in the Console.
Next, connect the short cable on the Resistance
Control (31) to the Resistance Cable (57) as follows:
¥ Insert the tip of the short cable into the wire clip as
shown in drawing A.
¥ Firmly pull the short cable and slide it into the
metal bracket as shown in drawings B and C.
Make sure that the tip of the short cable is held by
the wire clip as shown.
Next, attach the Console (33) to the Handlebar Post
(3) with four #8 x 1/2Ó Screws (43).
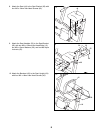
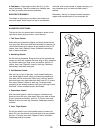
4. The Console (33) requires two ÒAAÓ batteries (not
included)Ñalkaline batteries are recommended.
Remove the Battery Cover (59) on the top of the
Console. Refer to the inset drawing. Press two bat-
teries into the Console top. Make sure that the
negative (Ð) ends of the batteries are touching
the springs. Reattach the Battery Cover.
53
Batteries
Console Top
A
B C
Wire
Clip


