


6
ASSEMBLY
A
ssembly requires two persons.
S
et the treadmill in a cleared area and remove all packing materials;
d
o not
dispose of the packing materials until assembly is completed. Note: The underside of the treadmill walking
belt is coated with high-performance lubricant. During shipping, a small amount of lubricant may be transferred to
the top of the walking belt or the shipping carton. This does not affect treadmill performance. If there is lubricant
on top of the walking belt, simply wipe off the lubricant with a soft cloth and a mild, non-abrasive cleaner.
In addition to the included hex key , assembly requires a phillips screwdriver , two
spanners , and wire cutters .
Note: To identify small parts used during assembly, see the PART IDENTIFICATION CHART in the center of
this manual. Some parts may be preassembled.
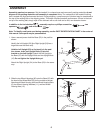
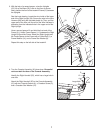
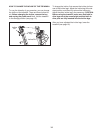
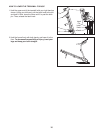
1. Have a second person hold the Base (52) in the position
shown.
Identify the Left Upright (53) (the Right Upright [54] has a
large hole near the lower end).
Hold the Left Upright (53) so the bend is in the posi-
tion shown. Insert two Upright Bolts (2) into the
bracket on the Left Upright. Attach the Left Upright to
the Base (52) with the Upright Bolts and two Upright Nuts
(16). Do not tighten the Upright Nuts yet.
Attach the Right Upright (54) to the Base (52) in the same
way.
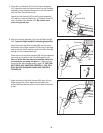
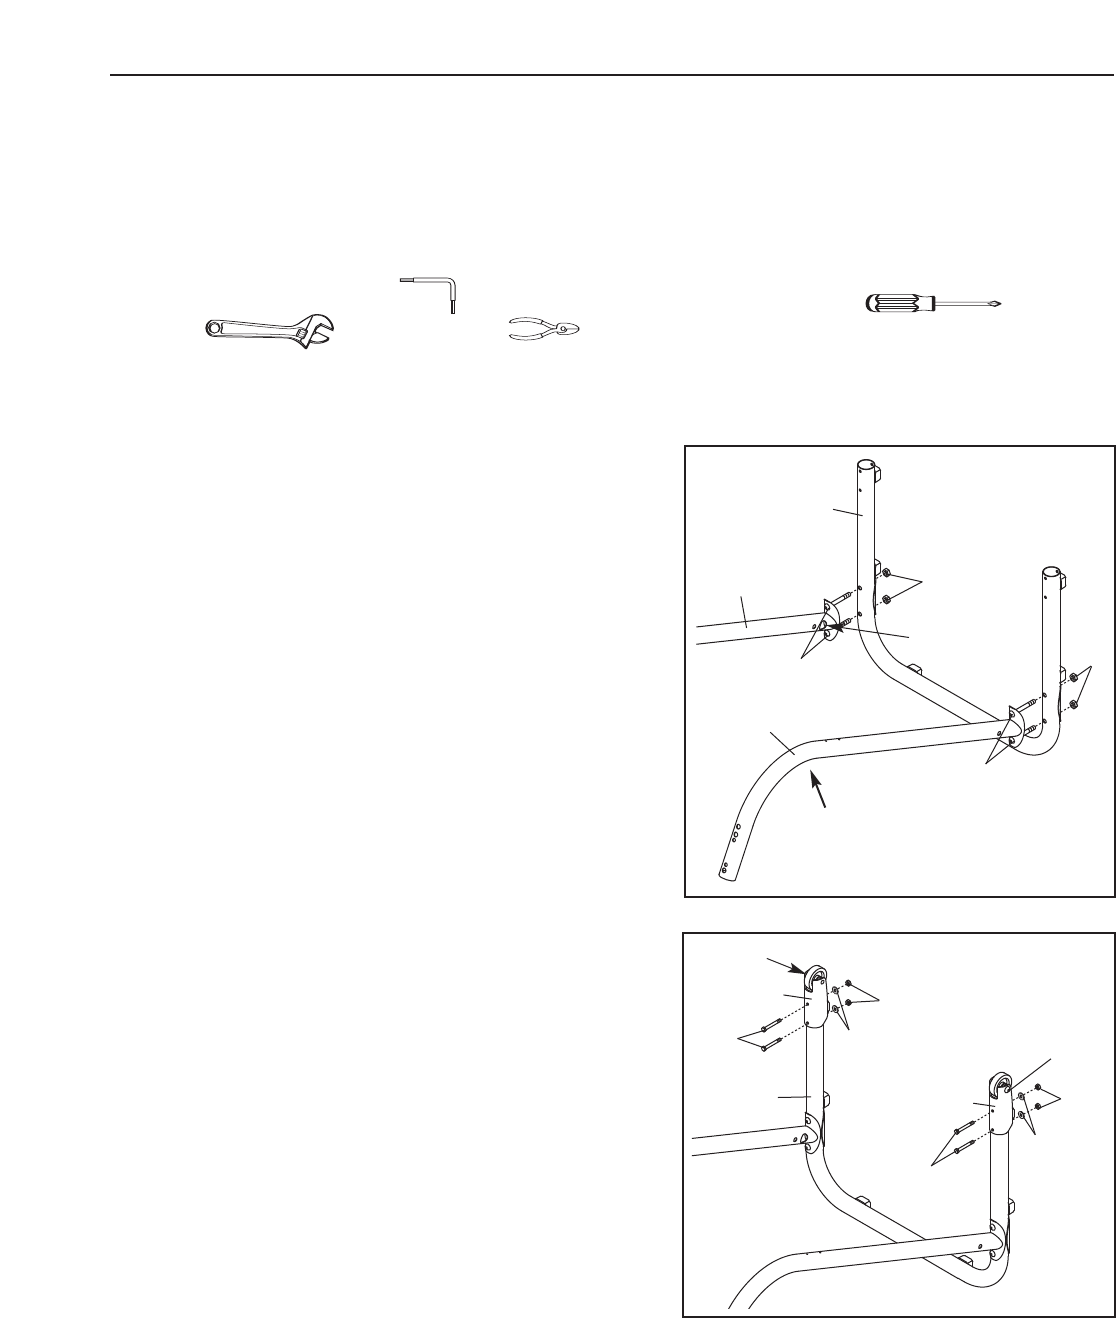
2. Slide the two Wheel Housings (62) onto the Base (52) with
the head of the Wheel Bolts (35) on the outside as shown.
Attach each Wheel Housing with two Wheel Housing Bolts
(6), two Wheel Housing Washers (11), and two Wheel
Housing Nuts (15).
52
53
54
16
1
2
2
16
2
52
Large
Hole
6
11
62
15
11
6
62
35
35
15
Bend