


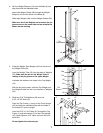
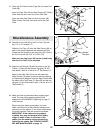
11
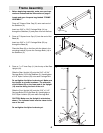
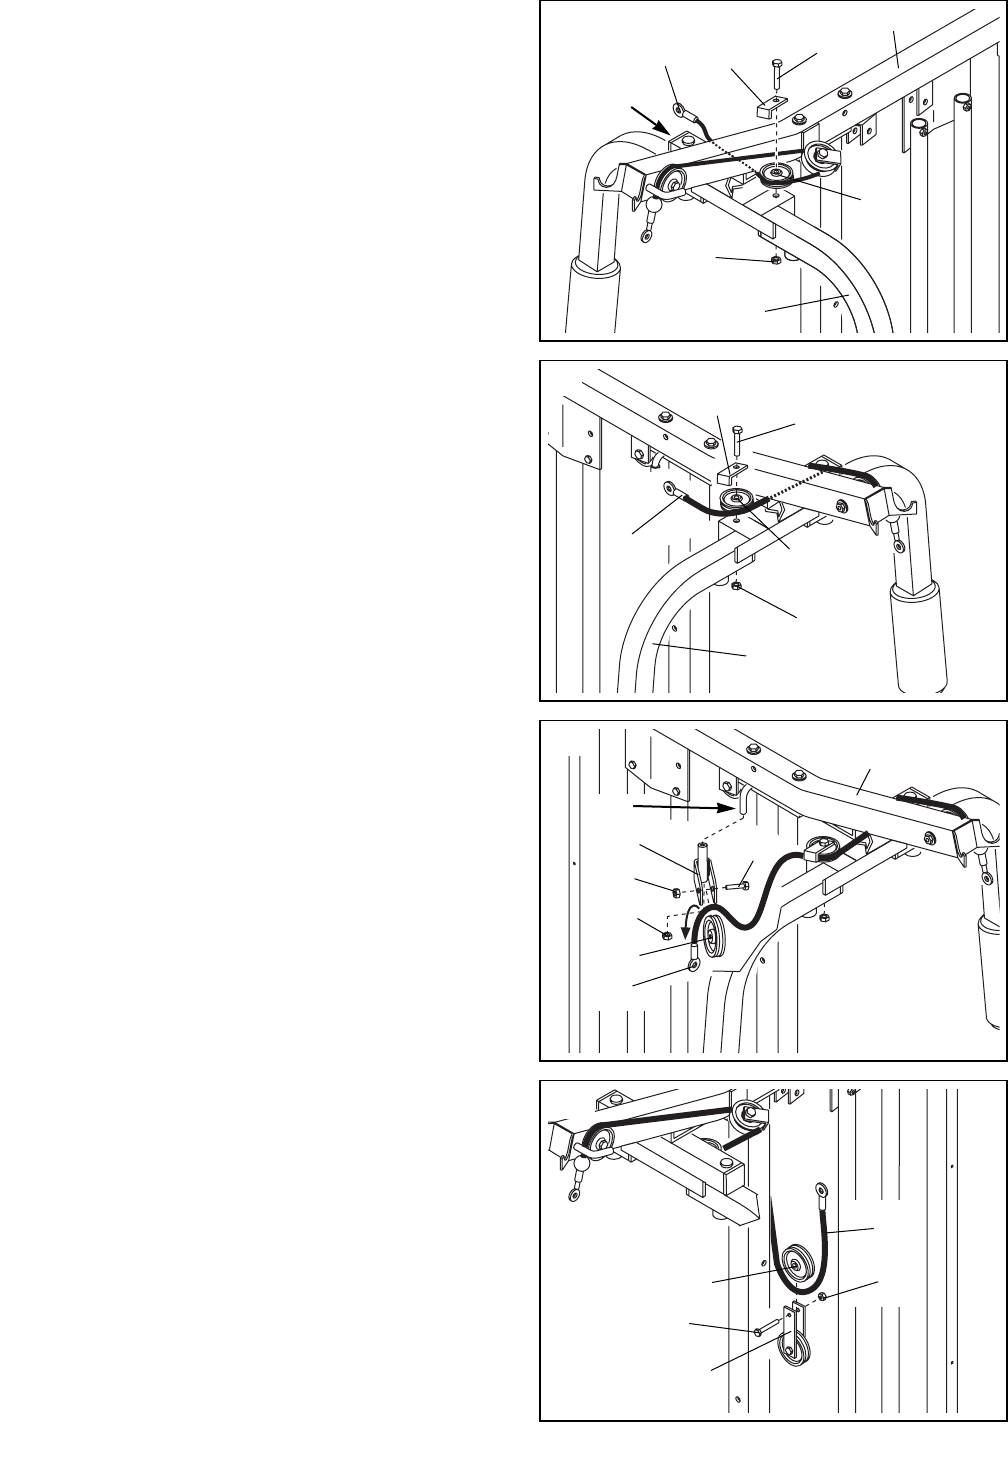
17. Move to the other side of the unit. Wrap the Short
Cable (9) around a 3 1/2Ó Pulley (35) in the direction
shown.
Attach the 3 1/2Ó Pulley (35) and a Cable Trap (66) to
the Right Butterfly Arm (48) with a 3/8Ó x 2Ó Bolt (62)
and a 3/8Ó Nylon Locknut (63).
Make sure the Cable Trap (66) is positioned as
shown.
17
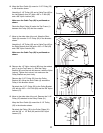
16. Wrap the Short Cable (9) around a 3 1/2Ó Pulley (35)
in the direction shown.
Attach the 3 1/2Ó Pulley (35) and a Cable Trap (66) to
the Left Butterfly Arm (47) with a 3/8Ó x 2Ó Bolt (62)
and a 3/8Ó Nylon Locknut (63).
Make sure the Cable Trap (66) is positioned as
shown.
Route the Short Cable (9) under the Top Frame (1)
between the Pulley (35) and the crossbar.
16
9
35
66
Crossbar
47
1
62
35
9
48
66
62
63
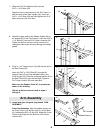
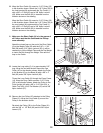
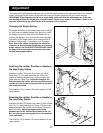
18. Remove the 1/2Ó Nylon Locknut (68) from the welded
bolt (L) on the Top Frame (1). Slide the Pulley
Bracket (20) onto the bolt and secure it with the Nylon
Locknut. Tighten the Locknut, but make sure the
Pulley Bracket can pivot freely.
Remove the 3 1/2Ó Pulley (35) from the Pulley
Bracket (20). Wrap the Short Cable (9) around the
Pulley in the direction shown.
Re-attach the 3 1/2Ó Pulley (35) to the Pulley Bracket
(20) with the 3/8Ó x 1 3/4Ó Bolt (83) and the 3/8Ó Nylon
Jamnut (57).
18
L
68
35
63
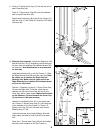
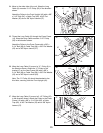
19. Move to the other side of the unit. Remove the 3 1/2Ó
Pulley (35) attached to the Pulley Plates (31).
Wrap the Short Cable (9) around the 3 1/2Ó Pulley
(35) in the direction shown.
Re-attach the Pulley (35) to the Pulley Plates (31)
with the 3/8Ó x 1 1/2Ó Bolt (60) and the 3/8Ó Nylon
Jamnut (57).
19
60
35
31
9
57
20
83
1
9
57