


25
1
2
3
4
5
6
2. FEATURES
• 1,000,000 Power Series
™
Spotlight
• Powerful replaceable H-3 Series 6 volt quartz halogen bulb in spotlight
• Powerful replaceable 13 watt fluorescent U-shaped twin tube in lantern
• Head swivels 90 degrees for soft, 360 degree area lighting
• Rubber safety guard protects spotlight
• Recharging LED and battery FULL LED
• Recharges from standard North American Standard 120 volt AC,
60 Hz, receptacle
• Recharges from 12 volt DC accessory socket
• Three way switch - Spotlight, Off and Lantern
• Comfortable handgrip
• Stable base prevents tip over in any head position
NOTE:
This unit is shipped in a partially charged state. Charge unit using either
AC or DC method until the green LED lights. Charge after each use. Initial
charge should be for 12 hours.
3. OPERATION
The swivel action of the unit keeps the lamp head securely in position for use while
carrying or while on tabletop. The range of swivel motion is greater than 90
degrees with five locking positions. The spotlight position (upright) focuses light
straight ahead. The lantern position (spotlight tilted forward 90 degrees) floods
light in a 360-degree pattern for reading, cooking and many other uses. A
three-position Power Switch (Spotlight, Off, Lantern) controls on/off operation of
both lights. The switch is protected by a flexible covering that protects it from dust,
dirt and moisture. This ensures reliability and extends the life of the switch. The
spotlight can be continuously lit for up to 20 minutes on a full battery charge; the
lantern can be lit for up to four hours on a full battery charge.
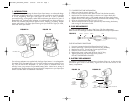
4. RECHARGE
All batteries lose charge over time, especially when they are warm. Frequent
battery recharges will extend battery life. AC recharge is recommended every two
months, when not in frequent use. Use the AC recharge adapter and charge until
battery is full. AC and DC recharge connections are through a heavy-duty barrel
receptacle at the lower rear of the unit. (See figure 5A) Two LED indicators display
the status of recharge. Continue recharge operation until the two LEDS are equally
bright. (See Figure 1A.)
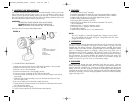
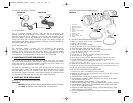
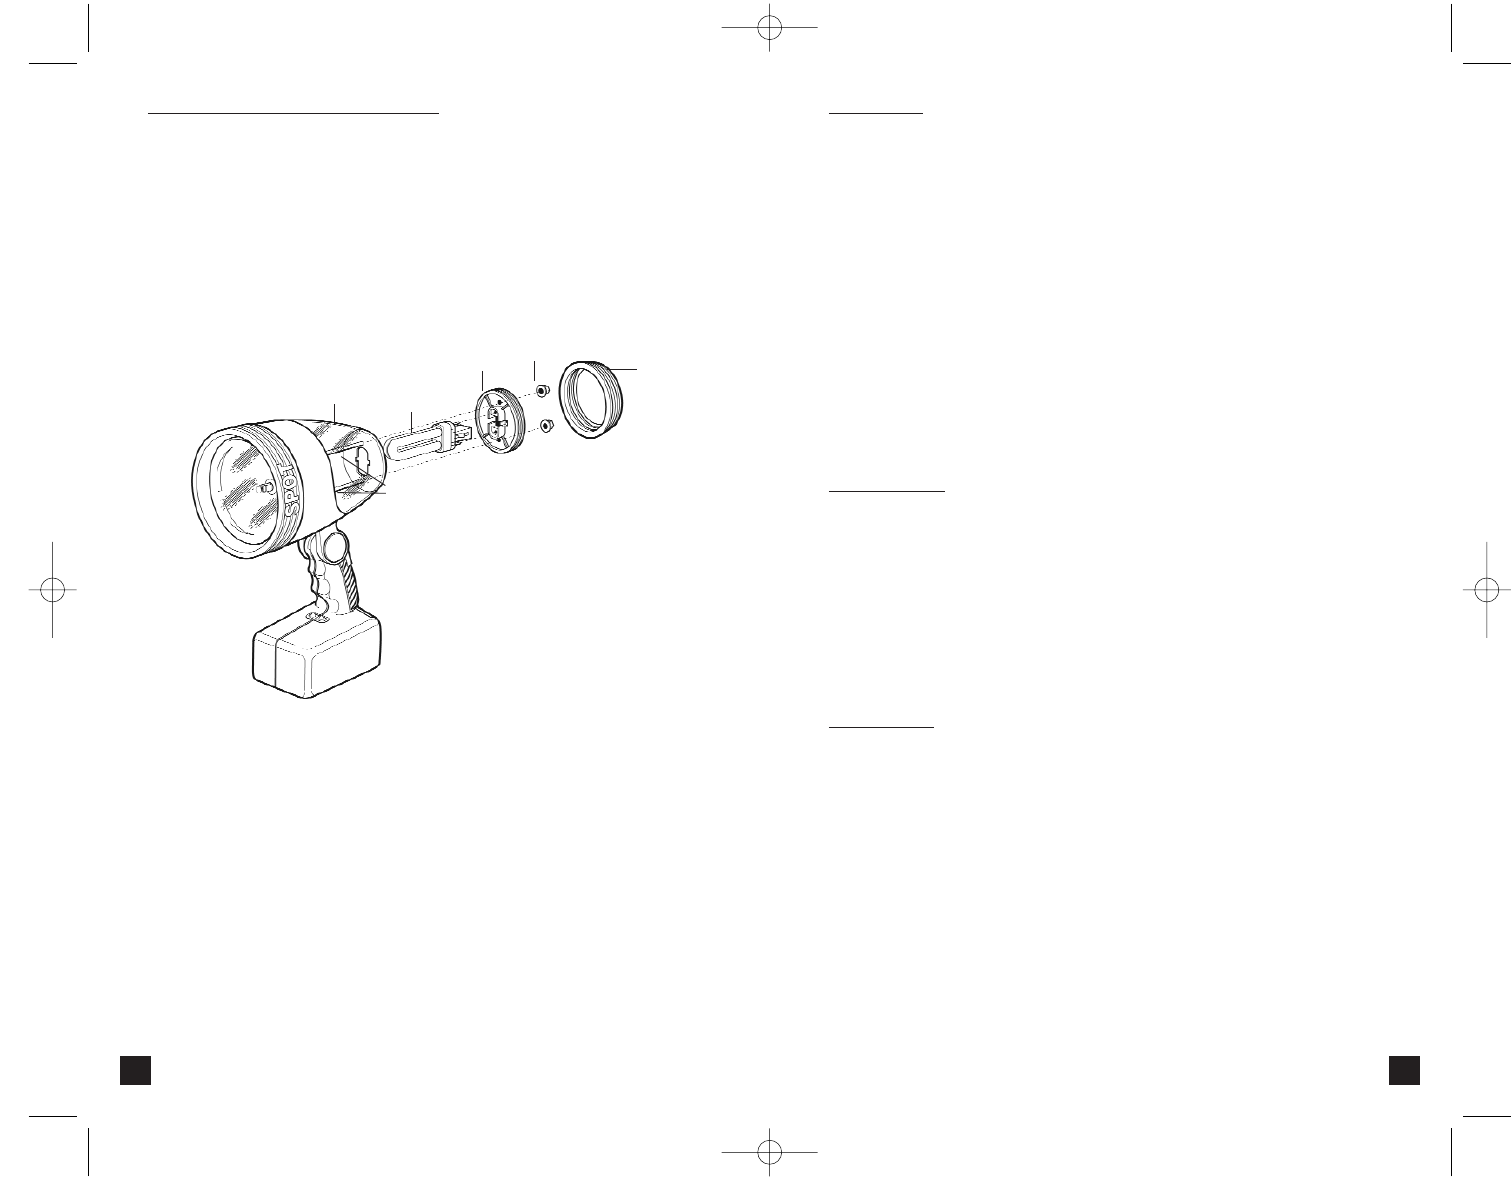
1. DOME
2. TWIN TUBE FLUORESCENT
3. TUBE SOCKET ASSEMBLY
4. NUTS
5. END CAP
6. SUPPORT RODS
FIGURE 4
7. LANTERN TUBE REPLACEMENT
The Lantern fluorescent tube is mounted on a socket assembly. Power is sent to the
tube socket through the two support rods. It is very important to make sure the
Lantern switch is turned OFF before removing the end cap. If there are any doubts
about the ON/OFF switch being Off, then refer to the Battery Removal section and
disconnect the battery before removing the end cap.
WARNING:
FLUORESCENT TUBES OPERATE WITH HIGH VOLTAGE.
DO NOT REMOVE END CAP UNLESS POWER IS OFF
AND THE BATTERY IS DISCONNECTED. SEE SECTION 9
See Figure 4 for Fluorescent Tube Replacement
7.1 FLUORESCENT TUBE REMOVAL
1. Make sure that the Power Switch is Off AND the battery is disconnected.
2. Remove the set screw from the end cap - item #5.
3. Rest the unit on a secure tabletop.
4. Position the head to be in the Spotlight position.
5. Unscrew (counter clockwise) the End Cap and set aside.
6. Unscrew (counter clockwise) the two nuts from the two support rods and set
them aside.
7. Slide the Tube Socket assembly away from the head and remove it from
the two support rods.
8. Set it on a stable work surface like a table, bench,etc.
9. Grasp the Tube Socket and push on the fluorescent tube base to disconnect
the tube from the socket.
10. Do not allow the tube to drop.
11. Follow local procedures for safe fluorescent tube disposal.
VEC128SL_ManualEN_092605 9/26/05 9:20 AM Page 9