


REMARKS AND WARNINGS
Please read this owner’s manual through carefully before assembling, using and servicing the rowing machine! Follow the
instructions described in this manual carefully.
THE EQUIPMENT HAS BEEN DESIGNED FOR DOMESTIC USE, FOR WHICH THE FULL TUNTURI WARRANTY
APPLIES.
* Before you start any training, consult a physician to check your state of health.
* If you experience nausea, dizziness or other abnormal symptoms while exercising, stop your workout at once and consult
a physician.
* Parents or others responsible for children should note that children’s natural playfulness and curiosity may lead to
situations and behaviour for which the rowing machine is not designed. If children are allowed to use the rowing machine,
they should be supervised and taught to use the rowing machine properly, keeping in mind the child’s physical and mental
development and their personality. The rowing machine is not a toy.
* Only one person may use the rowing machine at a time.
* Place the device on a firm, level surface. In heavy or long-term use the hydraulic pumps may drop oil. It is therefore advised
to place the machine on a protective base.
* Exercise only in an environment with sufficient air conditioning. However, in order to avoid catching cold, do not exercise
in draught.
* Before you start using the device, make sure that it functions correctly in every way. Do not use a faulty device.
* Wear appropriate clothing and shoes when exercising.
* To avoid muscular pain, begin and end each workout by streching, warming up and cooling down.
* Do not attempt any servicing or adjustment other than those described in this manual. The given instructions must be
followed carefully.
* The rowing machine is not recommended for use by persons weighing more than 100 kg or 225 lbs.
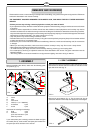
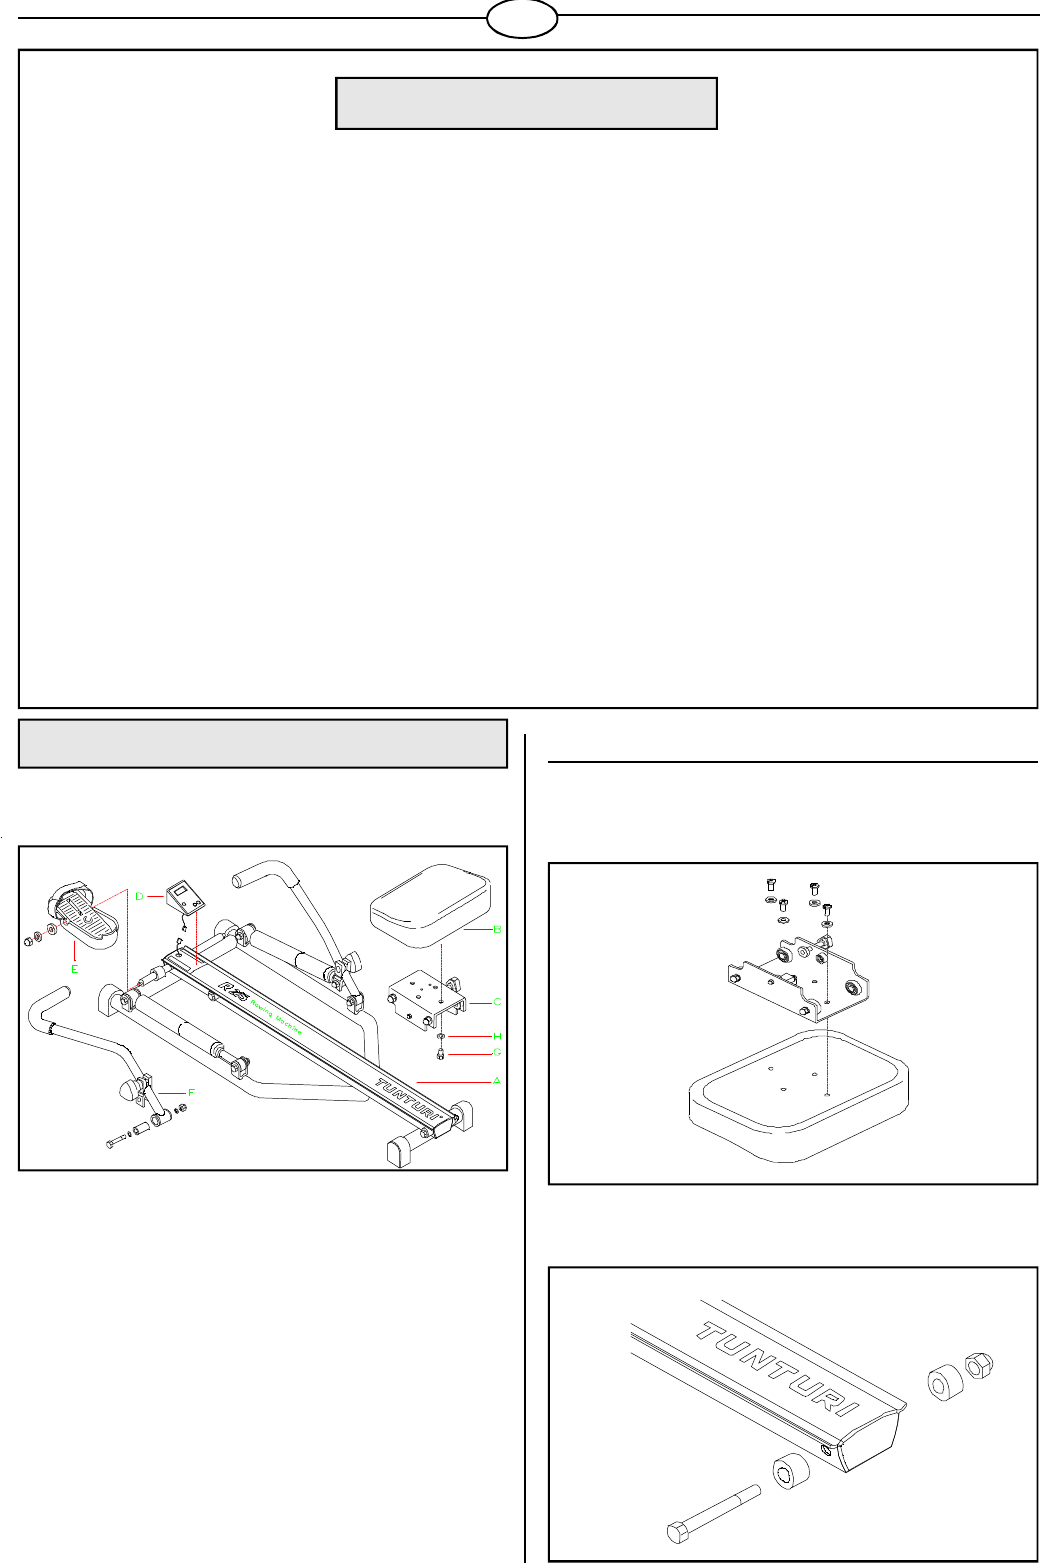
1. ASSEMBLY
Before assembling the device, make sure the following parts
are present (fig. 1):
A frame
B seat
C seat frame
D meter (2 x 1,5 V batteries)
E 2 footrests 2 pcs
F 2 oars 2 pcs
Hard ware kit including the following:
G bolts 4 pcs
H washers 4 pcs
open end wrenches 2 pcs
allen key wrench
If you notice that a part is missing, contact the dealer and give
the model (R 215), serial number and spare part number from
the spare part list at the back of the manual.
2
FIG. 1
FIG. 2
FIG. 3
1.1. SEAT ASSEMBLY
Attach the seat frame to the bottom of the seat with four screws
and washers so that the seat lock is either on the left or on the
right side of the seat (fig. 2).
Remove the seat stopper (fig. 3). Put the seat onto the rail
(notice the direction of the seat) and replace the seat stopper.
GB