


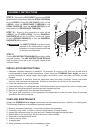


ASSEMBLY INSTRUCTIONS
8
4.3.
5.
STEP 3
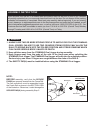
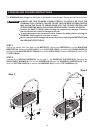
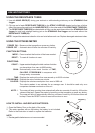
Slide the SAFETY PAD(4) over the rail frame. Make sure the holes in SAFETY PAD(4) t over the threaded
connectors properly. Refer to illustration 3.
HINT : Install one hole over a threaded connector. The next hole installed should be on the connector on
the opposite side of the trampoline.
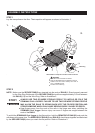
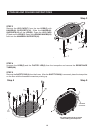
STEP 4
Refer to the position of the legs as shown in illustration 4. First, screw the FLUTED LEG(6) onto the threaded
connector at middle of the rail frame. Then attach the LEGS(5) onto the other threaded connectors on the
rail frame.
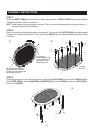
A.
First step,
install the Safety Pad(4)
on this end being sure
theholetsoverthe
threaded connector.
B. Second step, install the
Safety Pad(4) on the opposite
endbeingsuretheholetsover
the threaded connector.
Threaded
Connector
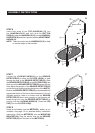
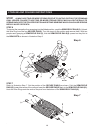
STEP 5
Place the trampoline in the normal use position. Remove the LEG CAPS(7) from the two LEGS(5) beside
the FLUTED LEG(6). Slide the HANDRAIL SUPPORTS(16) onto the LEGS(5). Press the LEG CAPS(7)
back on the LEGS(5).