


7
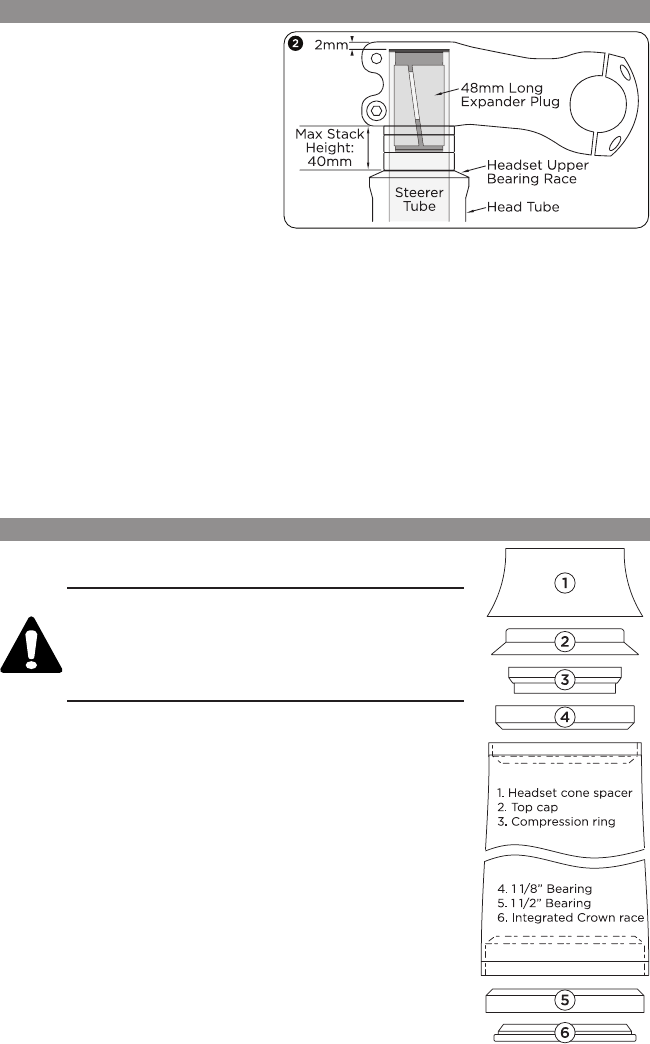
1. Once the initial stem height is
achieved, make a mark on the
steerer tube at the top of the stem.
Place the cutting line 3mm below
the mark to allow for the space
needed for the 1mm lip of the
expander plug. The end result is
2mm of space. (Fig. 2)
2. Wrap the area where you intend
to cut the fork with several layers
of masking tape. This will limit
fraying of the fibers, resulting in a cleaner cut. Once you’ve wrapped the layers of
tape, determine the precise location of the desired cut with a pen mark on the tape.
To avoid fraying the composite fibers, it is recommended that a carbide grit toothless
saw blade be used. A fine tooth (36 teeth) saw blade is also acceptable. Double
check all measurements to make sure the steerer tube will not be cut too short. It’s
easier to measure twice than to buy a new fork.
NOTE: It is very important that the steerer tube is cut straight. For best results, use a
steerer tube cutting guide tool.
3. Once the steerer tube is cut to the desired length, remove all burrs at the top of the steerer
tube by rounding out the edge with emery paper or a fine grit sand paper Only sand edge,
not clamping surface! Wipe off all excess dust. Be sure not to breathe carbon dust!
For additional information on carbon fiber preparation, please visit the tech section at
www.specialized.com
CUTTING THE FORK STEERER TUBE
INSTALLING THE FORK
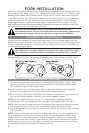
1. Install the 48mm Long Expander Plug (fig.2). Recommended
torque is 100 in-lbf (11.3 N-m).
Warning! The S120 steerer tube requires the use of
the RED (22.5mm O.D.) Specialized 48mm Long
Expander Plug (fig.2) supplied with the fork. Do not
use a star nut, it can damage the inside surface of the
steerer tube. Damage to the steerer tube can result in
failure, causing serious personal injury or death.
2. Place the fork back into the head tube, clean the stem
interface of the steerer tube with isoproyl alcohol.
3. Place the desired amount of headset spacers to achieve
proper stem height, followed by the stem and the top
preload cap.
NOTE: Do not twist the stem onto the steerer tube. This can
result in damage to the surface, which can render the fork
unsafe.
4. Install the disc brake and brake housing guide on the fork. make
sure the brake housing routing doesn’t touch the tire when the
fork is fully compressed and that it doesn’t interfere with the
controls on the handlebar when rotated. Do not overtighten the
bolts, refer to the disc brake manufacturer’s owner’s manual for
recommended torque specifications.
5. Install the front wheel and adjust the brake to allow the
rotor to spin freely.
Fork install steps continued on page 8.