


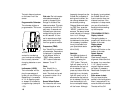

accept the hour selection.
The minutes will flash and
can be adjusted by press-
ing the “MODE” button.
(Hold the “MODE” button
to scroll through the digits
quickly) Press the “SET”
button to set the minutes
and return to clock mode
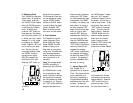
6. Timer Selection
The Turbo® Pro has two
timers; Automatic Timer
Mode (ATM) and Timer
Mode (TIMER). The ATM
selection allows you to
keep track of your actual
riding time. The ATM timer
only operates when the
wheel is rotating and can-
not be turned on or off
manually.
Note: The average speed
(AVSPD) calculation is
based upon the ATM time.
The TIMER function is just
like a conventional stop-
watch. The timer is activat-
ed manually and records
the time whether the wheel
is rotating or not. Tapping
the “TOP” button starts and
stops the stopwatch and
when the timer is stopped,
holding the “SET” button
for three seconds will reset
to stopwatch. The TIMER
includes a 12-memory lap
time feature. To record a
lap time, press the “SET”
button once while the stop-
watch is running. Each
time the “SET” button is
depressed the Turbo® Pro
will record the lap time.
After the TIMER has been
stopped (by pressing the
“TOP” button) the previous
twelve lap times can be
reviewed by pressing
“SET” button. Additionally,
the computer will display
the total time when LPTOT
is shown. The backlight
function is disabled when
the timer is running.
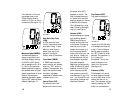
7. Interval Timer (INT)
Your Turbo® Pro is
equipped with an Interval
Timer. This feature allows
you to customize your
training by integrating a
programmable repeating
countdown timer into your
workout. To enter the
interval timer mode, press
13
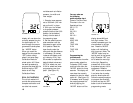
5. Setting the Clock
Your Turbo® Pro features a
digital clock. To access the
“clock mode” press and
the “MODE” button repeat-
edly until CLOCK appears
in the Dot-matrix Display
Area. To set the clock,
press the “SET” button for
three seconds. The display
will flash either twelve (12:)
or twenty four (24:). Select
between 12: or 24: mode
by pressing the “MODE”
button. Press the “SET” but-
ton to confirm your selec-
tion. The hour digit will
now begin flashing. Press
the “MODE” button to
adjust the hour digits.
AM/PM is selected by
scrolling the hour digit.
Press the “SET” button to
12
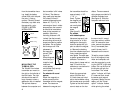
FIGURE 14
the “MODE button” repeat-
edly until “INT” appears
Dot Matrix Display Area of
the screen. You are now in
interval timer mode. To set
the interval timer, hold the
“SET” button for three sec-
onds. The hour digit will
begin flashing. Press the
“MODE” Button until the
desired number appears.
(Hold down the “Mode”
button to scroll quickly)
Press the “SET” button once
to set this number and
advance to minutes. Repeat
this process until minutes
and seconds are set to the
desired settings. Press the
“SET” button to exit pro-
gramming mode. Once
the time interval timer is
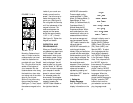
FIGURE 15