


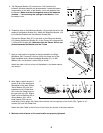
4
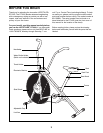
Assembly requires two people. Place all parts of the LIFESTYLER
¨
DT1000 in a cleared area and remove the
packing materials. Do not dispose of the packing materials until assembly is completed. Read through all steps
before beginning. During assembly, make sure that all parts are oriented as shown in the drawings.
Assembly requires the included tool and grease packet, an adjustable wrench , a rubber
mallet , and a phillips screwdriver .
ASSEMBLY
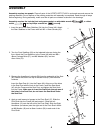
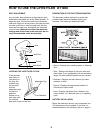
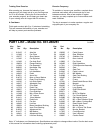
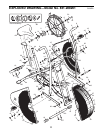
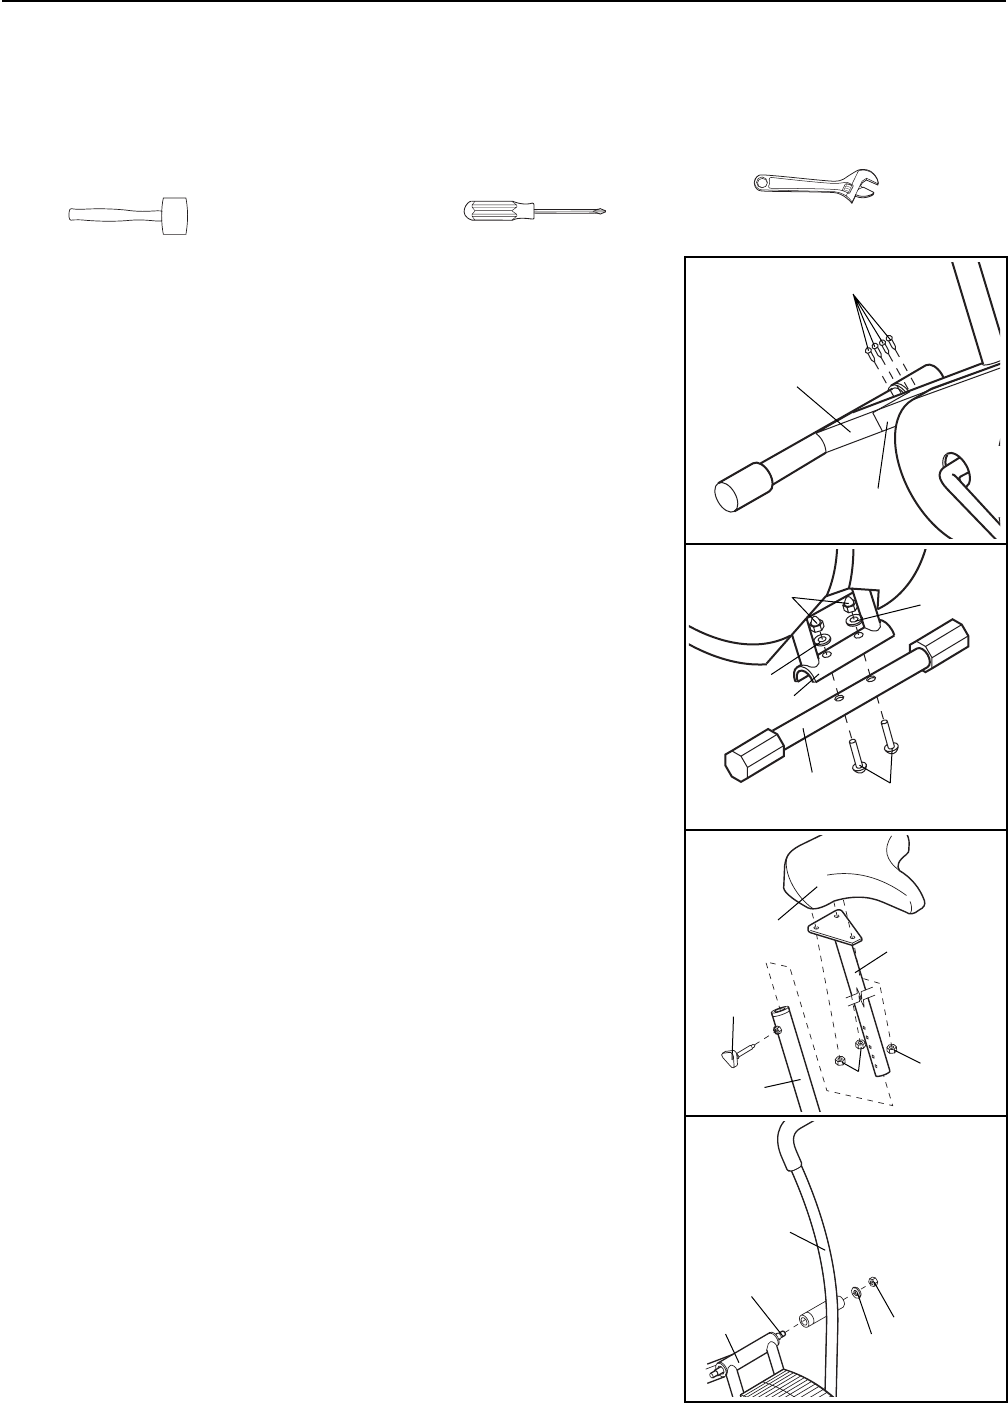
1. Insert the end of the Rear Stabilizer (34) into the Frame (46). Attach
the Rear Stabilizer to the Frame with four M5 x 12mm Screws (56).
2. Turn the Front Stabilizer (20) so the indented holes are facing the
floor. Attach the Front Stabilizer to the Frame (46) with two M8 x
48mm Carriage Bolts (57), two M8 Washers (43), and two
Acorn Nuts (12).
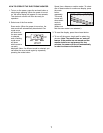
3. Remove the three 8mm Locknuts (36) from the underside of the Seat
(40). Attach the Seat to the top of the Seat Post (41) with the three
Locknuts.
Insert the Seat Post (41) into the Frame (46). Align one of the holes
in the Seat Post with the hole in the Frame. Insert the Seat Knob
(45) into the Frame and the Seat Post, and tighten the Seat Knob
into the Frame. Make sure to insert the Seat Knob through one of
the holes in the Seat Post; do not insert the Seat Knob under
the Seat Post.
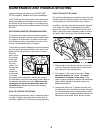
4. Apply a small amount of grease to the Pivot Shaft (17). Slide the
Pivot Shaft into the Frame (46) and center it. Slide the Left
Handlebar (10) onto the left end of the Pivot Shaft. Slide the Right
Handlebar (not shown) onto the right end of the Pivot Shaft. Attach
an M8 Washer (43) and an 8mm Locknut (36) to each end of the
Pivot Shaft.
1
56
34
46
12
57
20
36
36
40
41
45
46
43
43
46
2
3
46
17
10
43
36
4