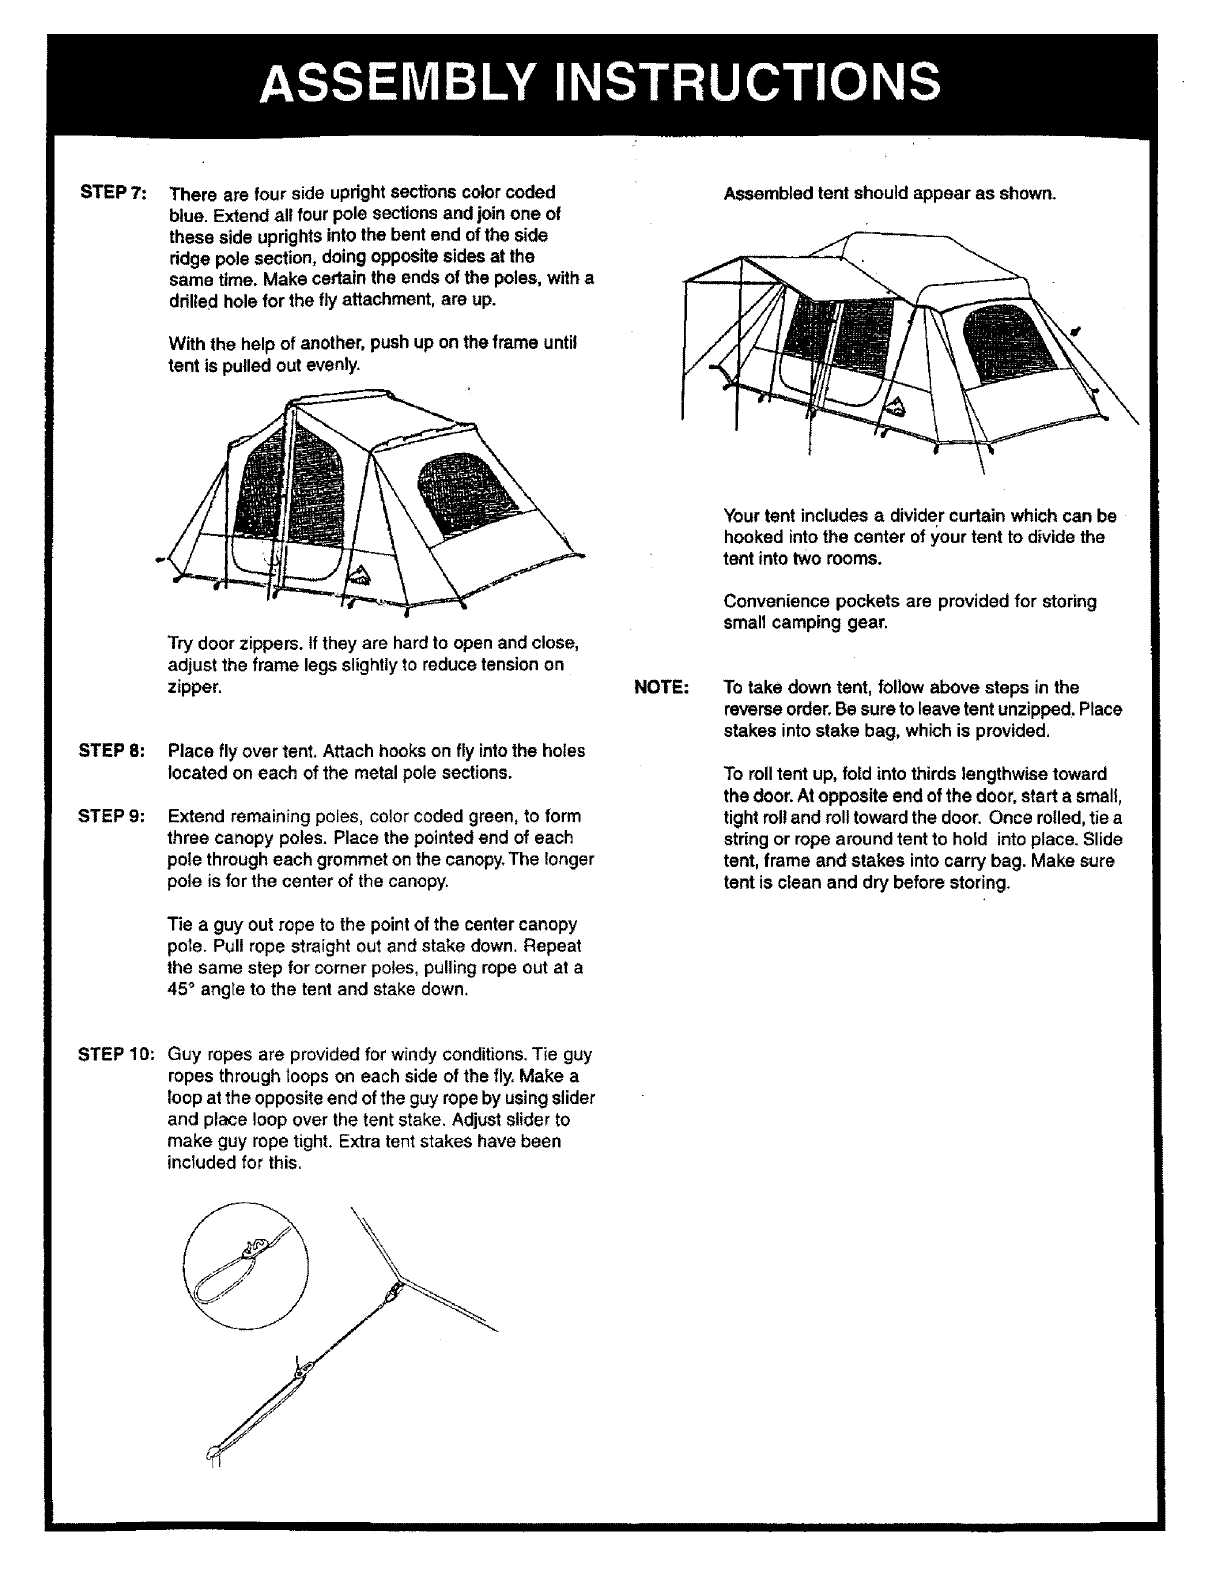
STEP7:
Therearefoursideuprightsectionscolorcoded
blue.Extendallfourpolesectionsandjoinoneof
thesesideuprightsintothebentendoftheside
ridgepolesection,doingoppositesidesatthe
sametime.Makecertaintheends ofthe poles, with a
drilled hole for the fly attachment, are up.
With the help of another, push up on the frame until
tent is pulled out evenly.
Assembled tent should appear as shown.
STEP 8:
STEP 9:
Try door zippers. Ifthey are hard to open and close,
adjust the frame legs slightly to reduce tension on
zipper.
Place fly over tent. Attach hooks on fly intothe holes
located on each of the metal pole sections.
Extend remaining poles, color coded green, to form
three canopy poles. Place the pointed end of each
pole through each grommet on the canopy. The longer
pole is for the center of the canopy.
Tie a guy out rope to the point of the center canopy
pole. Pull rope straight out and stake down, Repeat
the same step for corner poles, pulling rope out at a
45° angle to the tent and stake down.
NOTE:
Your tent includes a divider curtain which can be
hooked intothe center of your tent to divide the
tent into two rooms.
Convenience pockets are provided for storing
small camping gear.
To take down tent, follow above steps in the
reverse order.Be sure to leave tent unzipped. Place
stakes into stake bag, which is provided.
To rolltent up, fold into thirds lengthwise toward
the door. Atopposite end ofthe door. start a small,
tight rol!and rolltoward the door. Once rolled, tie a
string or rope around tent to hold into place. Slide
tent, frame and stakes into carry bag. Make sure
tent is clean and dry before storing.
STEP 10:
Guy ropes are provided for windy conditions.Tie guy
ropes through loops on each side of the fly, Make a
loop at the opposite end of the guy rope by using slider
and place loop over the tent stake. Adjust slider to
make guy rope tight. Extra tent stakes have been
included for this.
IIIIIIIIII II IIIIIIIIIIM


