


Vehicle runs sluggishly
Vehicle does not stop when
applying the brake
P
roblem Possible Cause Solution
Front tire is not properly inflated
Brake is not adjusted properly
The tire is infl
ated when shipped, but it will invariably will lose some
pressure between the point of manufacturing and your purchase.
Refer to tire inflation instructions above.
Refer to adjusting the brakes instructions above.
TROUBLESHOOTING GUIDE
5
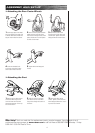
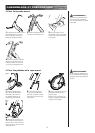
REPAIR AND MAINTENANCE
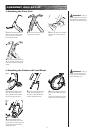
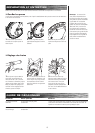
1 Slide the panel on the wheel
cover to the side to expose
tire valve.
Note: The pressurized air supplies
found at gasoline stations are
designed to inflate high-volume
automobile tires. If you decide to
use such an air supply to inflate
your RipRider 360˚ Caster T
rike tire,
first make sure the pressure gauge
is working, then use very short
bursts to inflate to the correct PSI.
If you inadvertently over
-inflate the
tire, release the excess pressure
immediately.
Check the Razor web site for any updates on the latest repair and maintenance procedures.
❑ Inflating the Tires
The front tire is inflated when shipped, but it will invariably lose some pressure between the point of manufacturing
and your purchase.
2 Use a bicycle style tire pump
equipped for a Schrader-type valve.
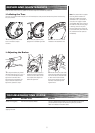
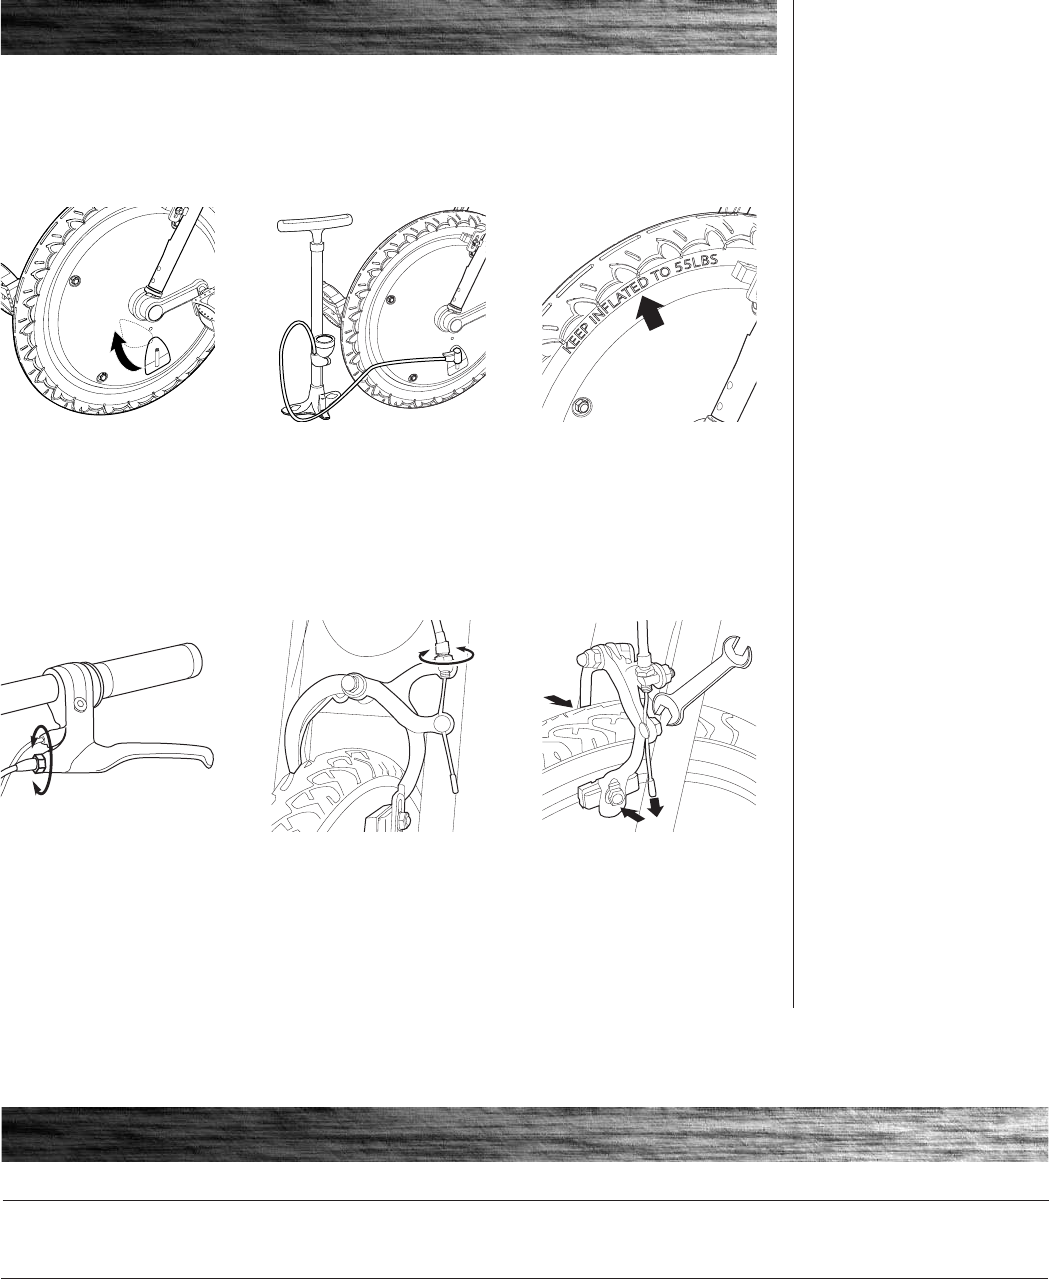
❑ Adjusting the Brakes
1 To adjust the brake play, thread
the brake lever adjuster in or out 1/4
to 1/2 turn until the desired brake
adjustment is attained. Most
adjustments are complete at this
step. If brake still needs further
adjustment, proceed to step 2.
2 If the brake lever adjuster is
threaded outward and the brake
still has too much slack, use the
front caliper brake adjuster for
additional adjustment.
3 Inflate the front tire to the lbs.
indicated on the sidewall of tire.
3 If brake still has too much slack,
adjust the brake cable by loosening
the nut that secures the cable with
a 10mm wrench. Pull the brake
closed so the pads almost touch
the wheel. Pull cable tight and
tighten the nut.