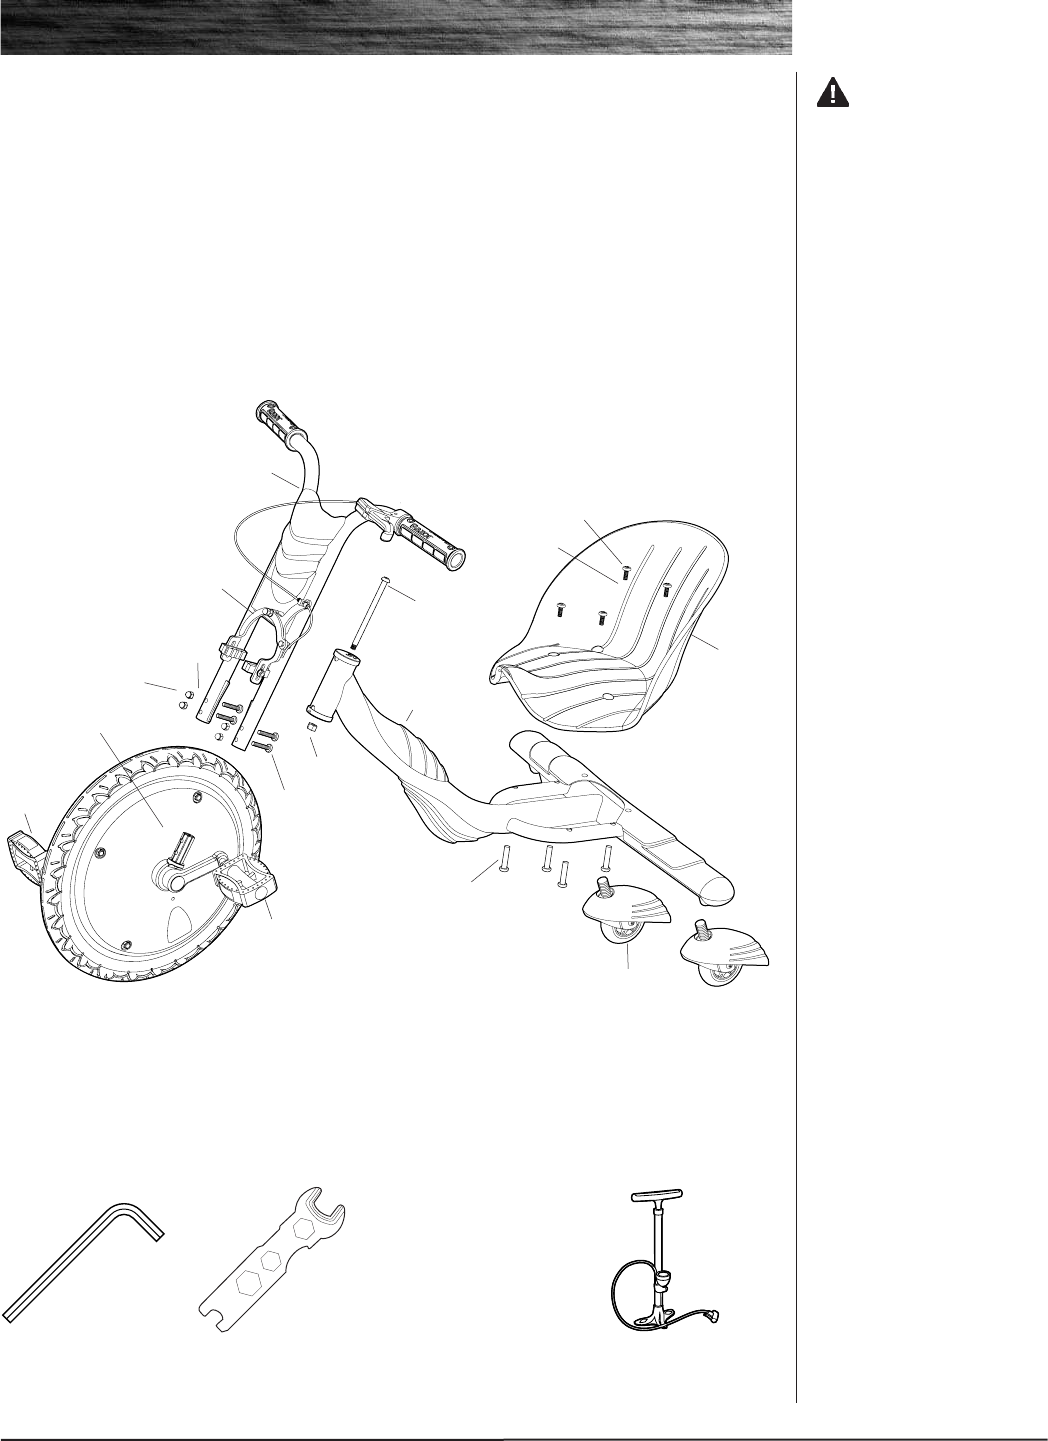
Remove contents from box and check parts against part diagram below. Remove the foam separators that protect the
components from damage during shipping. Inspect the contents of the box for scratches in the paint, dents or kinked
cables that may have occurred during shipping. Because the Rip Rider 360˚ was partially assembled and packed at the
factory
, there should not be any problems, even if the box has a few scars or dents.
❑ Estimated Assembly and Set-Up Time
Razor recommends assembly by an adult with experience in bicycle mechanics.
Allow up to 15–20 minutes for assembly.
BEFORE YOU BEGIN
2
WARNING: DO
NOT USE NON-RAZOR
PRODUCTS WITH YOUR
RIPRIDER 360˚.
The RipRider 360˚ has been built to
certain Razor design specifications.
The original equipment supplied at
the time of sale was selected on
the basis of its compatibility with
the frame, fork and all other parts.
Certain aftermarket products may
or may not be compatible.
❑ Required Tools
Some tools are supplied; however, we recommend the use of mechanic’s grade tools. Use the supplied tools only as a
last resort.
Need Help? Visit our web site for replacement parts, product support, live chat and a list of
authorized service centers at www.razor.com or call toll-free at 866-467-2967 Monday - Friday
8
:00 AM - 5:00 PM Pacific Time.
(2) 5mm
hexagonal key wrenches
(included)
Bicycle-style tire pump
for Schrader valve tires,
with pressure gauge
10mm, 13mm and 15mm
open end wrenches
(included)
Front Fork Assembly
Front Wheel Assembly
Seat
Rear Castor
Wheels
Steering Bolt
Front Caliper Brake
Locknut
Allen Socket Screw
W
asher
Allen Long Screw
Combinatory Nut
W
asher
Allen Socket Screw
Left Pedal
Right
Pedal
Frame
Assembly


