


4
ASSEMBLY
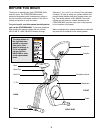
Place all parts of the exercise cycle in a cleared area and remove the packing materials. Do not dispose of the
packing materials until assembly is completed. Assembly requires the included allen wrench ,
a phillips screwdriver , and two adjustable wrenches .
2
46
39
3
5
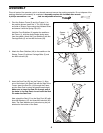
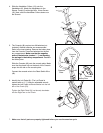
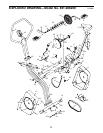
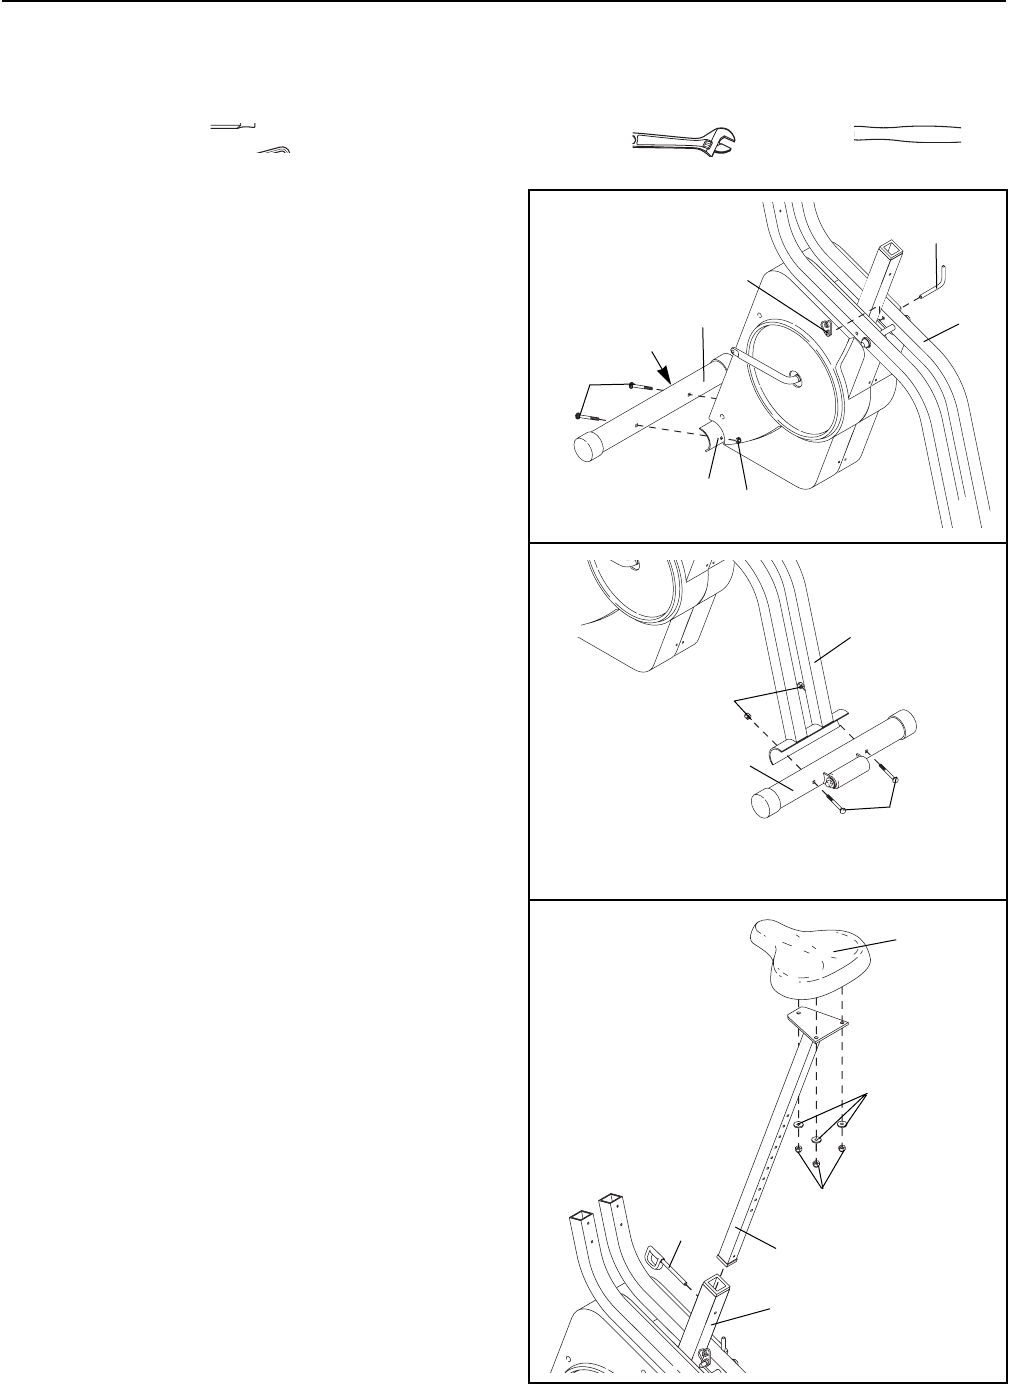
1. Pivot the Scissor Frame (3) and the Frame (1) to
the position shown. Insert the ÒLÓ Pin (56) through
one side of Scissor Frame using the indicated holes
and secure it with the Spring Clip (52).
Hold the Front Stabilizer (2) against the saddle on
the Frame (1), with the square holes facing away
from the saddle. Attach the Front Stabilizer with two
Carriage Bolts (5) and two M8 Locknuts (39).
1
5
1
2
Square
Holes
3
39
56
52
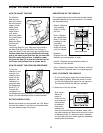
2. Attach the Rear Stabilizer (46) to the saddle on the
Scissor Frame (3) with two Carriage Bolts (5) and
two M8 Locknuts (39).
3. Insert the Seat Post (20) into the Frame (1). Align
one of the holes in the Seat Post with the hole in the
Frame. Insert the Seat Pin (16) through the Frame
and the Seat Post to select the desired seat height.
Make sure to insert the Seat Pin through one of
the holes in the Seat Post; do not insert the Seat
Pin under the Seat Post.
Next, attach the Seat (21) to the Seat Post (20) with
three M8 Washers (47) and three M8 Locknuts (39).
Note: The Seat Washers and Locknuts may be pre-
attached to the bottom of the Seat.
3
21
20
39
47
1
16