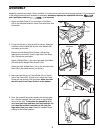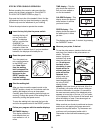
5. Move your right hand to the position shown at the right,
and hold the treadmill firmly. Raise the treadmill until the
Storage Latch (50) closes over the Frame Guide (52)
(see the inset drawing). Make sure that the Storage
Latch closes fully over the Frame Guide.
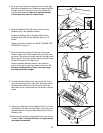
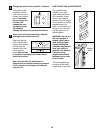
6. Slide the Stabilizer Pad (63) onto the bottom of the
Stabilizer (64) in the indicated location.
Attach the Stabilizer (64) to the Base (59) with two
Stabilizer Bolts (62) and two Stabilizer Nuts (61) as
shown.
Before moving the treadmill, see HOW TO MOVE THE
TREADMILL on page 11.
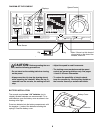
7. Refer to assembly drawing 5 at the top of this page.
Hold the upper end of the treadmill with your right hand
as shown. Using your left thumb, slide the Storage Latch
(50) to the left. Pivot the treadmill slightly until the Frame
Guide (52) is past the Storage Latch.
Hold the treadmill with both hands in the locations
shown at the right. Lower the treadmill to the floor. To
decrease the possibility of injury, bend your legs
and keep your back straight.
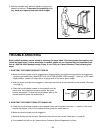
8. To attach the Book Rack (4) to the Console (2), first re-
move the backing from the Tape (60). Align the holes in
the Book Rack with those in the Console. Attach the
Book Rack to the Console with the four Screws (100) as
shown.
9. Remove the backing from the Adhesive Clip (77). Press
the Adhesive Clip onto the Rear Roller Cover (78) in the
indicated location. Press the Allen Wrench (76) into the
Adhesive Clip.
10.Make sure that all parts are tightened before you use the
treadmill. Note: To protect the floor or carpet, place a
mat under the treadmill.
6
7
50
52
Closed
5
6
61
64
62
59
62
63
4
100
100
60
2
9
78
77
76
8


