


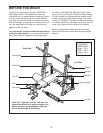


11
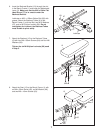
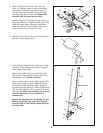
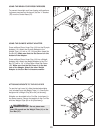
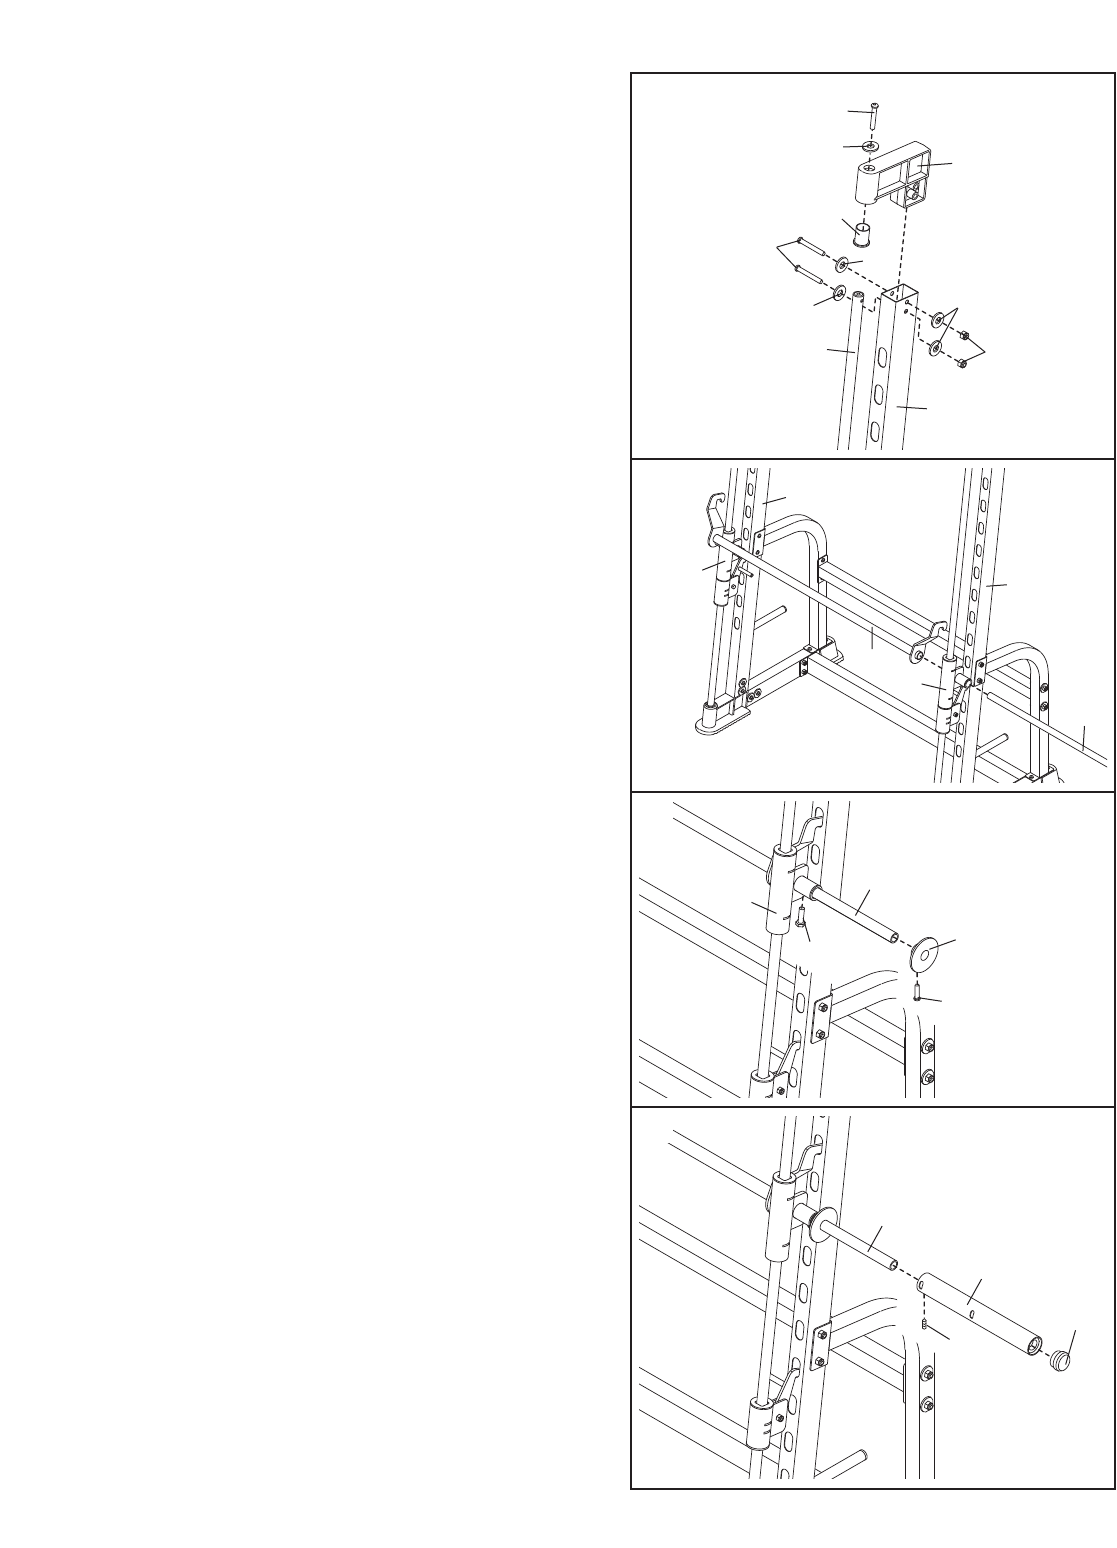
20. Slide a Weight Stop (42) onto the Weight Bar
(33). Thread a 1/4” x 14mm Button Screw (59)
into the Weight Stop and the hole in the Weight
Bar. Do not tighten the Screws yet.
Thread a 1/4” x 14mm Button Screw (59) into the
Left Barbell Glider (37).
Repeat this step with the Right Barbell Glider
(not shown) and the other Weight Stop (not
shown).
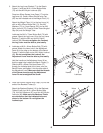
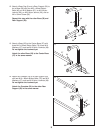
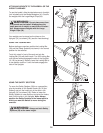
18. Press a Top Bracket Bushing (55) into the Top
Bracket (36). Using a rubber mallet, tap the Top
B
racket onto the Left Upright (31) and the Guide
Bar (32).
Attach the Top Bracket (36) to the Left Upright
(31) with two M10 x 65mm Button Bolts (60), four
M10 Washers (67), and two M10 Nylon Locknuts
(69).
Do not tighten the Locknuts yet.
Attach the Top Bracket (36) to the Guide Bar (32)
with an M10 x 30mm Button Screw (56) and an
M10 Washer (67).
Assemble the other Top Bracket (36) in the
same manner.
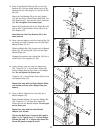
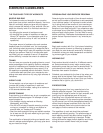
19. Have a second person orient the Locking Bar (34)
as shown and hold it between the Left and Right
Barbell Gliders (37, 81).
Slide the Weight Bar (33) through the Left Barbell
Glider (37), the Locking Bar (34), and the Right
Barbell Glider (81).
Engage the hooks on the Locking Bar (34) into a
set of holes in the Uprights (31, 62).
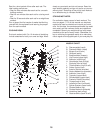
21. Press a 48mm Tapered Inner Cap (46) into a
Barbell Adapter (41).
Slide a Barbell Adapter (41) onto the Weight Bar
(33). Thread a 1/4” x 9.5mm Allen Head Set
Screw (66) into the Barbell
Adapter
. Do not tight
-
en the Screw yet.
Repeat this step with the other Barbell
Adapter (not shown).
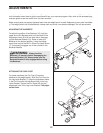
T
ighten the M10 Nylon Locknuts (69) used in
steps 11–21. Tighten the 1/4” x 14mm Button
Screws (59) and 1/4” x 9.5mm Allen Head Set
Screw (66) used in steps 20 and 21.
20
21
18
33
37
59
59
42
33
36
31
32
60
67
67
67
69
5
6
67
55
41
66
46
19
34
81
37
31
62
33