


11
MAINTENANCE AND TROUBLESHOOTING
Inspect and tighten all parts of the exercise cycle regu-
larly. To clean the exercise cycle, use a damp cloth
and mild detergent. Never use abrasives or solvents;
keep liquid away from the console.
CONSOLE TROUBLESHOOTING
If the console does not function properly, the batteries
should be replaced. See assembly step 5 on page 7
for battery installation instructions.
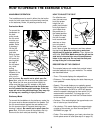
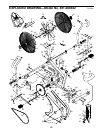
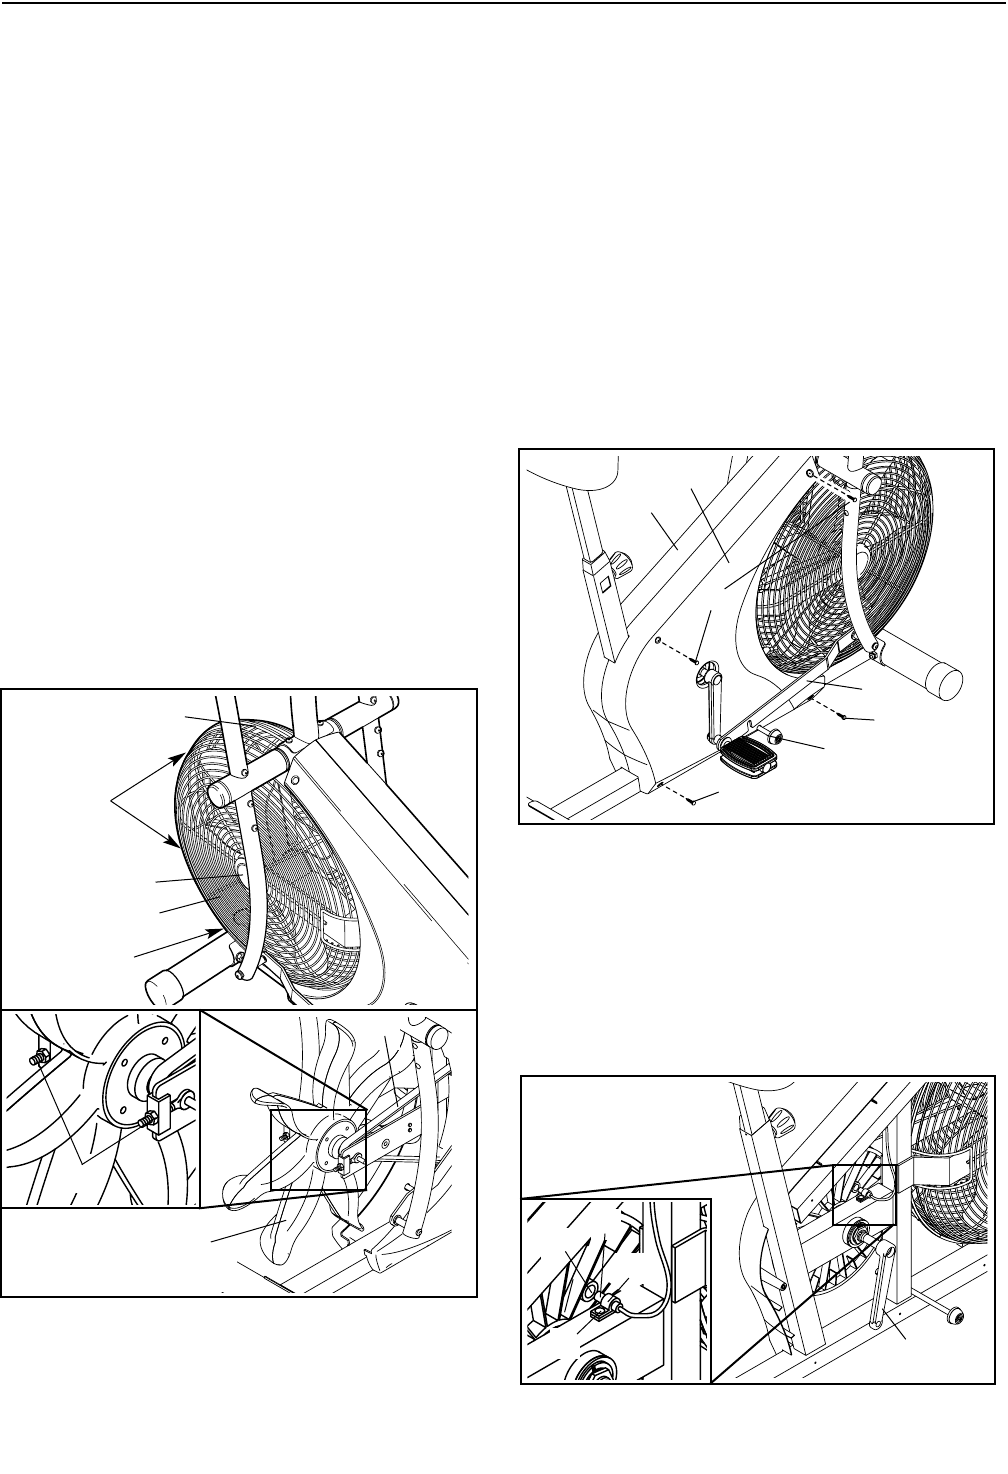
ADJUSTING THE BELT
The exercise cycle features a precision belt that must
be kept properly adjusted. If the belt is too tight, the
bearings may be damaged; if the belt is too loose, the
fan may be damaged. If the belt causes excessive
noise or slips as you pedal, follow the steps below.
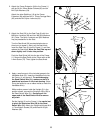
Carefully remove the four Guard Clips (76), the left
Guard Fastener (35), and the Left Guard (13). Press
down on the Belt (22). There should be no more
than 3/4 inch, and no less than 1/4 inch, of verti-
cal movement in the center of the Belt.
If the Belt (22) needs to be adjusted, loosen the right
Guard Fastener (not shown). To tighten the Belt, turn
the M6 Nuts (53) clockwise; to loosen the Belt, turn
the M6 Nuts counterclockwise. Make sure that the fan
is straight, and then reattach the Left Guard, tighten the
Guard Fasteners, and reattach the Guard Clips.
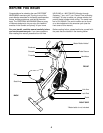
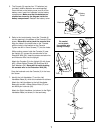
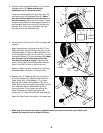
ADJUSTING THE REED SWITCH
If the console does not display correct feedback, the
reed switch should be adjusted. To adjust the reed
switch, the Right Side Shield (18) must be moved (refer
to the drawing below). Remove the four M4 x 25mm
Screws (69) from the Left Side Shield (17). Lift the
Right Link Arm (16) off the pedal or the lock rod and
move it clear of the Right Side Shield. Pull the top of
the Right Side Shield away from the Left Side Shield.
Next, locate the Reed Switch (31). Turn the Crank Arm
(26) until the Magnet (48) is aligned with the Reed
Switch. Loosen, but do not remove, the M4 x 16mm
Screw (27). Slide the Reed Switch slightly closer to or
away from the Magnet. Retighten the Screw. Turn the
Crank for a moment. Repeat until the console displays
correct feedback. When the Reed Switch is correctly
adjusted, reattach the Right Side Shield.
31
Note: For clarity, the
Right Side Shield is
not shown.
27
48
26
35
76
76
69
18
17
69
Lock Rod
16
69
76
13
53
22
Fan
32