


6
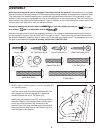
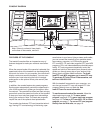
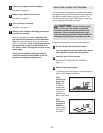
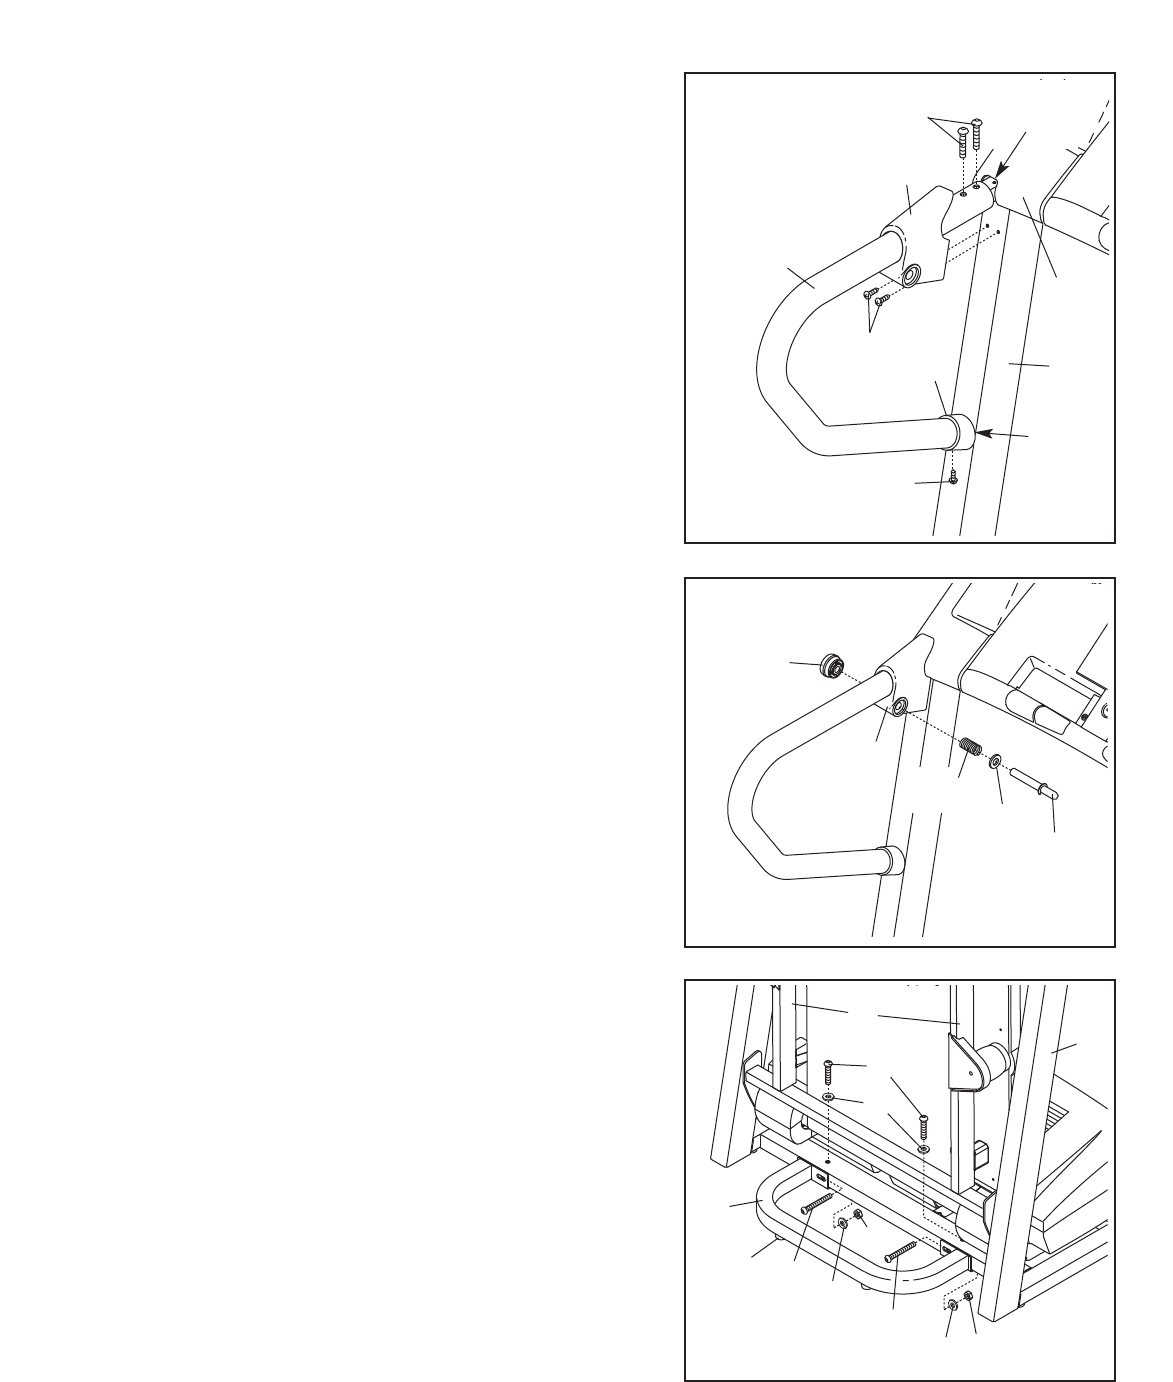
3. Remove the knob from the pin. Make sure that the collar
and the spring are on the pin. Next, insert the pin into the
Left Handrail Cover (27), and tighten the knob back onto
the pin.
Place the treadmill in the storage position (see HOW TO
FOLD THE TREADMILL FOR STORAGE on page 21).
27
Pin
Collar
Knob
Spring
3
4
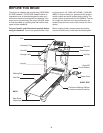
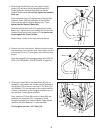
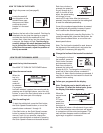
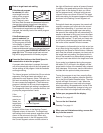
4 Orient the U-base (89) so the Base Pads (99) are un-
derneath it, and position the U-base against the base of
the Uprights (97) as shown. Insert two 1 3/4” Bolts (76)
with Washers (71) into the base of the Uprights and the
U-base; if necessary, tip the Uprights forward as you in
-
sert the Bolts. Finger tighten the Bolts.
Next, insert two 3” Bolts (86) into the U-base (89) and
the base of the Uprights (97); if necessary, tip the
Uprights forward as you insert the Bolts. Finger tighten
two Nuts (20) with Washers (71) onto the Bolts.
Firmly tighten the two 1 3/4” Bolts (76).
89
99
97
76
86
86
71
71
20
20
71
59
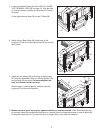
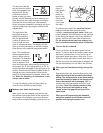
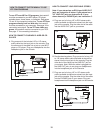
2. Slide the left Handrail (43) onto the post on the left
U
pright (97) and onto the left Handrail Bracket (81).
Finger tighten two Handrail Bolts (80) into the left
Handrail and the post;
do not fully tighten the Handrail
Bolts yet.
Set the Handrail Cap (105) against the left Upright (97).
Tighten a Screw (95) into the bottom of the Handrail
Cover and into the left Handrail Bracket (81). Then,
tighten the two Handrail Bolts (80).
Slide the Left Handrail Cover (27) against the Console
Base (101). Tighten two Cover Screws (34) into the Left
Handrail Cover and the left Upright (97);
be careful not
to overtighten the Cover Screws.
Repeat steps 1 and 2 on the right side (not shown).
95
97
101
81
34
105
43
27
80
Post
2