


38 Assembling and Maintaining Elliptical Fitness Crosstrainers: EFX 883 / 833
Completing the Console Installation (P30)
Before you complete the final installation steps, double-check
the connections you have made. Make sure that all cables are
fully and securely connected, and that any unneeded cables
are tied back properly.
To complete the installation:
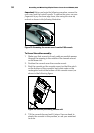
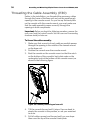
1. Feed extra cable back into the neck tube.
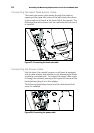
2. Tilt the control console backward (toward yourself) until
the tab on the top edge of its back plate slides along the
top edge of the console mount and the screw holes align
properly.
3. Insert the four ⁵₈-inch flat head screws through the holes
in the console mount and thread them into the holes in
the back plate on the console. Partially tighten the screws
using a ⁵₈-inch hex wrench.
4. Line up the two small tabs at the bottom of the console’s
back cover with the slots at the bottom of the console
case. Insert the tabs into the slots.
5. Insert the two #8–32 x ¹₂-inch Phillips-head screws that
you removed earlier into the holes at the top edge of the
console’s back cover. Tighten the screws fully.
Important: Use caution not to pinch the cables between the
back cover and PVS mounting screw heads.
6. Fully tighten the four mounting screws (partially
tightened in step 3) using a ⁵₃₂-inch hex wrench.
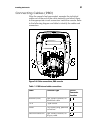
Verifying That the Heart Rate Display Is
Operational
To verify that the heart rate display is operational:
1. Begin exercising on the equipment.
2. Grasp both touch-sensitive handlebars.
Note: The heart rate is read within ten seconds. During
that time, the heart on the display flashes.
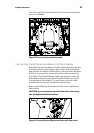
3. Look at the HEART RATE display. After a few seconds, a
number appears indicating your heart rate.
4. If a number does not appear in the HEART RATE display,
check the cable connection to make sure it is properly
connected.