9
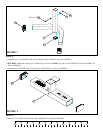
STEP 8:
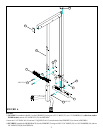
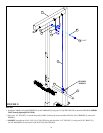
FIGURE 8
23 3/8 X 2”
19
19
20
9
8
29
2
5
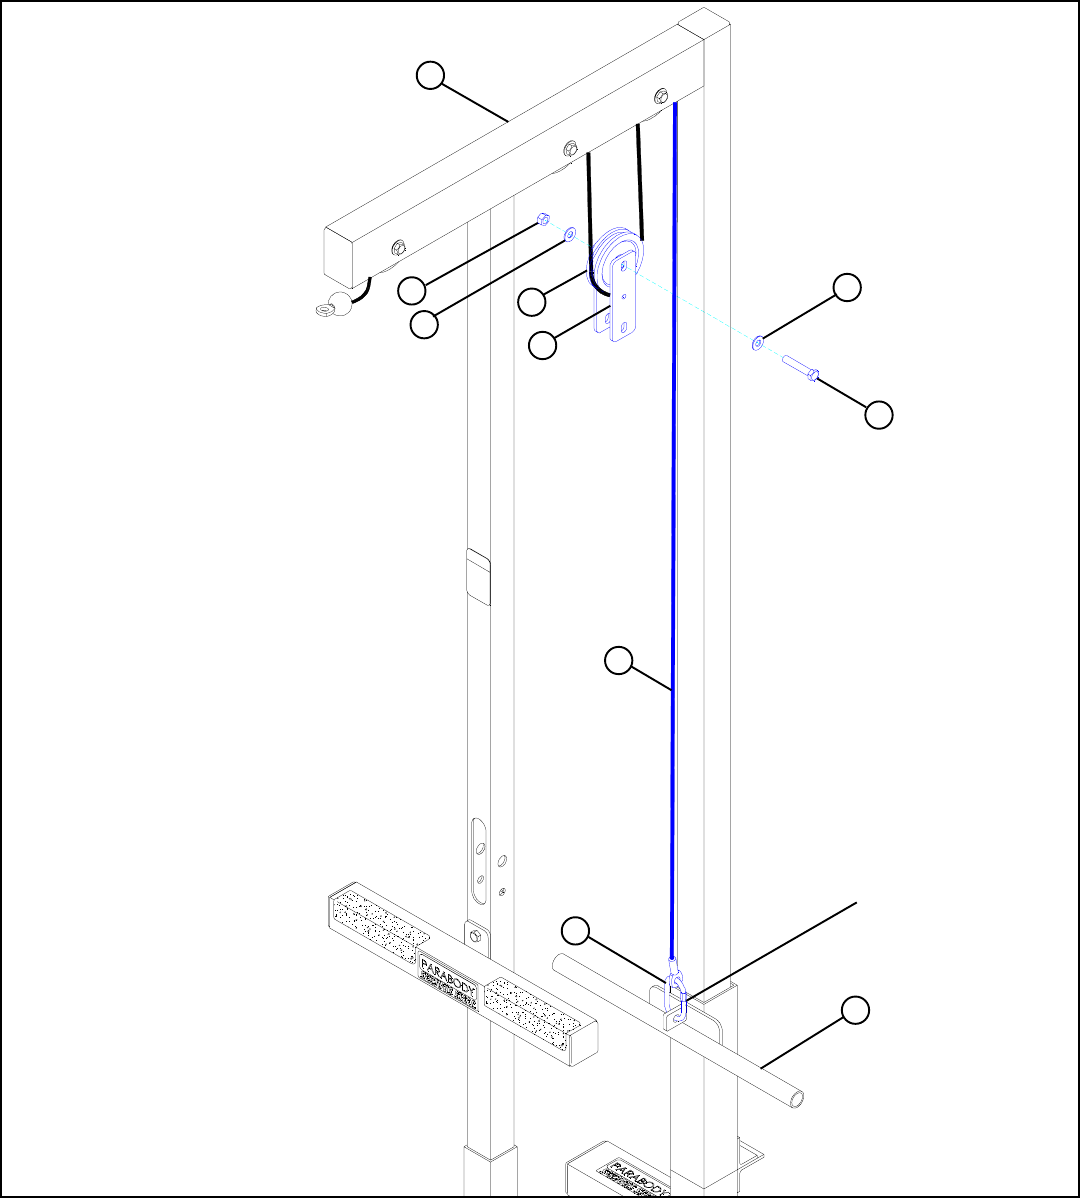
• Place one 3-1/2” PULLEY (11) into the loop of the CABLE (9) below the second and third PULLEY of the UPRIGHT (2) as shown in
FIGURE 8.
• LOOSELY assemble two 3/16 X 1-3/4 X 5-1/4” PLATES (8) to each side of the 3-1/2” PULLEY (11) using one 3/8 X 2” BOLT (23),
two 3/8” WASHERS (19), and one 3/8” LOCK NUT (20). See FIGURE 8.
• Attach the CABLE (9) from the UPRIGHT (2) to the CARRIAGE (5) using one 1/4” QUICK LINK (29) as shown in FIGURE 8. (IMPOR-
TANT! Securely tighten QUICK LINK.)
11
SECURELY
TIGHTEN!


