10
STEP 9:
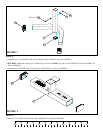
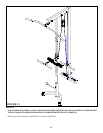
FIGURE 9
23 3/8 X 2”
19
19
20
9
11
2
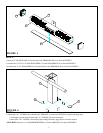
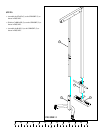
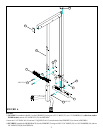
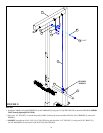
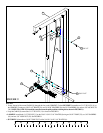
• Route the end of the second CABLE (9) through the slot on the UPRIGHT (2) then SECURELY assemble one 3-1/2” PULLEY (11) to
the UPRIGHT (2) using two 3/8 X 2-1/2” BOLTS (24), two 3/8 X 3/8” SPACERS (30), four 3/8” WASHERS (19), and two 3/8” LOCK NUTS
(20). (NOTE: The CABLE (9) should be routed between the pulley and the retaining bolt as shown in FIGURE 9.)
• Loop the CABLE (9) around one 3-1/2” PULLEY (11) as shown in FIGURE 9.
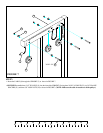
• LOOSELY assemble the 3-1/2” PULLEY (11) to the 3/16 X 1-3/4 X 5-1/4” PLATES (8) using one 3/8 X 2” BOLT (23), two 3/8” WASHERS
(19), and one 3/8” LOCK NUT (20). See FIGURE 9.
• SECURELY tighten the two 3/8 X 2” BOLTS (23) of the 3/16 X 1-3/4 X 5-1/4” PLATES (8).
24 3/8 X 2-1/2”
20
19
30
11
0
1
2
345
6
1/2 1/2 1/2 1/2 1/2 1/2
8


