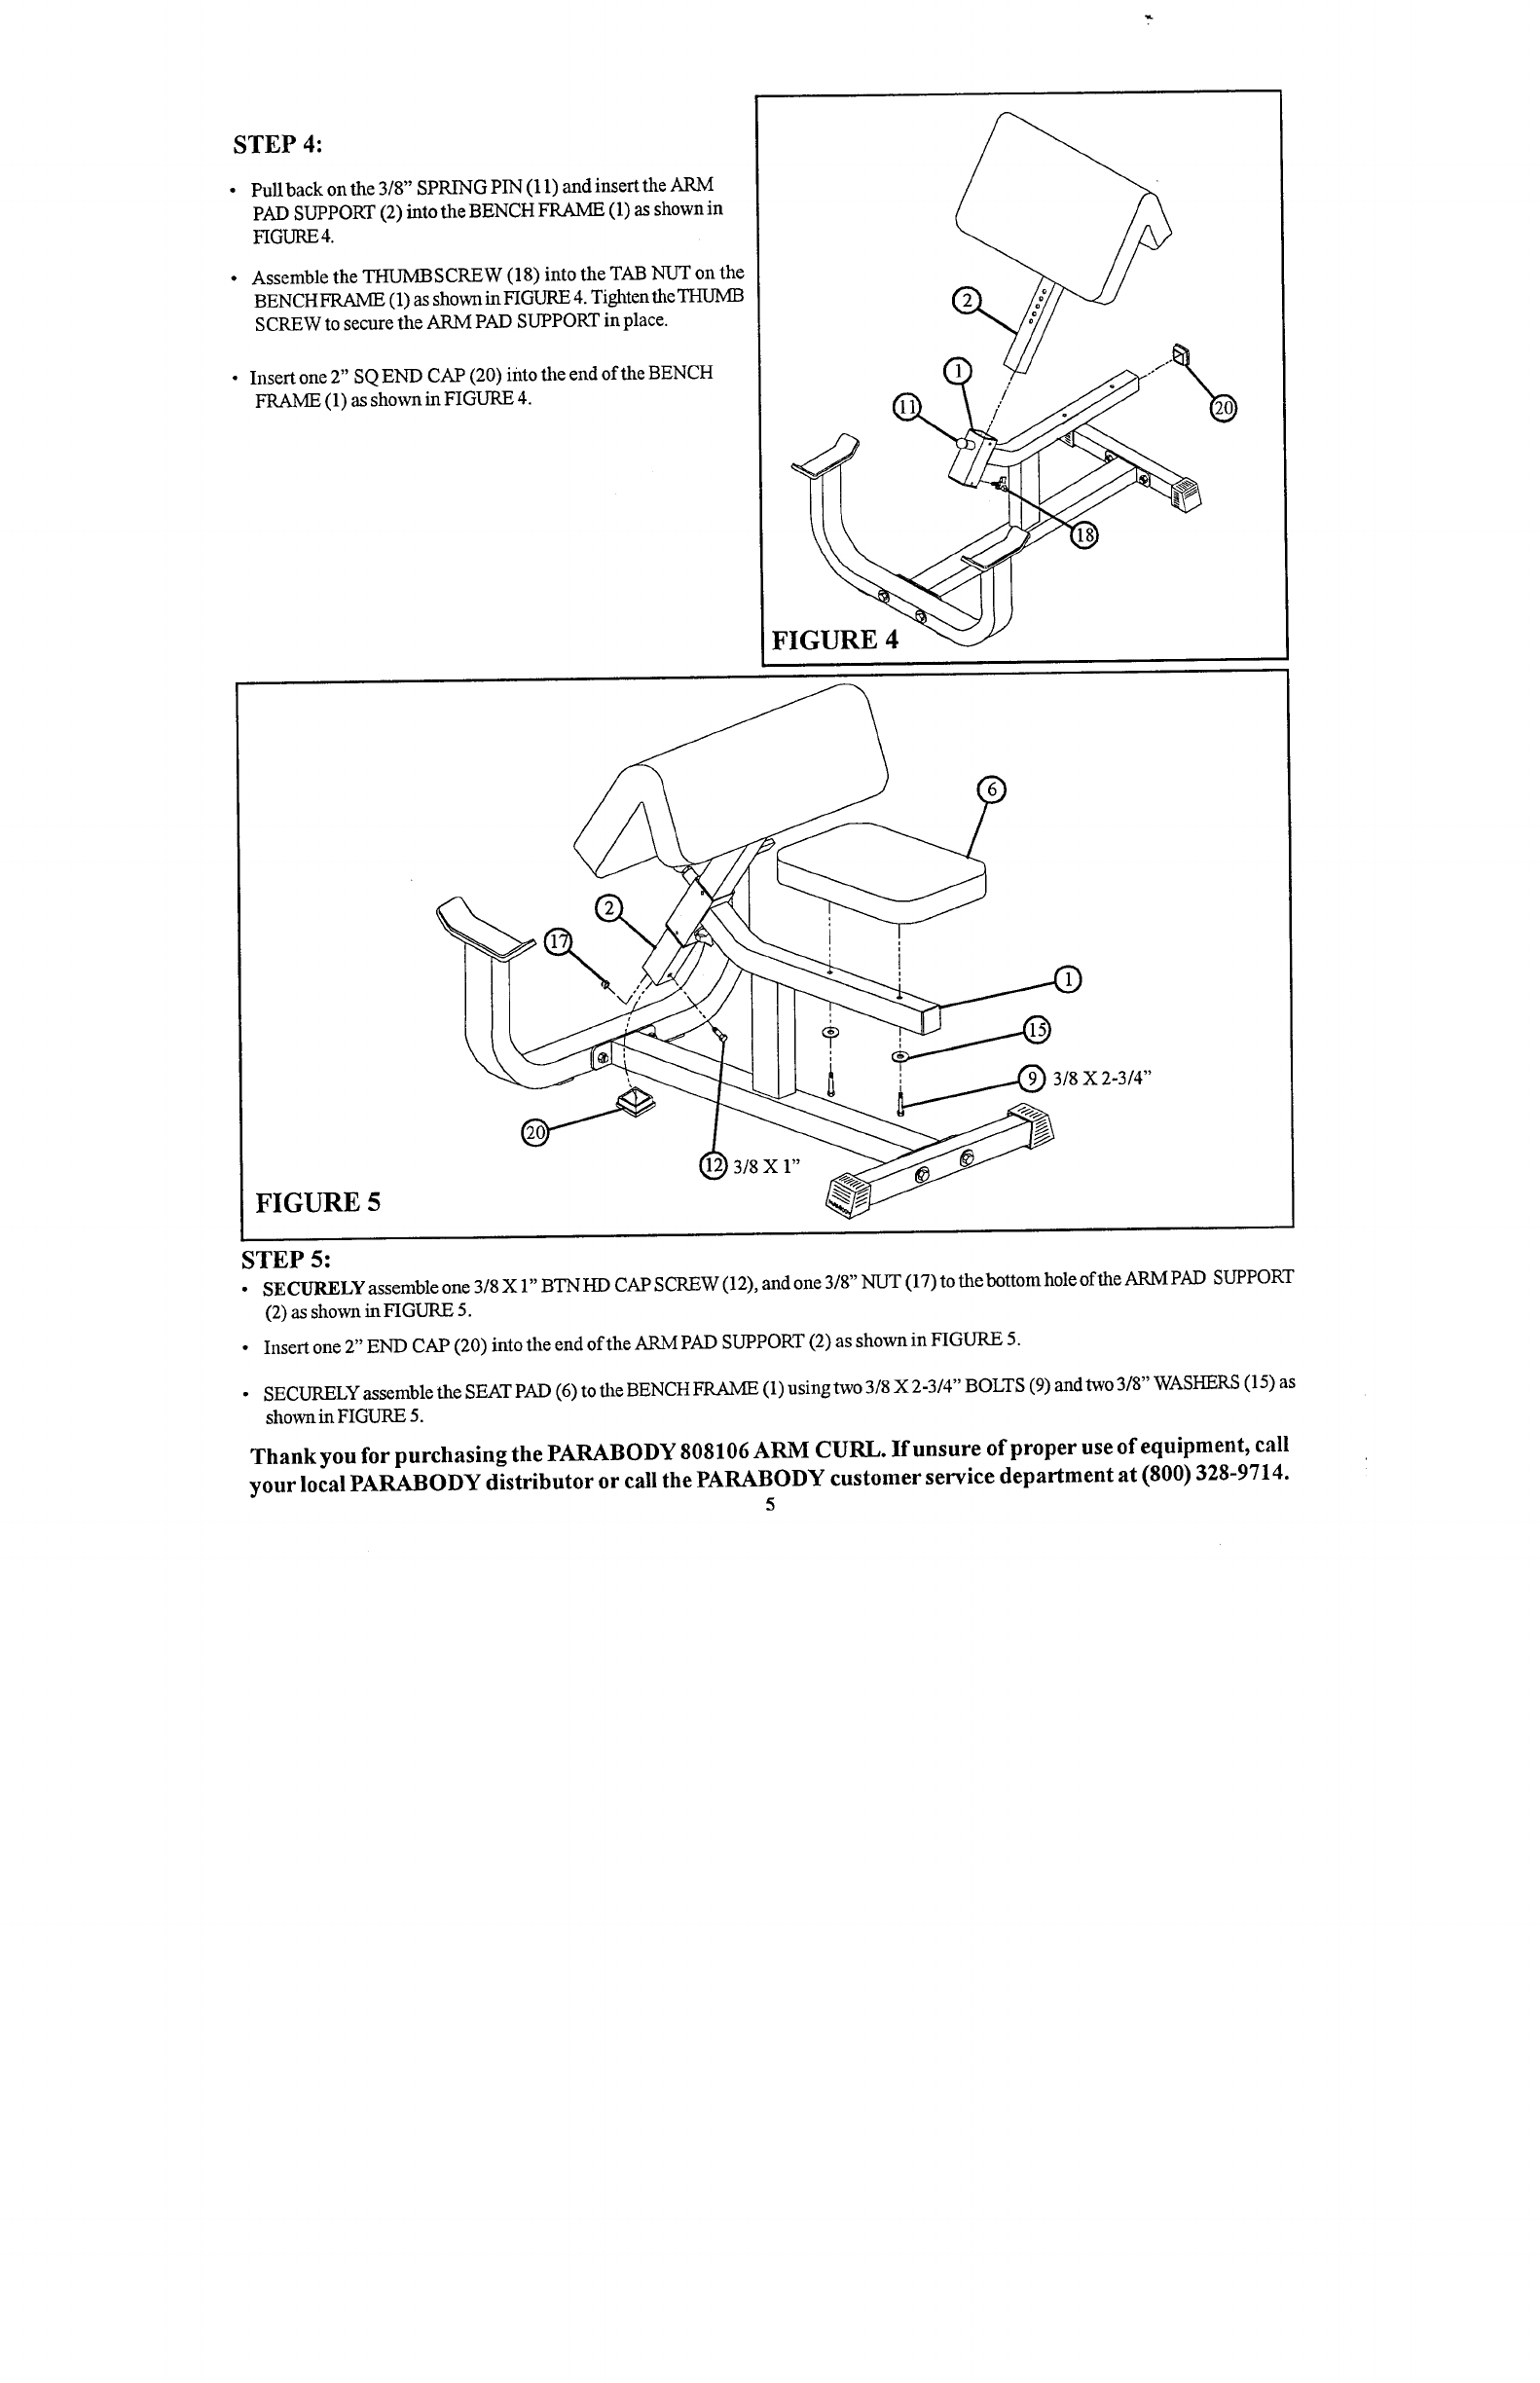
STEP 4:
Pullback on the 3/8" SPRING PIN (11) and insert the ARM
PAD SUPPORT (2) into the BENCH FRAME (1) as shown
FIGURE 4.
Assemble the THUMBSCREW (18) into the TAB NUT on the
BENCH FRAME (1) as shown in FIGURE 4. Tighten the THUMB
SCREW to secure the ARM PAD SUPPORT in place.
¯ Insert one 2" SQ END CAP (20) into the end of the BENCH
FRAME (1) as shown in FIGURE
FIGURE 4
FIGURE 5
3/8 X 1"
~
3/8 X 2-3/4"
STEP 5:
¯
SECURELY assemble one 3/8 X 1" BTN HD CAP SCREW (12), and one 3/8" NUT (17) to the bottom hole of the ARM PAD SUPPORT
(2) as shown in FIGURE
¯ Insert one 2" END CAP (20) into the end of the ARM PAD SUPPORT (2) as shown in FIGURE
¯ SECURELY assemble the SEAT PAD (6) to the BENCH FRAME (1) using two 3/8 X 2-3/4" BOLTS (9) and two 3/8" WASHERS (15)
shown in FIGURE 5.
Thank you for purchasing the PARABODY 808106 ARM CURL. If unsure of proper use of equipment, call
your local PARABODY distributor or call the PARABODY customer service department at (800) 328-9714.
5


