


9
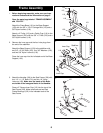
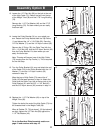
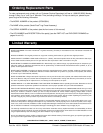
13. Locate the Pulley Bracket (91), a 1/4” Flat Washer
(71), and a 1/4” Nylon Locknut (25) that came with
your weight system. Attach the end of the Cable (133)
to the Pulley Bracket with the Flat Washer and the
Nylon Locknut.
13
71
25
91
133
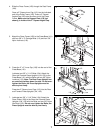
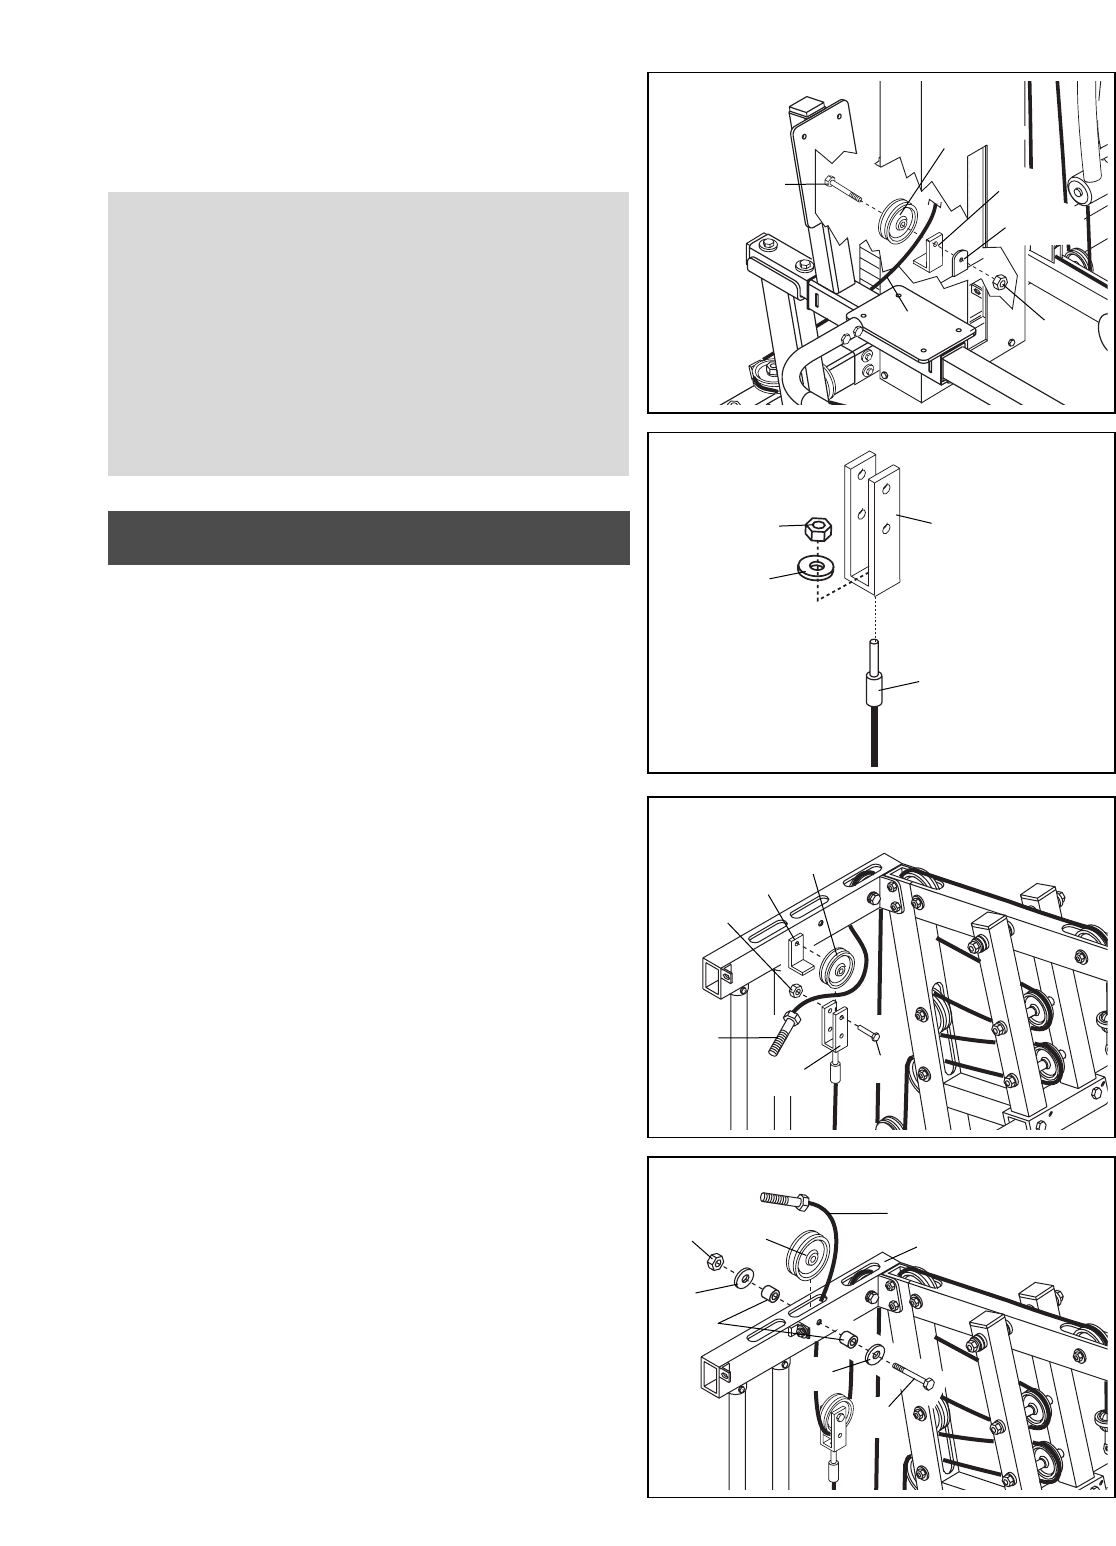
12. Wrap the Cable (133) under a 4” Pulley (113) and
attach the Pulley and a Cable Trap (116) to the weld-
ed bracket on the stabilizer with a 3/8” x 2” Bolt (121)
and a 3/8” Nylon Locknut (118).
IMPORTANT:
If you are assembling the leg
press accessory and your weight system at the
same time, continue with Assembly Option A,
below. If your weight system is already assembled,
continue with Assembly Option B, on page 11.
Note: At this point, you will begin using parts from
both the leg press accessory and your weight sys-
tem. Pay attention to key numbers as they will cor-
respond to two different part lists.
12
118
133
113
121
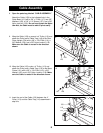
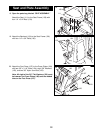
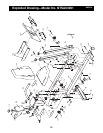
14. Install the High Cable (73) to the stage shown at
the right as instructed in your weight system
manual. Then, substitute the following steps for
those in the manual to complete the installation of
the High Cable.
Wrap the High Cable (73) under a 4” Pulley (35) and
attach the Pulley and a Cable Trap (44) to the top
hole in the Pulley Bracket (91) with a 3/8” x 1 3/4”
Bolt (60) and a 3/8” Nylon Jamnut (63).
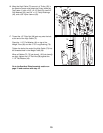
15. Wrap the High Cable (73) up around a 4” Pulley (35)
in the direction shown and attach the Pulley inside
the Top Frame (1) with a 3/8” x 2 1/2” Bolt (54), two
3/8” Flat Washers (55), two 5/8” x 1/2” Pulley
Bushings (42), and a 3/8” Nylon Jamnut (63).
14
15
44
63
73
60
73
1
35
63
55
55
54
42
91
35
Assembly Option A
116
Bracket