


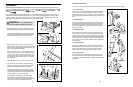
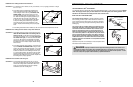
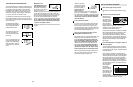
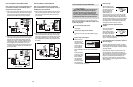
HOW TO CONNECT YOUR VCR
Note: If your VCR has an unused AUDIO OUT jack,
see instruction A below. If the AUDIO OUT jack is
being used, see instruction B. If you have a TV
with a built-in VCR, see instruction B. If your VCR
is connected to your home stereo, see HOW TO
CONNECT YOUR HOME STEREO on page 20.
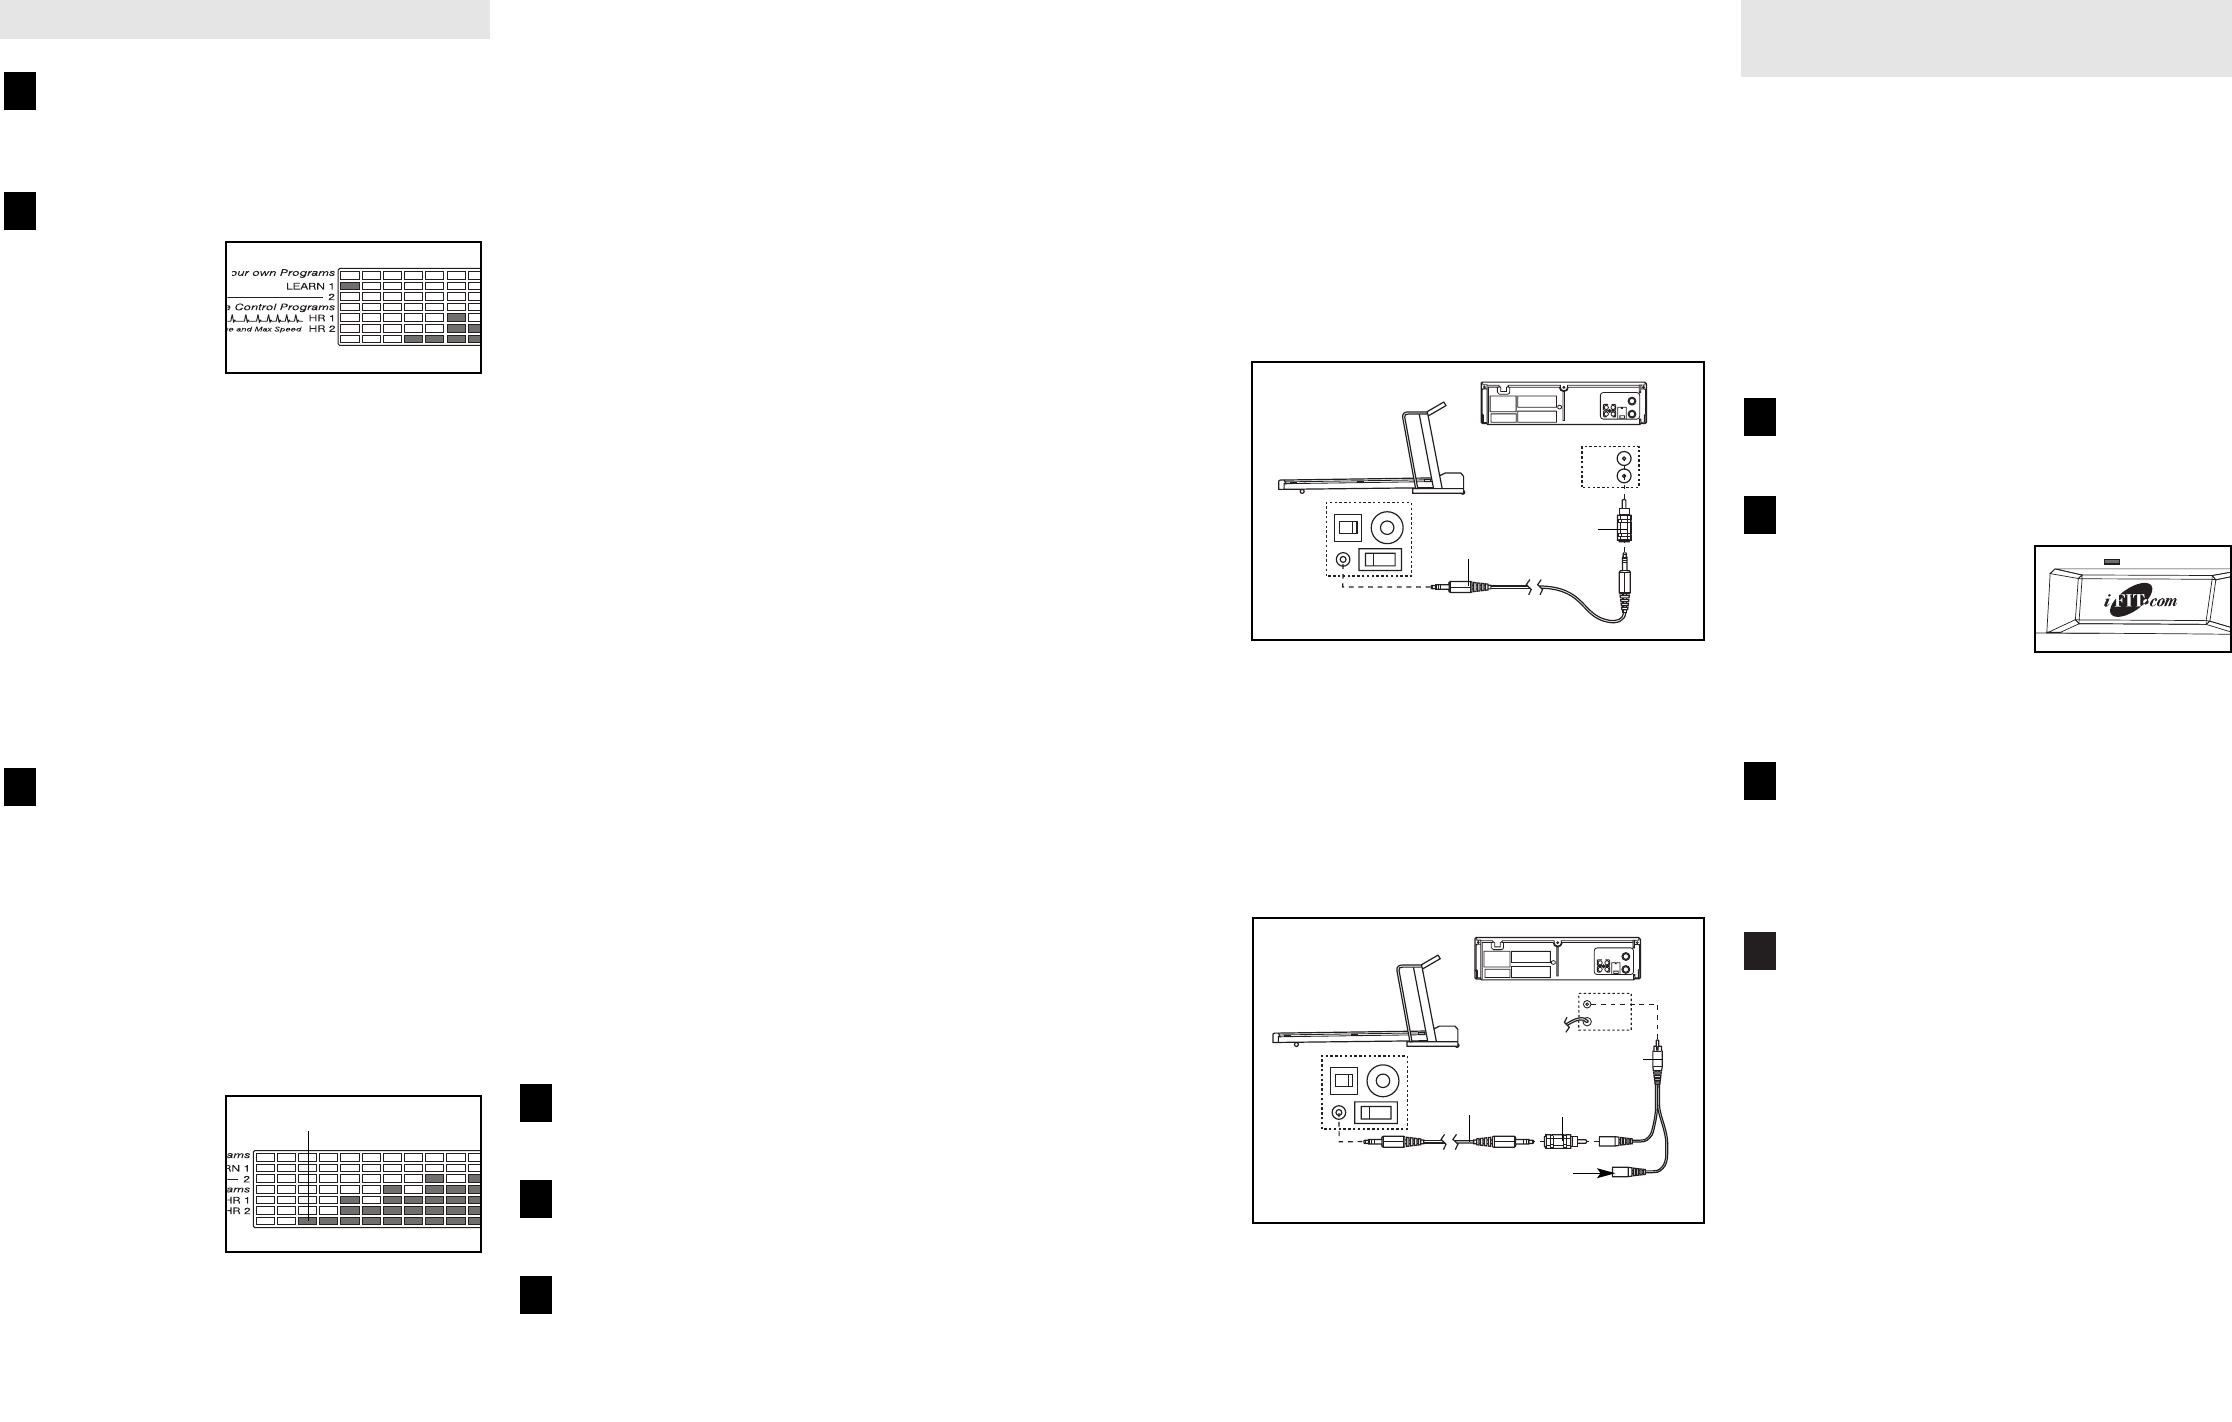
A. Plug one end of the audio cable into the jack on the
front of the treadmill near the power cord. Plug the
other end of the cable into the included adaptor.
Plug the adaptor into the AUDIO OUT jack on your
VCR.
B. Plug one end of the audio cable into the jack on the
front of the treadmill near the power cord. Plug the
other end of the cable into the included adaptor.
Plug the adaptor into an RCA Y-adaptor (available
at electronics stores). Next, remove the wire that is
currently plugged into the AUDIO OUT jack on your
VCR and plug the wire into the unused side of the
RCA Y-adaptor. Plug the RCA Y-adaptor into the
AUDIO OUT jack on your VCR.
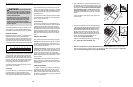
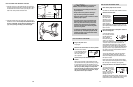
To use iFIT.com CDs or videocassettes, the treadmill
must be connected to your portable CD player,
portable stereo, home stereo, computer with CD
player, or VCR. See HOW TO CONNECT THE
TREADMILL TO YOUR CD PLAYER, VCR, OR COM-
PUTER on pages 19 to 21. Note: To purchase
iFIT.com CDs and videocassettes, visit our Web
site at www.iFIT.com.
Follow the steps below to use an iFIT.com CD or video
program.
Insert the key fully into the console.
See HOW TO TURN ON THE POWER on page 11.
Select the iFIT.com mode.
When the key is in-
serted, the manual
mode will be selected.
To use an iFIT.com CD
or video program, press
the iFIT.com button or
press the Select Program button repeatedly until
the indicator above the iFIT.com button lights.
Insert the iFIT.com CD or videocassette.
If you are using an iFIT.com CD, insert the CD
into your CD player. If you are using an iFIT.com
videocassette, insert the videocassette into your
VCR.
Press the PLAY button on your CD player or
VCR.
A moment after the button is pressed, your per-
sonal trainer will begin guiding you through your
workout. Simply follow your personal trainer’s
instructions. Note: If the Time/Pace display is
flashing, press the Start button or the Speed +
button on the console. The treadmill will not re-
spond to a CD or video program when the
Time/Pace display is flashing.
During the CD or video program, an electronic
“chirping” sound will alert you when the speed
and/or incline of the treadmill is about to change.
CAUTION: Always listen for the “chirp” and be
prepared for speed and/or incline changes. In
some instances, the speed and/or incline may
change before the personal trainer describes
the change.
4
3
2
1
16 21
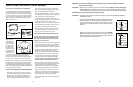
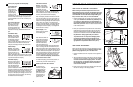
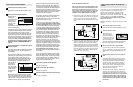
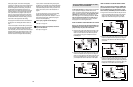
Insert the key fully into the console.
See HOW TO TURN ON THE POWER on page
11.
Select one of the custom programs.
When the key is
inserted, the
manual mode will
be selected. To
select a custom
program, press
the Select
Program button repeatedly until the Learn 1 or
Learn 2 indicator lights.
For about six seconds after a program is selected,
the Incline/Heart Rate display will flash the maxi-
mum incline setting for the program, and the
Speed display will flash the maximum speed set-
ting for the program. The Time/Pace display will
show how long the program will last. The program
display will show the first ten speed settings for
the program. Note: If only three columns of in-
dicators are lit in the program display, refer to
HOW TO CREATE CUSTOM PROGRAMS on
page 15.
Press the Start button or the Speed + button to
start the program.
A moment after the button is pressed, the walking
belt will begin to move. Hold the handrails and
begin walking.
Each program is divided into several one-minute
segments. One speed setting and one incline set-
ting are programmed for each segment. The
speed setting for the first segment will be shown
in the flashing Current Segment column of the
program display. (The incline settings are not
shown in the pro-
gram display.)
The speed set-
tings for the next
several segments
will be shown in
the columns to
the right.
When only three seconds remain in the first seg-
ment of the program, both the Current Segment
column and the column to the right will flash and a
tone will sound. If the speed and/or incline of the
treadmill is about to change, the Speed display
and/or the Incline/Heart Rate display will flash to
alert you, and three tones will sound. When the
first segment is completed, all speed settings will
move one column to the left. The speed setting for
the second segment will then be shown in the
flashing Current Segment column and the treadmill
will automatically adjust to the speed and incline
settings for the second segment.
The program will continue until the speed setting
for the last segment is shown in the Current
Segment column and no time remains. The walk-
ing belt will then slow to a stop.
If desired, you can redefine the program whilst
using it. To change the speed or incline setting
for the current segment, simply press the Speed
or Incline buttons. When the current segment is
completed, the new setting will be saved in mem-
ory. To increase the length of the program, first
wait until the program is completed. Then, press
the Start button and program speed and incline
settings for as many additional segments as de-
sired. Note: Whilst you are adding segments to
the program, the speed settings in the program
display will not move to the left. Instead, each time
a segment is completed, the flashing Current
Segment column will move one column to the
right. If the Current Segment column reaches the
right side of the program display, when the current
segment is completed, all columns of indicators in
the program display will move three columns to
the left. When you have added as many segments
as desired, press the Stop button twice. To de-
crease the length of the program, press the
Stop button twice at any time before the program
is completed.
To stop the program temporarily, press the Stop
button. All displays will pause and the Time/Pace
display will begin to flash. To restart the program,
press the Start button or the Speed + button. To
end the program, press the Stop button, remove
the key, and then reinsert the key.
Follow your progress with the displays.
See step 5 on page 12.
Measure your heart rate if desired.
See step 6 on page 12.
When the program has ended, remove the key.
See step 7 on page 14.
6
5
4
3
2
1
Current Segment
AUDIO OUT
RIGHT
LEFT
VIDEO AUDIO
ANT. IN
RF OUT
IN
OUT
CH
34
Audio
Cable
adaptor
A
VIDEO AUDIO
ANT. IN
RF OUT
IN
OUT
CH
34
Audio
Cable
adaptor
B
Wire removed from
AUDIO OUT jack
RCA Y-adaptor
HOW TO USE IFIT.COM CD AND VIDEO PRO-
GRAMS
HOW TO USE CUSTOM PROGRAMS