


3.6 MONOCOLUMN, WIRING AND COVER
Parts: Hardware Bag #4 (2, 100mm Hex Head Bolts)
(5, Thick Flat Washers - 16mm O.D.)
(2, 60mm Hex Head Bolts)
(4, 12mm Phillips Screws)
(4, Flat Washers - 12mm O.D.)
(4, 15mm Button Head Screws)
Tools: 13mm Socket Wrench, 5mm Hex Head Wrench, Phillips Screwdriver
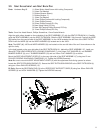
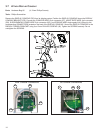
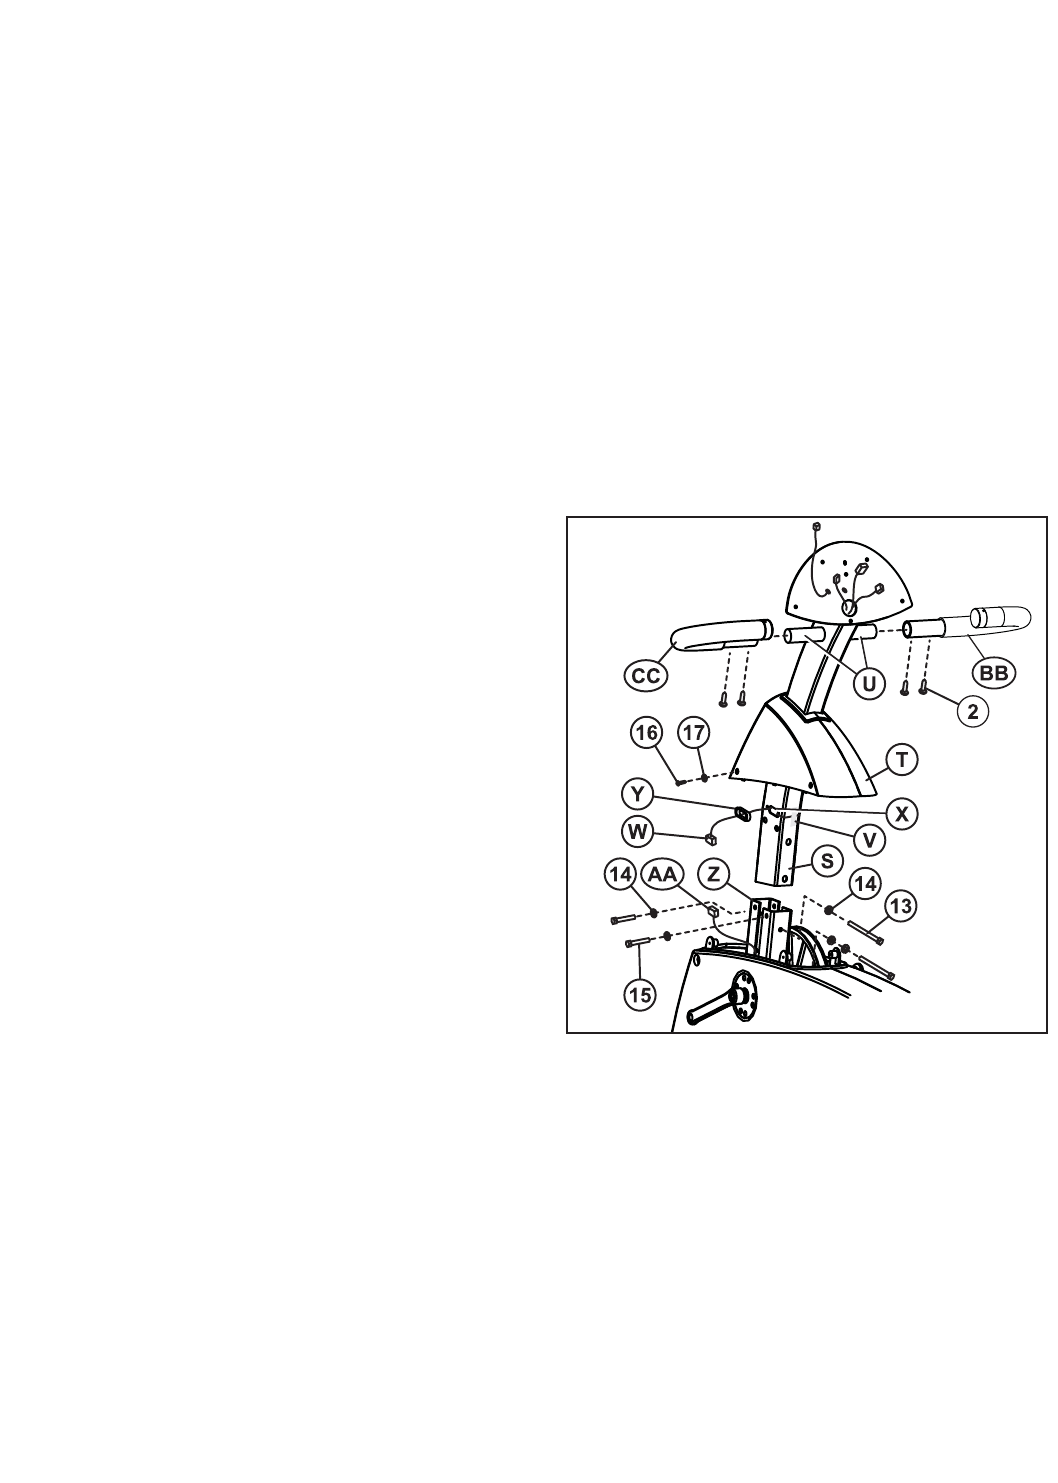
Locate the MONOCOLUMN (S). Slide the MONOCOLUMN COVER (T) onto the MONOCOLUMN as shown. Slide the
MONOCOLUMN COVER up to the FRONT HANDLEBAR POSTS (U).
Note: A zip-tie has been included to keep the MONOCOLUMN COVER (T) from falling during assembly.
Detach the WIRE TIE (V) attached to the front of the MONOCOLUMN (S). Carefully pull the CONSOLE WIRE (W)
through the SIDE ACCESS HOLE (X) of the MONOCOLUMN. Feed the CONSOLE WIRE through the GROMMET (Y)
as shown and insert the GROMMET into the SIDE ACCESS HOLE. Slide the MONOCOLUMN (S) into the MONOCOL-
UMN BRACKET (Z). Slide the MONOCOLUMN down until it is fully seated. Secure the MONOCOLUMN to the MONO-
COLUMN BRACKET using two 100mm HEX HEAD BOLTS (13) and three THICK FLAT WASHERS (14) from the front
side of the MONOCOLUMN and two 60mm HEX HEAD BOLTS (15) and THICK FLAT WASHERS (14) from the user left
side of the MONOCOLUMN BRACKET. Tighten the BOLTS securely.
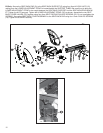
Note: The two 100mm HEX HEAD BOLTS (13) and three
THICK FLAT WASHERS (14) are shown entering from the back
side of the MONOCOLUMN for clarity. Please secure from the
FRONT side.
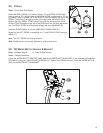
CAUTION: Be careful not to pinch the WIRE(s) (AA) leading
from the MONOCOLUMN BRACKET (Z) when inserting the
MONOCOLUMN (S) into the MONOCOLUMN BRACKET.
Connect the WIRE(s) (AA) leading from the MONOCOLUMN
BRACKET (Z) to the corresponding WIRE (W) from the SIDE
ACCESS HOLE (X) of the MONOCOLUMN. Slide the MONO-
COLUMN COVER (T) downward to meet the MAIN SHROUDS.
Secure the MONOCOLUMN COVER to the MAIN SHROUDS
using four 12mm PHILLIPS SCREWS (16) and four 12mm O.D.
WASHERS (17). Tighten the SCREWS securely. Do not over-
tighten the SCREWS.
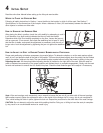
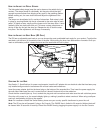
Attach the RIGHT (BB) and LEFT (CC) FRONT HANDLEBARS
(labeled right and left) to the MONOCOLUMN as shown using
two each 15mm BUTTON HEAD SCREWS (2). Tighten the
SCREWS securely
13