


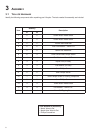
3.2 PACKAGING
Parts: None
Remove all packaging and place main components to the side of the box. Break box down in each of the four corners.
3.3 ASSEMBLE THE REAR STABILIZER
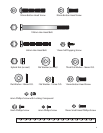
Parts: Hardware Bag #1 (2, 50mm Button Head Screws)
(2, 20mm Button Head Screws)
Tools: 5mm Hex Head Wrench
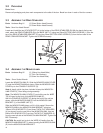
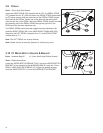
Locate and install the two LEVELER FEET (A) to the bottom of the REAR STABILIZER (B).With the bends facing rear-
ward, attach the REAR STABILIZER (B) to the BASE UNIT (C) using two 50mm BUTTON HEAD SCREWS (1) from the
top of the REAR STABILIZER BRACKET (D) and two 20mm BUTTON HEAD SCREWS (2) from the front side of the
REAR STABILIZER BRACKET. Tighten the SCREWS securely.
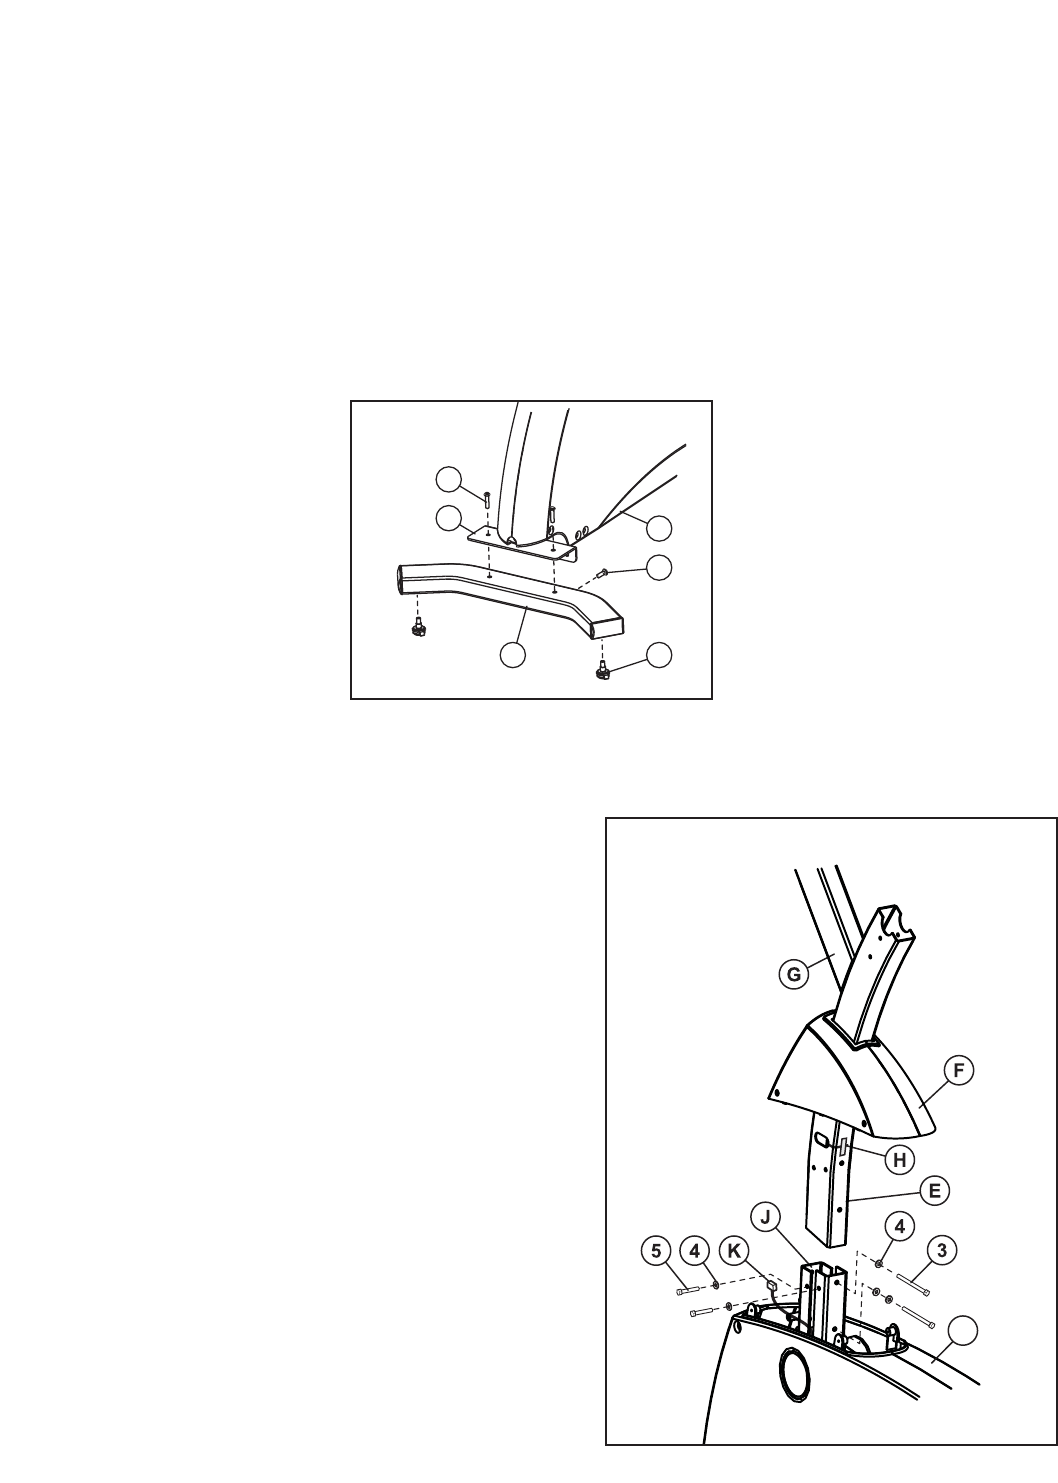
3.4 ASSEMBLE THE MONOCOLUMN
Parts: Hardware Bag #2 (2, 100mm Hex Head Bolts)
(5, Thick Flat Washers)
(2, 60mm Hex Head Bolts)
Tools: 13mm Socket Wrench
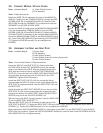
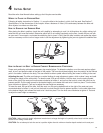
Locate the MONOCOLUMN (E). Slide the MONOCOLUMN COVER
(F) onto the MONOCOLUMN as shown. Slide the MONOCOLUMN
COVER up to the CONSOLE SUPPORT (G).
Note: A plastic zip-tie has been included to keep the MONOCOL-
UMN COVER (F) from falling during assembly.
Note: The MONOCOLUMN COVER (F) must slide over the WIRE
TIE (H) taped to the front of the MONOCOLUMN (E).
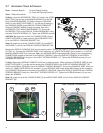
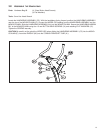
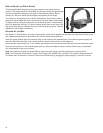
With the CONSOLE SUPPORT (G) facing the front of the unit as
shown, slide the MONOCOLUMN (E) into the MONOCOLUMN
BRACKET (J) of the BASE UNIT (C).
Slide the MONOCOLUMN down until it is fully seated. Secure the
MONOCOLUMN to the MONOCOLUMN BRACKET using two
100mm HEX HEAD BOLTS (3) and three THICK FLAT WASHERS
(4) (as shown) from the rear side of the MONOCOLUMN. Use two
60mm HEX HEAD BOLTS (5) and two THICK FLAT WASHERS (4)
from the user left side of the MONOCOLUMN BRACKET. Tighten the
BOLTS securely.
CAUTION: Be careful not to pinch the WIRE (K) leading from the
MONOCOLUMN BRACKET (J) when inserting the MONOCOLUMN
(E) into the MONOCOLUMN BRACKET.
10
C
2
AB
1
D
C