


INSTALLATION
14
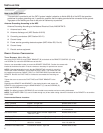
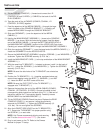
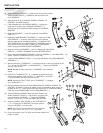
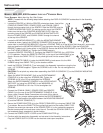
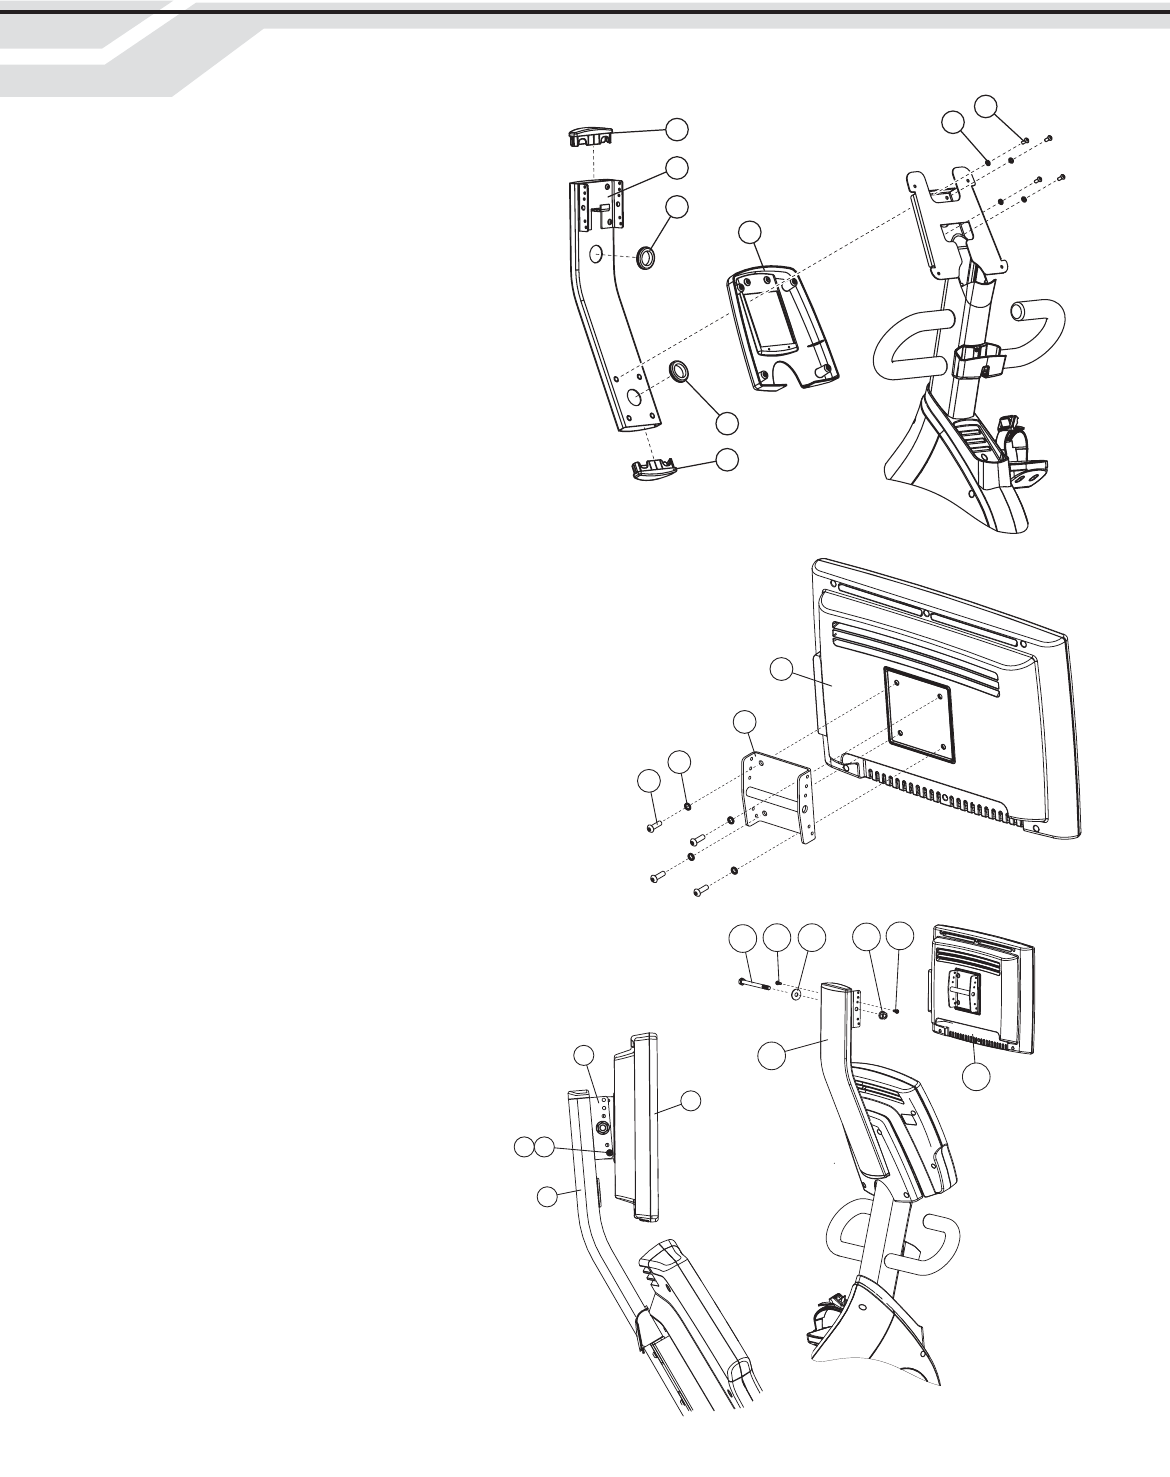
9. Tilt the DISPLAY CONSOLE (--) forward and connect the I-R CON-
TROL (A) and S-VIDEO (--) CABLES to the back of the DIS-
PLAY CONSOLE.
10. Tape the ends of the all CABLES (POWER, COAXIAL, I-R
CONTROL, S-VIDEO) together.
11. Feed the taped end of the MEDIA CABLES (--) through the
large hole in the back of the CONSOLE BRACKET (--).
Carefully pull excess MEDIA CABLE through the CONSOLE
BRACKET .
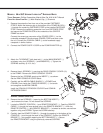
12. Slide one GROMMET (--) over the taped end of the MEDIA
CABLES (--).
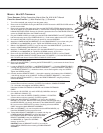
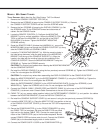
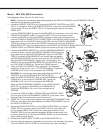
13. Holding the MAIN BRACKET ASSEMBLY (--) close to the CON-
SOLE BRIDGE (--) as shown. With the holes facing upward,
feed the taped end of the MEDIA CABLES (--) through the BOT-
TOM LARGE HOLE of the MAIN BRACKET ASSEMBLY and out
of the UPPER HOLE as shown. Carefully pull excess MEDIA
CABLE through the MAIN BRACKET ASSEMBLY.
14. Slide the remaining GROMMET (--) over the taped end of the MEDIA
CABLES (--). Install the GROMMETS into the ACCESS HOLES.
15. Secure the MAIN BRACKET ASSEMBLY using four SCREWS (--) and WASHERS (--) as
shown. Tighten the SCREWS securely. (8-10 ft. lbs.)
16. Install the MAIN BRACKET CAPS (--) to the top and bottom of the MAIN BRACKET
ASSEMBLY (--).
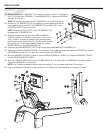
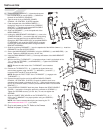
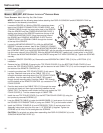
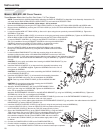
17. With the remaining TV BRACKET (--) oriented as shown, install it to the back of the
TV (--) using four SCREWS (--) and WASHERS (--). Tighten the SCREWS
securely. (8-10 ft. lbs.)
NOTE: Be sure the side holes of the TV BRACKET are oriented as
shown.
18. Position the TV BRACKETS (-- & --) together as shown below and
secure them together using one BOLT (--), WASHER (--) and NUT (--
). Leave the BOLT and NUT loose at this time.
NOTE: Be sure the PIVOT POST of the TV BRACKET (--) engages
onto TV BRACKET (--).
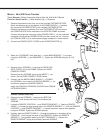
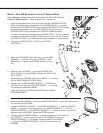
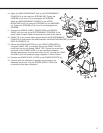
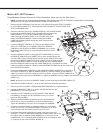
19. Remove the tape from the end of the MEDIA CABLES (POWER, COAXIAL, I-R
CONTROL, S-VIDEO). Connect all cables to their corresponding jacks located on
the back of the TV (--) (See end of instruction manual for TV connection details).
Feed any excess MEDIA CABLE into the MAIN BRACKET (--).
20. Tilt the DOSPLAY CONSOLE back into place. Replace the
REAR CONSOLE COVER (--) and secure it using the previ-
ously removed six SCREWS (--). Tighten the SCREWS
securely. (8-10 ft. lbs.). Do not over-tighten the SCREWS.
21. Align the LOWEST SIDE HOLES on the TV BRACKETS
(-- & --). Secure the TV BRACKET into proper position
using one SCREW (--) on each side.
NOTE: Life Fitness recommends aligning and securing
the TV at the lowest side holes ???? (--) as shown.
22. Plug in and power on the TV. Refer to the Owners Manual for
proper TV setup.
A
A
A
A
AA
A
A
A
A
A
A
A
A
A
17
6
15
16
22
4
16
8
D