


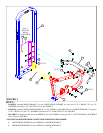
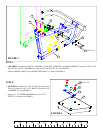
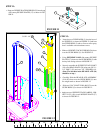

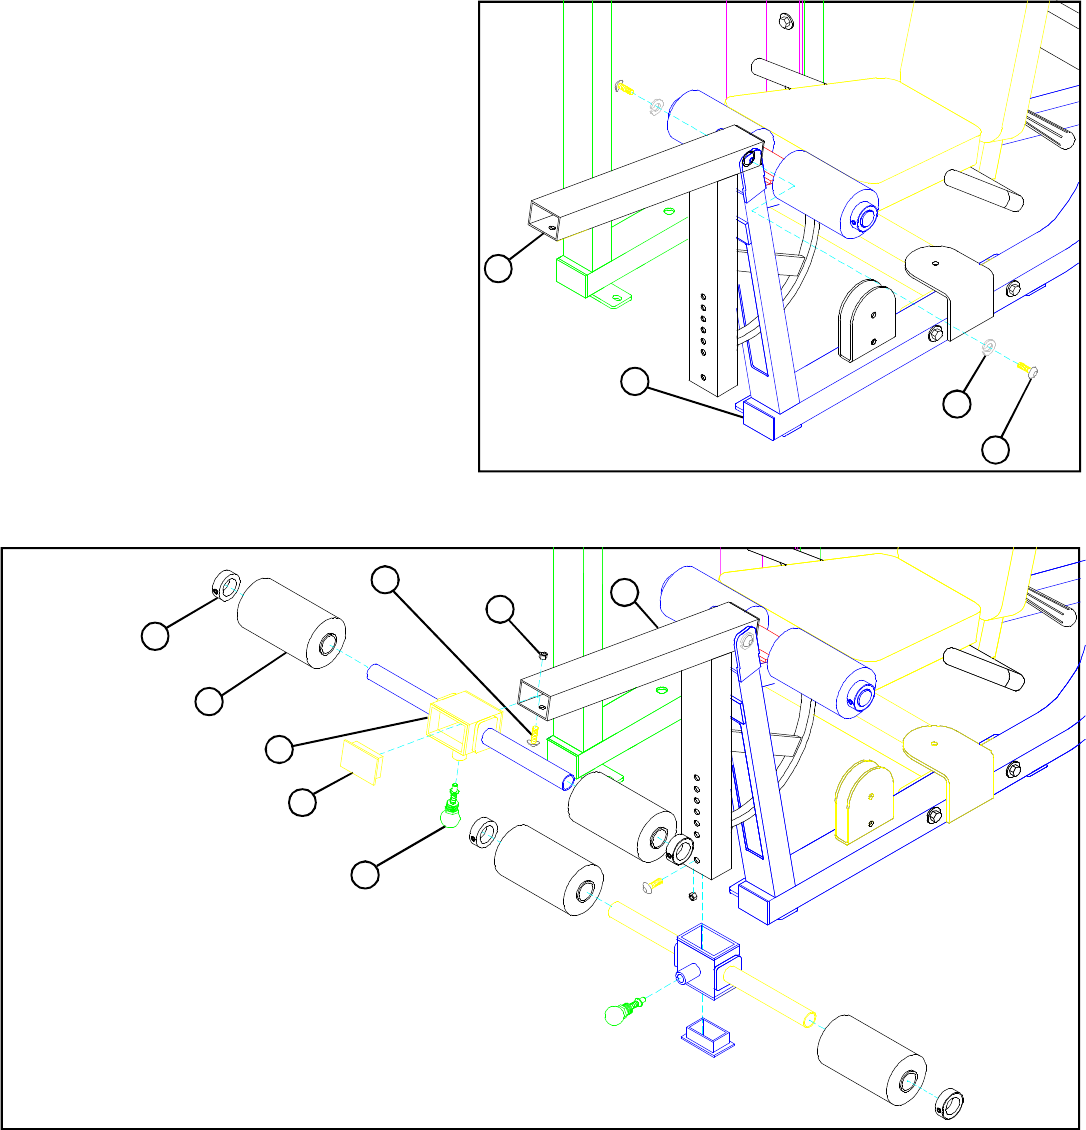
STEP 10:
9
• SECURELY assemble two 3/8” SPRING PINS (47) to the PAD SLEEVES (6) as shown in FIGURE 10. (NOTE: IMPORTANT! Tighten
SPRING PIN completely.)
• Assemble four ROLLER PADS (4) to the PAD SLEEVES (6) using four 1-5/16” SHAFT COLLARS (53). SECURELY tighten
set screws on SHAFT COLLARS (53). See FIGURE 10.
• Slide PAD SLEEVES (6) over LEG CURL/EXTENSION (9) until the spring pin pops into the holes. See FIGURE 10.
• SECURELY assemble two 3/8 X 1” BUTTON HEAD CAP SCREWS (39) and two 3/8” HEX NUTS (54) to the last holes in the LEG
CURL/EXTENSION as shown in FIGURE 10.
• Insert two 3 X 2” END CAPS (30) into the ends of the LEG CURL/EXTENSION (9) as shown in FIGURE 10.
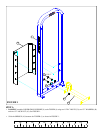
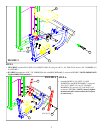
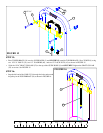
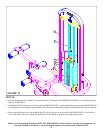
FIGURE 9
STEP 9:
• Attach LEG PEDESTAL (9) to the BENCH FRAME
(7) using two 3/8 X 1” BUTTON HEAD CAP
SCREWS (39) and two 3/8” LOCKWASHERS (42) as
shown in FIGURE 9.
(NOTE: Both button head cap screws must be
tightened at the same time using two allen
wrenches.)
3/8 X 1” BTN HEAD 39
7
FIGURE 10
6
30
4
53
HEX 54
NUT
39 3/8 X 1” BTN HD
9
47
9
42