


Belt Adjustment
WARNING! Do not over-tighten rollers! This will
cause premature roller bearing failure!
Belt adjustment and tension performs two functions:
adjustment for tension and centering. Your new treadmill
comes pre-adjusted from the factory for tension and cen-
tering. Please follow the procedures below if the belt shifts
to the left or right while walking:
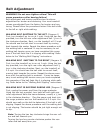
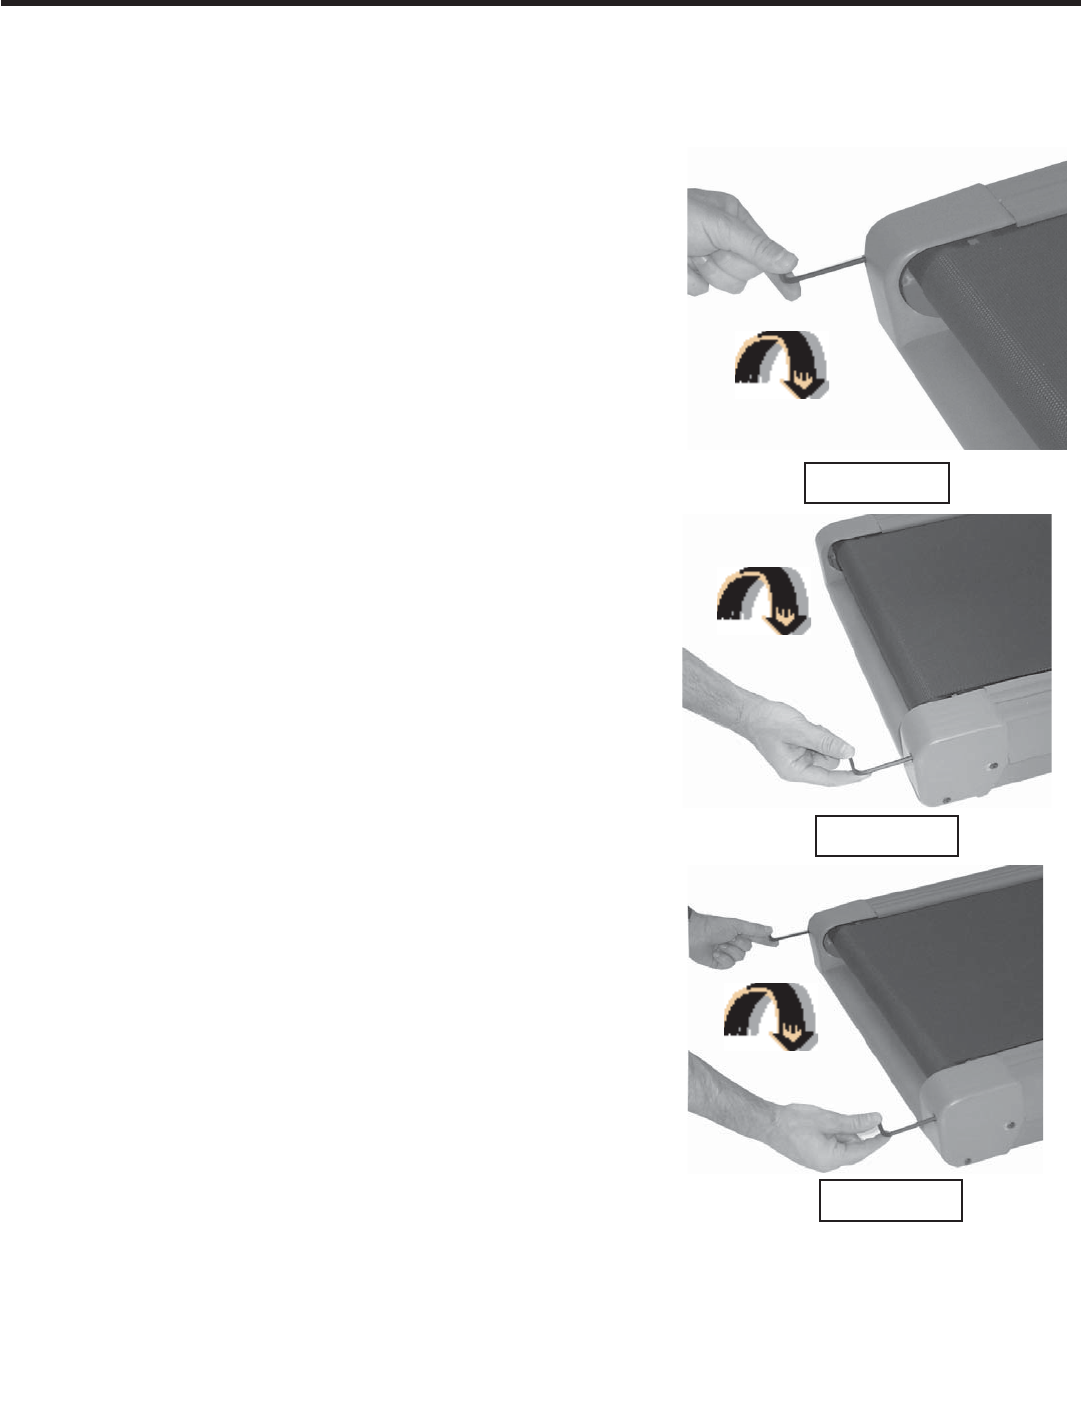
WALKING BELT SHIFTING TO THE LEFT (Diagram 1)
First, turn treadmill on to run at 1 mph. Using the hex key
provided, turn the left rear roller adjustment bolt ¼ turn in
the clockwise direction. Next, run the treadmill at 2.5 mph.
You should see the belt start to correct itself by moving
back towards the center. Repeat the above procedure until
the walking belt is centered. It may be necessary to set
walking belt tension once you have completed this proce-
dure if the belt feels like it is slipping while walking. Refer
below to the “Walking Belt Slipping” instructions.
WALKING BELT SHIFTING TO THE RIGHT (Diagram 2)
First, turn the treadmill on to run at 1 mph. Using the hex
key provided, turn the right rear roller adjustment bolt ¼
turn in the clockwise direction. Next, run the treadmill at
2.5 mph. You should see the belt start to correct itself,
moving back towards the center. Repeat the above proce-
dure until the walking belt is centered. It may be neces-
sary to set walking belt tension once you have completed
this procedure if the belt feels like it is slipping while walk-
ing. Refer below to the “Walking Belt Slipping” instructions.
WALKING BELT IS SLIPPING DURING USE (Diagram 3)
First, unplug the power cord from the surge protector.
Using the hex key provided, turn both left and right rear
roller adjustment bolts the same distance, usually a ¼ turn
in the clockwise direction. Plug the power cord back into
the surge protector and run the treadmill at 2.5 mph. You
should now walk on the belt to determine if the belt is still
slipping. Repeat the above procedure until the walking belt
is not slipping. The tension should be just tight enough not
to slip.
Note: Turning the hex key clockwise brings the rear roll-
ers and belt towards you.
Turning the hex key counter clockwise pushes the rear
roller and belt away form you.
15
Diagram 1
Diagram 2
Diagram 3