STEP 2 (See Diagram 2)
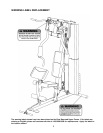
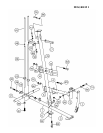
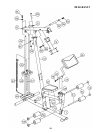
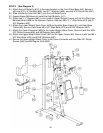
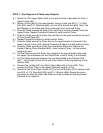
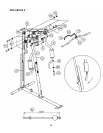
A.) Slide 9 Weight Plates (#66) onto the Guide Rods. Make sure the grooves on the
Weight Plates are all facing the back of the machine and downward. Insert the
Selector Rod (#47) through the center hole on the Weight Plates.
B.) Slide the Selector Stem (#65) onto the Guide Rods.
C.) Slide the Ring on the Selector Pin (#67) onto the Selector Rod. Insert the Selector
Pin into the selected groove to choose the number of weight plates for exercise.
Note: Each weight plate weights approximately 10 lbs.
D.) Attach the Upper Frame (#8) onto the two Guide Rods. Secure the two Guide
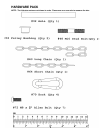
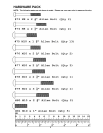
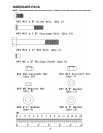
Rods to the Upper Frame with two M10 x 1” Allen Bolts (#81) and Ø ¾” Washers
(#86).
E.) Place the Upper Frame onto the Upper Vertical Frame (#15). Secure it with two
M10 x 2 3/8” Carriage Bolts (#83), one 5 ½ Curved Bracket (#6), two Ø ¾”
Washers (#86), and two M10 Aircraft Nuts (#90).
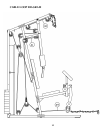
F.) Securely tighten all Nuts and Bolts previously installed.
G.) Attach the Front Press Base (#9) to the Upper Frame. Align the holes and insert
an Axle (#32) through the holes. Secure each end of the Axle with one M10 x 5/8”
Allen Bolt (#82) and one Ø ¾” Washer (#86).
H.) Place the Seat Pad (#37) onto the Seat Support (#5). Secure it with two M8 x 2
1/8” Allen Bolts (#73) and two Ø 5/8” Washers (#87).
I.) Attach the Arm Curl Pad (#36) to the Arm Curl Stand (#19). Secure it with two M8
x 5/8” Allen Bolts (#72) and Ø 5/8” Washers (#87). Insert the Arm Curl Stand into
the opening on the Seat Support Frame. Use a Lock Knob (#68) to lock the Arm
Curl Stand at desired height.
J.) Insert two Foam Tubes (#44) halfway through the holes on the Leg Developer
and Seat Support. Push four Foam Rolls (#56) onto the Tubes. Plug four Foam
Roll End Caps (#53) into the ends.
9


