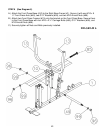
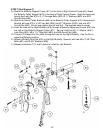
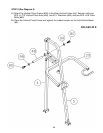
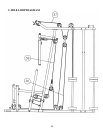
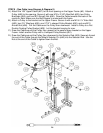
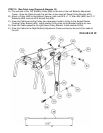
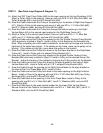
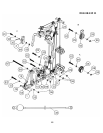
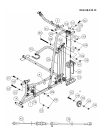
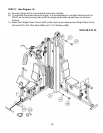
STEP 12 (See Diagram 12)
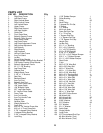
A.) Attach end of the 357” Leg Press Cable (#39) to the bracket on the Left Seat Support
(#8). Secure the Cable to the bracket with one M10 x 1” Allen Bolt (#81), two Ø ¾”
Washers (#99), and one M10 Aircraft Nut (#96).
B.) Draw the Cable to the upper open bracket on the Leg Press Frame. Attach a Pulley to
the bracket. Secure it with one M10 x 1 3/4” Allen Bolt (#82), two ∅ ¾” Washers (#99),
and one M10 Aircraft Nut (#96).
C.) Draw the Cable around the Pulley then to the open bracket on the Left Seat Support
(#8). Attach a Pulley to the opening. Secure it with one M10 x 1 ¾” Allen Bolt (#82), two
Ø ¾” Washers (#99), and one M10 Aircraft Nut (#96).
D.) Draw the Cable around the Pulley then back to the lower open bracket on the Leg Press
Frame. Repeat Procedure B above to install a Pulley.
E.) Draw the Cable around the Pulley then to the lower opening on the Left Seat Support.
Install another Pulley and secure it with one M10 x 2 3/8” Allen Bolt (#83), two Pulley
Bushings (#55), and one M10 Aircraft Nut (#96).
F.) Draw the Cable underneath the Pulley then through the bottom of Left Vertical Beam to
the first open bracket on the Left Base Frame.
G.) Install a Pulley with one M10 x 1 ¾” Allen Bolt (#82), two ∅ ¾” Washers (#99), and one
M10 Aircraft Nut (#96).
H.) Pull the Cable upward to the front opening on the Vertical Press Frame (#20). Install a
Pulley with one M10 x 5 ¾” Allen Bolt (#86), two Ø ¾” Washers (#99), and one M10
Aircraft Nut (#96).
I.) Draw the Cable around the Pulley then downward to the second open bracket on the
Left Base Frame. Repeat Procedure G above to install a Pulley.
J.) Pull the Cable upward to the back opening on the Vertical Press Frame. Repeat
Procedure H above to install a Pulley.
K.) Draw the Cable around the Pulley then downward to the third open bracket (angled) on
the Left Base Frame. Repeat Procedure G above to install a Pulley.
L.) Pull the Cable upward and connect to the Short Chain (#77) with a C-clip (#78). Note:
After completing the entire Cable installations, check the tightness of the Cables, if the
Cables are too loose, shorten the Chain. If the Cables are too tight, lengthen the Chain.
M.) Connect the Chain to the 61”Vertical Press Cable (#40) with a M10 x 1” Allen Bolt (#81),
two Ø ¾” Washers (#99), and one M10 Aircraft Nut (#96).
N.) Draw the Cable to the bracket on the top of Upper Frame (#6). Install two Small Pulleys
(#57) to the bracket with two 2 3/8” L-shaped Pulley Brackets (#52).
O.) Draw the Cable over the Small Pulleys then downward. Securely threaded it through the
Weight Selector Pin (#46) into the Selector Rod (#29).
P.) Use the Nut on the Bolt at the end of the Cable to securely tighten the Bolt to the
Selector Rod.
20


