


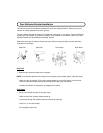
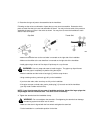
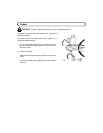


3. Point the seat forward and put the seat post or seat
pillar into the seat tube.
- Make sure you can not see the “MIN-IN” minimum
insertion mark [13] of the seat post above the seat tube
- Install a bolt, washer (if supplied), and nut or a quick release
lever
- Put the seat at a comfortable height for the rider
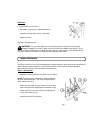
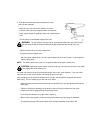
WARNING: The red reflector must be vertical, point straight toward the rear of the bicycle,
and have three inches of clearance between the top oft the seat and the top of the red
reflector.
- Tighten the bolt and nut or quick release lever
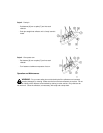
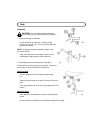
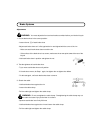
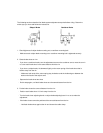
- To tighten the quick release lever:
- Move the quick release lever [1] to the “open” position [2] so the word “open” is pointing away
from the post clamp
NOTE: The words “open” and “close” are on opposite sides of the quick release lever.
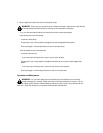
CAUTION: Operate the quick release lever by hand only. Do not use a hammer or any other
tool to tighten the quick release lever.
You must use strong force to move the quick release lever to the “close” position. If you can easily
move the lever to the “close” position, the clamping force is too light.
If the clamping force of the quick release lever is too light, the seat post or seat pillar can loosen
while riding. This can cause injury to the rider or to others.
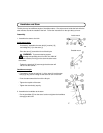
- Open and close the quick release lever with one hand while you turn the adjusting nut with the
other hand
- Tighten or loosen the adjusting nut by hand, so that you first feel resistance to the quick
release lever when it perpendicular to the bicycle frame
- Push the quick release lever to the “close” position [ ]
- When in the “close” position, make sure the quick release lever lays along the seat tube
- The tightening torque of the quick release lever should be between 43 and 65 in.-lbs.