


pressure you apply, the more braking force, up to the point where the rear wheel stops rotating and begins to skid
(see paragraph 3. Braking Technique, below).
Coaster brake service and adjustment requires special tools and special knowledge. Do not attempt to disassemble
or service your coaster brake. Take the bicycle to your dealer for coaster brake service.
2. Hand Brakes
It’s very important to your safety that you learn and remember which brake lever controls which brake on your
bike.
The braking action of a bicycle is a function of the friction between the brake surfaces - usually the brake pads
and the wheel rim. To make sure that you have maximum friction available, keep your wheel rims and brake pads
clean and free of lubricants, waxes or polishes.
Make sure that your hands can reach and squeeze the brake levers comfortably. If your hands are too small to
operate the levers comfortably, consult your dealer before riding the bike. The lever reach may be adjustable; or you
may need a different brake lever design.
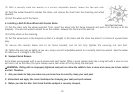
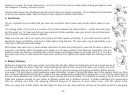
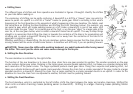
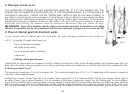
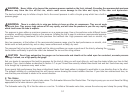
Most brakes have some form of quick-release mechanism to allow the brake pads to clear the tire when a wheel is
removed or reinstalled. When the brake quick release is in the open position, the brakes are inoperative. Ask your
dealer to make sure that you understand the way the brake quick release works on your bike (see figs. F, G, H & I)
and check each time to make sure both brakes work correctly. Fully tighten the coaster brake arm securing nut and
bolt.
3. Braking Technique
Brakes are designed to control your speed, not just to stop the bike. Maximum braking force for each wheel occurs at
the point just before the wheel “locks up” (stops rotating) and starts to skid. Once the tire skids, you actually lose most
of your stopping force and all directional control. You need to practice slowing and stopping smoothly without locking
up a wheel. The technique is called progressive brake modulation. Instead of jerking the brake lever to the position where you think
you’ll generate appropriate braking force, squeeze the lever, progressively increasing the braking force. If you feel the wheel begin to
lock up, release pressure just a little to keep the wheel rotating just short of lockup. It’s important to develop a feel for the amount of
brake lever pressure required for each wheel at different speeds and on different surfaces. To better understand this, experiment a
little by walking your bike and applying different amounts of pressure to each brake lever, until the wheel locks.
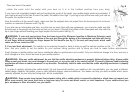
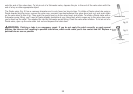
When you apply one or both brakes, the bike begins to slow, but your body wants to continue at the speed at which it was going.
fig. F
fig. H
fig. I
fig. G
25