


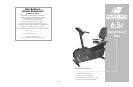


6 23
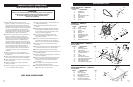
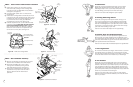
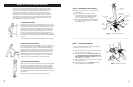
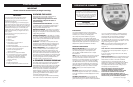
STEP 1 – Front Foot Tube Assembly
a) Remove (2) Carriage Bolts, (2) Washers and
(2) Acorn Nuts from the Front Foot Tube.
b) Position Front Foot Tube (with rollers) in front of
Main Fame and align bolt holes, see Figure 1.
c) Attach Front Foot Tube with (2) Carriage
Bolts, (2) Washers and (2) Acorn Nuts that
were removed in Step 1a.Tighten bolts with
Multi Hex Tool provided.
M8 acorn nuts
M8 x 60mm
carriage bolts
front foot
tube
main
frame
M8 washers
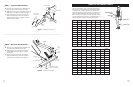
STEP 2 – Rear Foot Tube Assembly
a) Remove (2) Carriage Bolts, (2) Washers and
(2) Acorn Nuts from Rear Foot Tube.
b) Position Rear Foot Tube (with End Caps)
behind Main Fame and align bolt holes,
see Figure 2.
c) Attach Rear Foot Tube with (2) Carriage
Bolts, (2) Washers and (2) Acorn Nuts that
were removed in Step 2a. Hand tighten.
M8 acorn
nut
M8 washer
M8 x 60mm
carriage bolts
rear foot
tube
M8
acorn
nut
M8
washer
Figure 1 - Install Front Foot Tube
Figure 2 - Install Rear Foot Tube
roller
main
frame
end cap
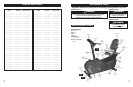
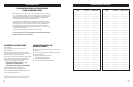
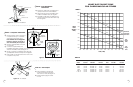
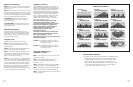
WORKOUT PROGRESS CHARTS
Use the charts below and on the following pages to
keep track of your progress over time. Before writing
on them, make as many copies as you think you’ll
need.We suggest you keep these in a notebook.You
will find it both informative and motivational to look
back at what you’ve done, and this data will help you
to chart future fitness goals as you progress. Every two
weeks, measure yourself to rechart your progress.
Measuring Sites
Waist
Abdomen
Hips
Thighs (L/R)
Calves (L/R)
Resting
Heart Rate
Calves
Thighs
Hips
Abdomen
Waist
Weight
Date
Resting
Heart Rate
Calves
Thighs
Hips
Abdomen
Waist
Weight
Date